
We've independently reviewed this article to make sure it's as accurate as we can make it.
To find out more about our article creation and review process, check out our editorial guidelines.
Wondering how much an electric dryer costs to run?
Understanding the running costs of an electric dryer is a common concern. With nearly 80% of Americans owning one, it’s no surprise that many share the same question and want to keep their energy bills in check.
On average, running a ventless electric dryer for two loads per week, with each cycle lasting around 60 min, can cost about $19 per year. However, the running costs will vary depending on factors such as venting, Energy Star rating, and local electricity rates.
Keep reading to know the cost of running your electric dryer and how to reduce it.
Why trust us? This article was written by Craig Anderson and James Blackford.
Craig has helped thousands of other homeowners repair their appliances since 2016.
James is one of our resident appliance experts with over 16 years of experience. He currently works as a Master Technician for SquareTrade, and runs his own appliance repair business.
Click here to find out the cost of electricity in your state
How I’ve Estimated Electric Dryer Running Costs
If you’re curious about how I created the calculator above to estimate your dryer’s running costs, read on!
It can be tricky to figure out the energy consumption of clothes dryers because their heating element switches on and off.
So, even if a dryer is rated at a high wattage, say 5600W, it doesn’t always use full power. Instead, the heating element cycles on and off like an oven to reach the required temperature.
To give an accurate estimate in the clothes dryer energy cost calculator, I collected data from over 500 dryers from EnergyStar. For each of these dryers, they projected the yearly running cost using a standardized test and calculation.
I’ve worked the calculation back to find the average energy use per load, which greatly depends on whether the dryer is vented or ventless and Energy Star certified.
An Energy-Star Certified model can use as little as 0.9KW for drying a whole load, vs. an average of 2.1KW for a standard vented non-energy star certified model. That’s over 50% cheaper to run!
How to Lower Your Electric Dryer Running Costs
Keeping your dryer well-maintained can reduce its running costs and make it last for many years to come.
To help you make the most out of your dryer, I’ve gathered a few essential tips. But, if you want to dive deeper into dryer maintenance & care to save up to $450, I recommend reading our specialized guide.
Please note that in order to follow the tips provided in this section, you’ll need to refer to your dryer’s user manual. Having it on hand will make everything much easier and faster.

#1 Make Sure Your Dryer is Installed the Right Way
My usual advice for lowering the running costs of an electric dryer is to ensure it’s installed correctly.
First, checking the electrical requirements and ensuring you’re using the right outlet is important.
A grounded three-pong outlet is the best option for your electric dryer. It’s crucial to avoid using an extension cord, as it’s not designed to handle the high wattage that major appliances require.
Using an extension cord can overheat and damage your dryer and even cause a short circuit, which is frustrating, expensive, and dangerous.
You’ll also need to make sure your dryer venting is independent of other systems and free of obstructions to ensure proper airflow.
And don’t forget to make sure your dryer is level to avoid unnecessary wear and tear on the drum and bearings. Leveling your dryer will also ensure evenly distributed clothes and prevent excessive noise and vibration.

Please ensure at least 6 inches of space between the back wall and your dryer to avoid heat buildup and keep the hoses from bending or kinking.
#2 Clean the Lint Screen
Believe it or not, your dryer’s running costs can also be reduced if you regularly clean the lint screen.
You see, all dryers have a removable filter that catches lint and other fibers that come off your clothes while drying so that they don’t clog the dryer’s internal parts or vent.
Unfortunately, if you don’t regularly clean the lint screen, your dryer can take longer to dry your clothes and overheat, increasing energy bills.
Regularly cleaning your lint not only helps to reduce your dryer’s energy usage, but also helps prevent a fire hazard. In fact, about 27% of home fires are caused by lint buildup!
You should remove the lint from the screen after every load and deep clean the screen every two to three months.

Follow these simple instructions to clean the lint screen:
- Locate the lint screen and carefully remove it. Then, wipe away the lint.
- Use a soft brush or an old toothbrush to scrub the screen with warm soapy water gently.
- Rinse the lint screen thoroughly with warm water and dry the lint screen.
- Allow it to dry completely before putting it back into your dryer.
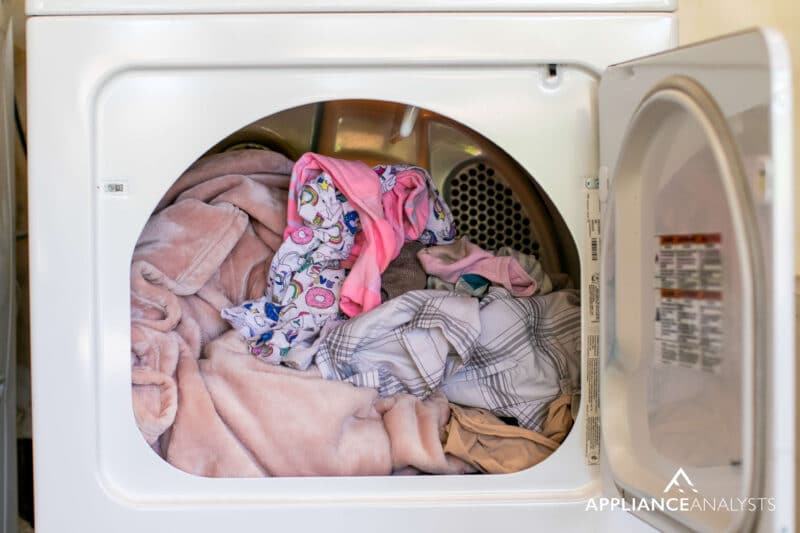
#3 Properly Load Your Dryer
Another way to lower your electric dryer’s running costs is to ensure you load it properly.
Overloading your dryer may seem like a time-saver, but in reality, it can be counterproductive.
Not only can it take much longer for your clothes to dry, but it can also lead to higher energy bills and damaged clothes.
In my experience, you should always aim to fill your dryer around 75% to allow enough room for clothes to move freely, preventing restricted airflow.
But, if you live alone or need to dry a small load, I recommend ensuring your electric dryer is at least 1/3 full to allow the sensors to accurately detect moisture levels and dry your clothes accordingly.
Never mix wet clothes with partially dry ones because doing so can throw off the moisture detector and cause the dryer to work harder. You should also avoid putting dripping wet clothes in your appliance because they’ll take much longer to dry, which can lead to increased energy bills, a damaged motor, and expensive repair costs!
While properly loading your dryer is essential to reduce its running costs and extend its lifespan, selecting the right cycle is also important.
You see, each cycle has different run times and temperatures, which means that selecting the wrong cycle can damage your clothes and waste energy and money.
#4 Inspect the Venting System
People often ask me how often they should inspect and clean their venting system. The answer is at least once a year.
You see, inspecting the venting system is one of the most effective ways of reducing running costs, preventing lint buildup, and ensuring your dryer’s performance.
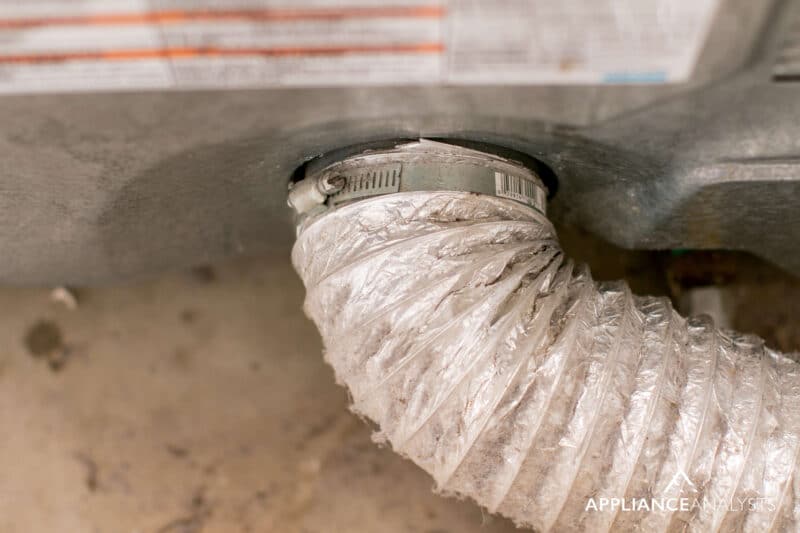
Here’s how to clean the venting system:
- Unplug your dryer from the wall outlet. Then, locate the vent behind your dryer and the exhaust vent on the exterior of your home.
- Remove the vent from the back of your dryer.
- Check the duct for any lint buildup and remove it using a vacuum.
- Go outside and remove the exterior vent cover. Then, use a vacuum to clear the remaining lint.
- Inspect the ducts for any damage. If you find any, it’s best to call a professional.
- Push the dryer back into place and plug it back into the wall outlet.
- Test your dryer for 20 minutes on the air dry setting.
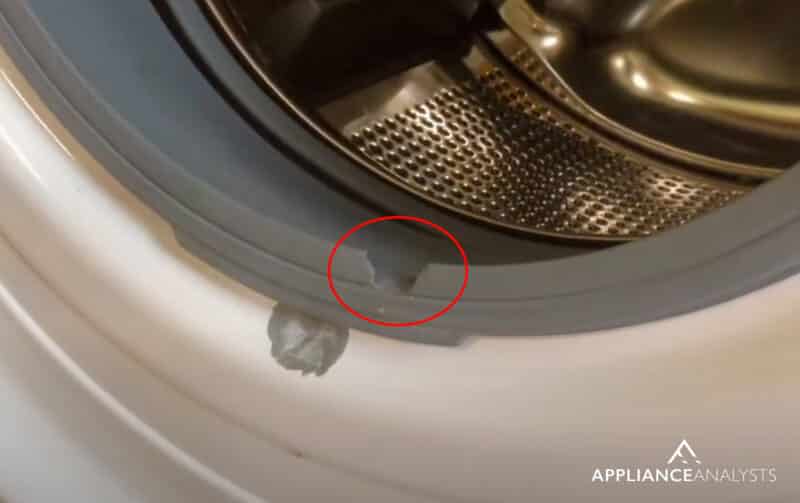
#5 Check the Door Seal Regularly
Last but not least, to lower your electric dryer’s running costs and ensure its efficiency, you’ll need to check the door seal regularly.
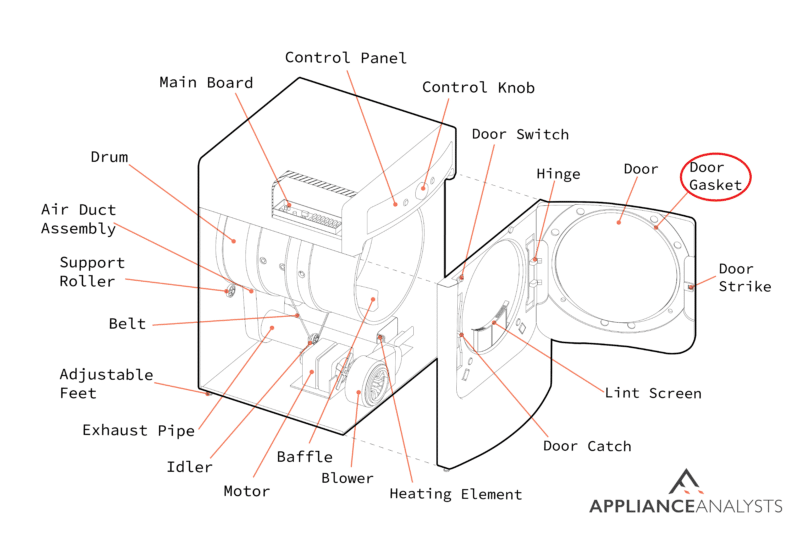
Your dryer’s door seal (also known as door gasket) creates a tight seal between the drum and the door, preventing air from escaping the appliance.
Unfortunately, if the door seal is damaged, dirty, or worn, it can allow hot air to leak out of the drum, which can cause your dryer to work harder and longer to dry your clothes effectively, resulting in higher energy bills.
Clean the gasket with equal parts of warm water and vinegar. If you notice that it’s damaged, please replace it immediately.
Taking Control of Your Electric Dryer’s Running Costs
Hopefully, now you understand the running costs of your electric dryer.
Remember, ensuring your dryer is properly installed, cleaning the lint screen after every load, inspecting the venting system once a year, and checking the door seal regularly can help you save money on your energy bills.
Be sure to check out our Appliance Challenge, which includes multiple guides that provide tips on how to reduce running costs and extend the lifespan of your appliances, helping you save thousands of dollars. Best of all, they’re available for free!
Thanks for reading! Have a great day.


Designing Modern Living Rooms from Iconic Movies

7 Tips for Heating a Room with High Ceilings (On A Budget)