
We've independently reviewed this article to make sure it's as accurate as we can make it.
To find out more about our article creation and review process, check out our editorial guidelines.
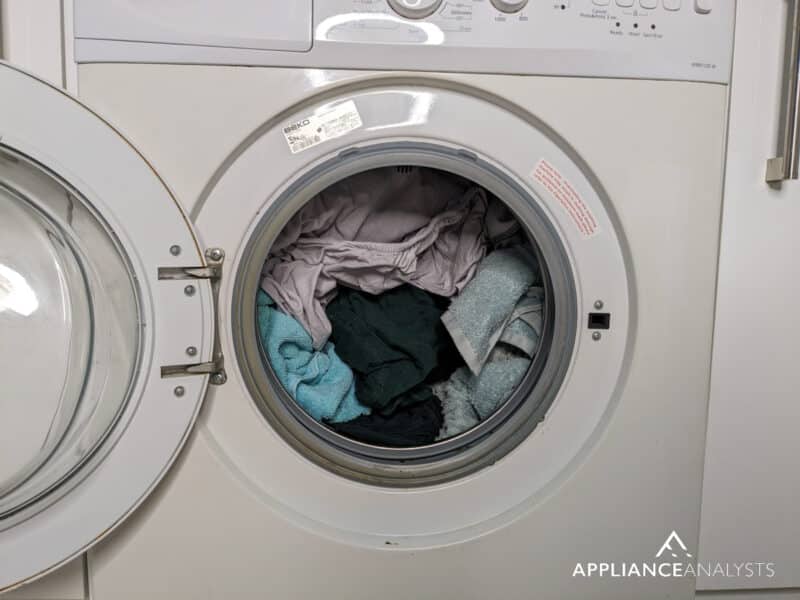
Is your washer having spinning issues?
You’re not alone! Unfortunately, a washer that is not spinning is a very common problem.
But don’t worry! I’m here to help.
If your washer is refusing to spin, you’ll need to balance the load, inspect the lid switch, and examine the drive belt. I also recommend checking the motor coupling and testing the motor.
Keep reading to get your washer spinning again!
Washer Refusing To Spin? Try These 8 Fixes
Different reasons could explain why your washer is having spinning issues. Luckily, solving them is relatively easy.
You’ll need the following materials:
- A multimeter
- A screwdriver
- A socket wrench
- A flashlight
- A pair of needle-nose pliers
- Replacement parts (as required)
When I see a washer refusing to spin, I always follow these troubleshooting steps:
#1 Balance the Load
My usual advice for fixing a washer that won’t spin is to check the load.
You see, when washing large and heavy items, like comforters or coats, the load can become unbalanced and affect the washer’s spin cycle.
Sometimes, newer machines only reach high speeds with off-balanced loads, leaving clothes wet. If the load distribution is the issue, try rearranging your laundry and rerunning the spin cycle.
It’s also important to mention that overloading or underloading your washer can also disrupt the spin cycle. Try maintaining the washer’s load between 1/4 and 3/4 of its capacity.
#2 Ensure Your Washer Is Getting Power
When fixing a washer that is not spinning, I always double-check that it is plugged into the wall outlet.
Washers can easily vibrate, causing the plug to come loose from the outlet. Check if your washer is plugged into a power outlet and that there are no tripped circuit breakers.
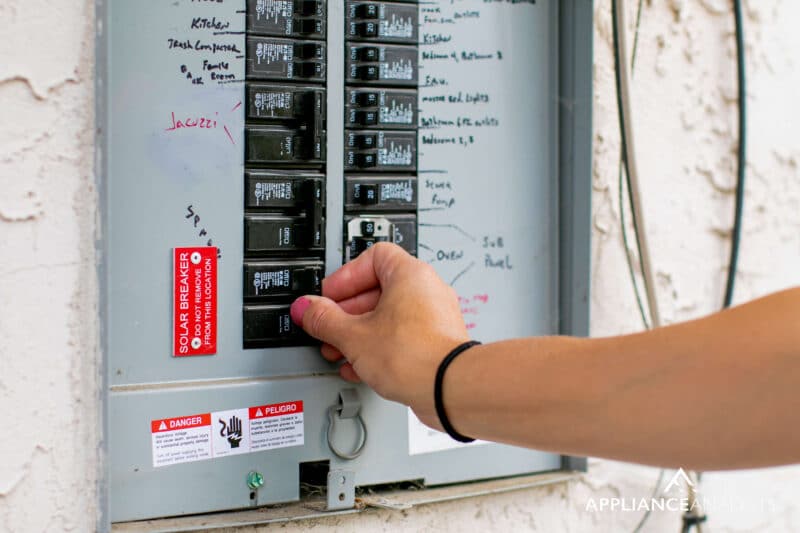
While you’re at it, I recommend resetting the circuit breaker by turning off the switch, waiting for a few minutes, and turning it back on.
#3 Ensure Proper Water Drainage
In my experience, when a washer is not draining water, it can result in spinning issues.
Here’s how to inspect the drainage system:
- Locate the drain hose: This is a flexible tube connected to the rear of the washer, typically leading to a drain pipe or a standpipe. It carries wastewater out of the machine during the draining process.
- Check for blockages: Inspect the drain hose for any kinks or visible obstructions. Straighten the hose and remove any debris that may be restricting water flow.
- Access the drain pump: Unplug the washer and consult your appliance’s user manual or tech service manual for specific instructions on removing the front or back panel to access the drain pump.
- Check the pump and filter: The drain pump is usually a small, motorized component with an attached filter or screen. Inspect the pump and filter for any debris or damage, and clear any obstructions as necessary.
To find a service manual, check out our free guide on finding manuals online. Alternatively, consider purchasing access to a tech manual library, such as appliancetechmanuals.com.

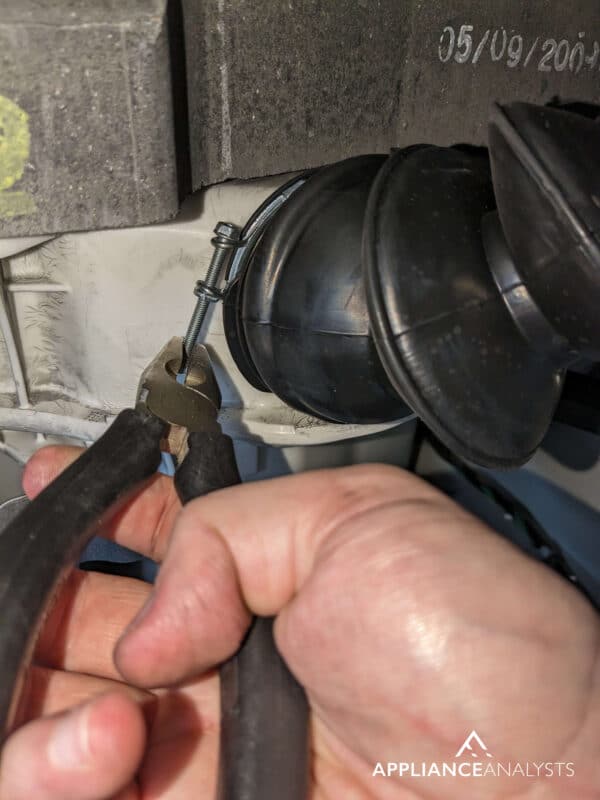
#4 Check Suspension Rods, Shocks, or Dampers
If your washer is still not spinning, it’s important to inspect the suspension rods, shocks, or dampers, as these components help the machine maintain the stability and balance of the drum.
If the suspension components become damaged, it can result in spinning issues.
First, I recommend locating the suspension components. For top-loading washers, suspension rods are typically found in each corner of the washer, connecting the drum to the washer’s frame. They look like long, thin metal rods with plastic caps.
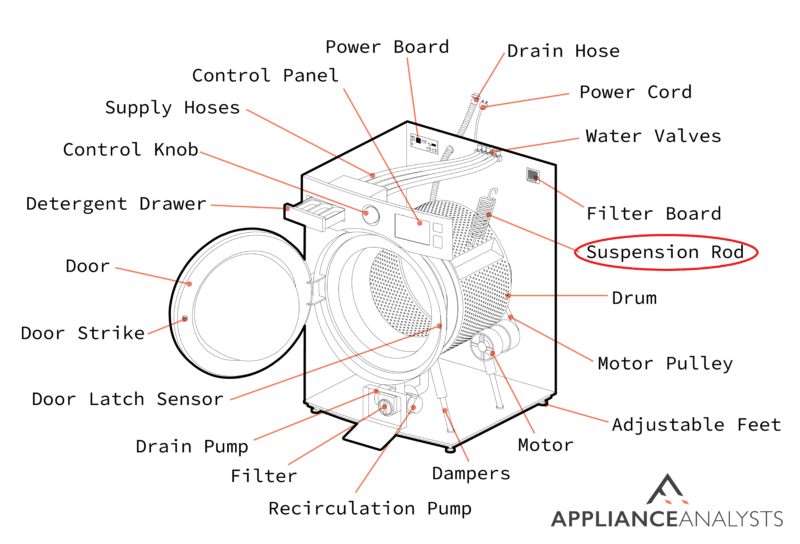
For front-loading washers, on the other hand, shocks or dampers are typically found near the bottom of the machine, connecting the drum to the washer’s frame. They look like cylindrical components with a piston-like appearance.
Once you’ve located the suspension components, check for visible signs of wear, damage, or leakage. Replace any faulty components as needed.
#5 Inspect the Lid Switch
If your washer is still having spinning issues, it’s time to inspect the lid switch.
The lid switch is a safety feature that prevents the washer from spinning when the lid is open. If it’s malfunctioning, it can interfere with the spin cycle.
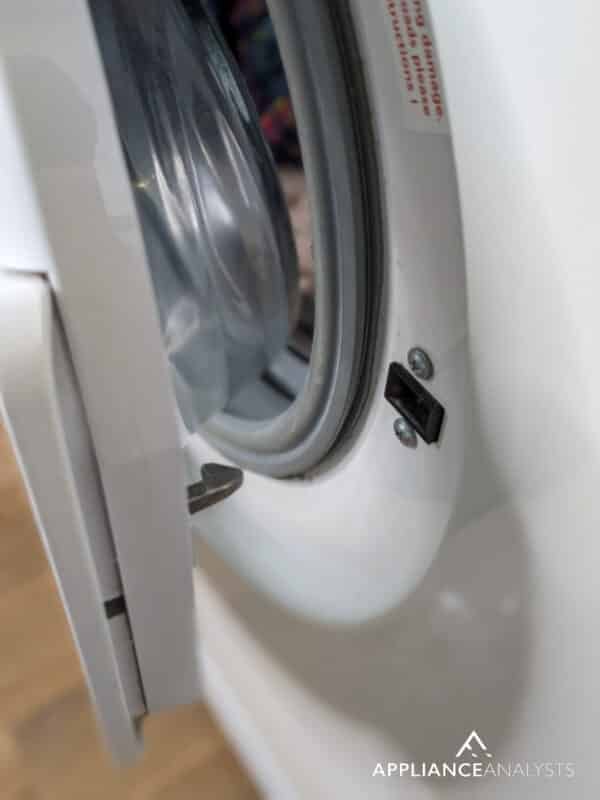
To inspect the lid switch, please unplug the washer from the power outlet for safety and locate the switch, usually under the washer’s top panel or near the door hinge on top-loading washers. To access it, consult your tech service manual for instructions on removing the top panel or accessing the lid switch.
Once you’ve found the switch, it should look like a small plastic or metal component with a prong or lever sticking out, which gets pressed down when the lid is closed.
Listen for its sound when trying to lock to test the lid switch. A faulty lid switch will either make no sound or constantly click. If you hear no sound or the switch keeps clicking, it’s time to replace it.
Note that common lid switches cannot be tested with continuity in washers, as they use voltage and have position and close indicators.
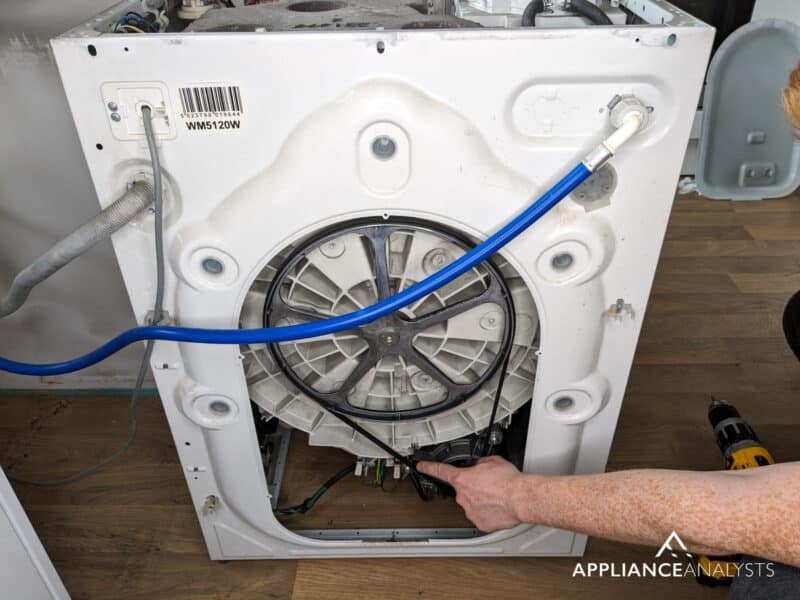
#6 Examine the Drive Belt
From what I’ve seen, a damaged drive belt can also cause a washer not to spin.
You see, the drive belt allows the drum to turn during the washing cycle. So, your washer will refuse to spin if it becomes worn out or broken.
To inspect the drive belt, you’ll need to unplug your washer and access the back or bottom of the unit, depending on your model. Generally, a removable panel will be held in place by screws or clips.
Once you remove the panel, you’ll see a rubber belt connecting the motor pulley to the drum pulley. The belt should be snug but not overly tight. You’ll need to replace it if it appears loose, damaged, or broken.
#7 Test the Motor
If you’ve tried the steps above, but your washer still refuses to spin, you’ll need to test the motor.
- Start by unplugging the washer and removing the cabinet or front panel.
- Locate the motor, a cylindrical metal component with wires.
- Use a multimeter to test the motor for continuity. Place the probes on the motor terminals.
- Do a resistance check for Ohm’s value and check the service manual to see what the normal range is.
If the motor fails the test, consider replacing it.
Remember, if you don’t feel comfortable replacing the motor, you should contact a professional.
#8 Inspect the Shifter or Coupling Assembly
When I see a washer that won’t spin, I always check the shifter or coupling assembly.
The motor coupling is a critical component that connects the motor to the transmission in older, timer-style washers.
A shifter and coupling assembly replaces the traditional motor coupling in newer washers. To access and inspect the motor coupling or shifter and coupling assembly:
- Unplug the washer.
- Remove the cabinet or front panel of your washer (check your tech service manual for guidance).
- Locate the motor, and connect to the transmission via the motor coupling or shifter and coupling assembly.
For older washers with a motor coupling, the coupling should look like two plastic pieces connected by a rubber grommet. Check for signs of wear, cracks, or damage. If the motor coupling is compromised, it’s time to replace it.
Inspect newer washers with a shifter and coupling assembly for signs of wear or damage. If the assembly is faulty, it must be replaced to restore proper spinning function.
If your washer is still refusing to spin after trying the 8 fixes above, there’s likely a more complex issue, such as a problem with the transmission, that requires professional assistance.
Don’t forget to check out our maintenance guide to make the most out of your washer and prevent other performance issues!
Conclusion
Hopefully, you’ll be able to fix the issue causing your washer not to spin.
Remember, if your washer is struggling with spinning issues, ensure it’s getting power, redistribute the laundry, and inspect essential components like the drain hose, dampers, shocks, lid switch, drive belt, and motor coupling.
Thank you so much for reading! If you found this article helpful, please check out our other related guides below.
Good luck!


Designing Modern Living Rooms from Iconic Movies

7 Tips for Heating a Room with High Ceilings (On A Budget)