We've independently reviewed this article to make sure it's as accurate as we can make it.
To find out more about our article creation and review process, check out our editorial guidelines.
Is your washer making clicking noises and driving you up the wall?
You’re not alone! Several people face the annoying clicking, but luckily, there are some simple solutions to try.
I’m here to help you get to the bottom of the clicking noise mystery so you can enjoy your peaceful laundry days again.
In this article, I’ll guide you through 7 easy steps to identify and fix the source of the clicking noise. We’ll cover everything from checking belts to inspecting the drum; all explained plain and simple.
Tools You’ll Need:
- A flashlight.
- A screwdriver (Phillips and flathead).
- A wrench (adjustable or socket set).
- A pair of pliers.
Why trust us? This article was written by Craig Anderson and James Blackford.
Craig has helped thousands of other homeowners repair their appliances since 2016.
James is one of our resident appliance experts with over 16 years of experience. He currently works as a Master Technician for SquareTrade, and runs his own appliance repair business.
Solving a Washing Machine That’s Making Clicking Noises
#1: Check for Loose Objects
From what I’ve seen over the years, loose objects or components could explain why your washing machine is making clicking or banging noises.
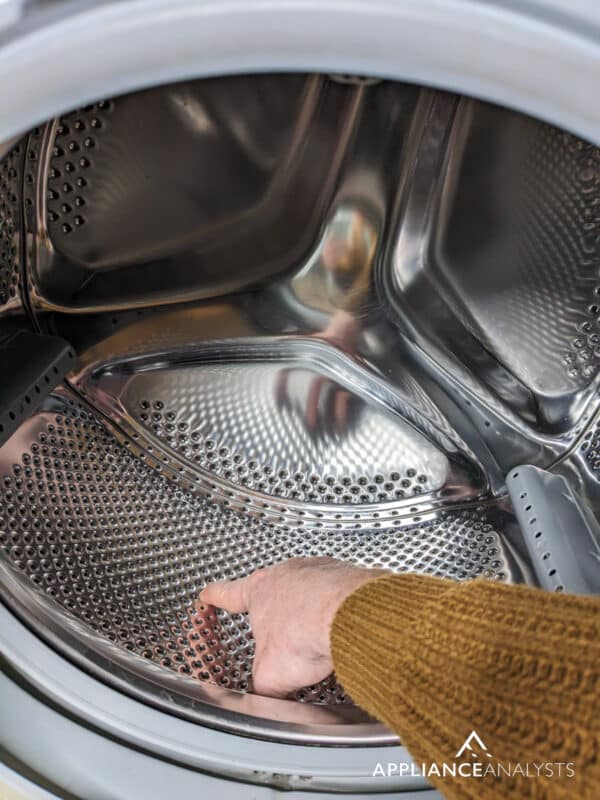
So, first, check the drum and remove any loose objects you find. Then, give the drum a spin to see if the noise persists. If the clicking noise remains, it’s time to move on to the next step.
#2: Inspect the Agitator
The agitator in your washing machine is a spindle-like component in the middle of the drum that helps move your clothes around during the wash cycle. A loose or damaged agitator could explain why your washing machine is making a clicking noise when spinning.
To inspect the agitator, follow the steps below:
- Remove the fabric softener dispenser or cap (if your washer has one) by gently lifting it off or unscrewing it.
- For some models, you’ll have to remove an additional cap or cover to access the bolt or nut holding the agitator in place.
- Remove the bolt or nut that holds the agitator in place using a socket wrench or pliers.
- Carefully lift the agitator from the washer and inspect it for any damage, wear, or loose parts.
- If necessary, replace the agitator or tighten any loose components.
- Reassemble the agitator in the reverse disassembly order, ensuring to securely tighten the bolt or nut.
Remember that the exact steps vary depending on your washer’s make and model. My usual recommendation is to consult your washer’s user manual or search online for model-specific instructions.

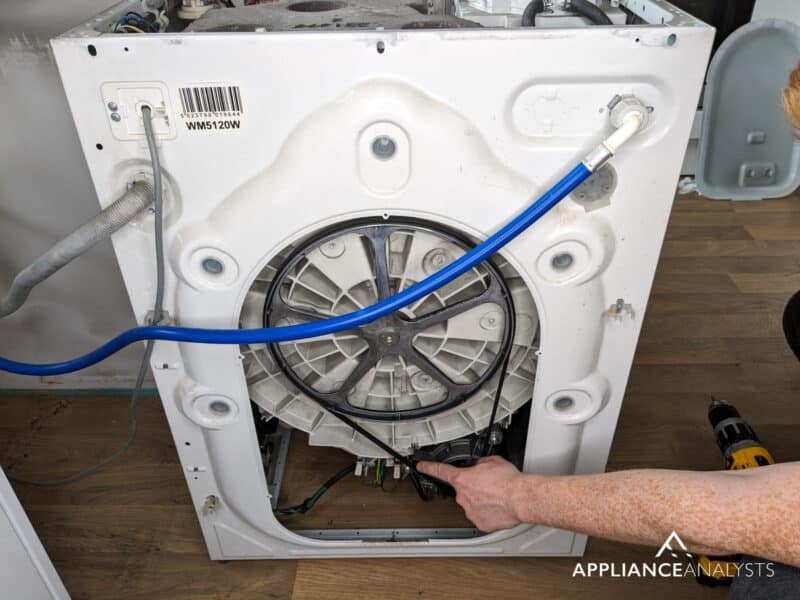
#3: Examine the Drive Belt or Stator and Rotor
A damaged drive belt, stator, or rotor could also explain why your washing machine is making clicking noises when spinning.
Depending on your washer’s design, it may have a drive belt that transfers power from the motor to the drum or a direct drive system using a stator and rotor.
A worn, loose, or damaged drive belt can create a clicking noise, while issues with the stator and rotor can produce similar sounds.
For washers with a drive belt:
- Remove the washer’s back or front panel, depending on your washer’s design.
- Locate the drive belt, a stretchy, looped band resembling a giant, sturdy rubber band.
- Check the belt for any signs of wear, damage, or looseness, and replace it if necessary.
For washers with a stator and rotor:
- Unplug the washer and remove the back panel or access the bottom of the washer.
- Locate the stator (the stationary part with coils) and the rotor (the part that rotates and contains magnets).
- Inspect the stator and rotor for any signs of damage or wear, such as cracked or chipped magnets.
- Ensure the rotor is appropriately aligned and securely attached to the motor shaft.
- If any components appear damaged or misaligned, consult a technician or replace the faulty parts.
#4: Investigate the Motor Coupling or Direct Drive System
The motor coupling connects a washer’s motor to the transmission in older models with a timer, allowing the washer to agitate and spin. In newer washer designs, I’ve found that there’s a direct drive system in place instead. Both systems can cause clicking noises if damaged or worn.
For older washer models with a motor coupling:
- Remove the washer’s cabinet or front panel, depending on the design, to access the motor coupling.
- Look for a small, plastic rubber component with three prongs connecting the motor to the transmission.
- Check the motor coupling for any signs of wear or damage and replace it if necessary.
For newer washer models with a direct drive system:
- Remove the washer’s back panel or access the bottom of the washer.
- Locate the stator and rotor, part of the direct drive system.
- Inspect the stator and rotor for any signs of damage, misalignment, or wear.
- Consult a technician or replace the faulty parts if any issues are found.
#5: Explore the Clutch Assembly
The clutch assembly helps your washer switch between agitating and spinning. If the teeth on the clutch assembly are worn or damaged, it could be the source of the clicking noise. To access the clutch assembly, you’ll need to remove the washer’s cabinet or front panel and the transmission.
The clutch assembly looks like a round, flat piece with a ring of gear-like teeth on the outer edge. Swap the clutch out for a new one if worn out or damaged. A replacement clutch should cost you around $20.
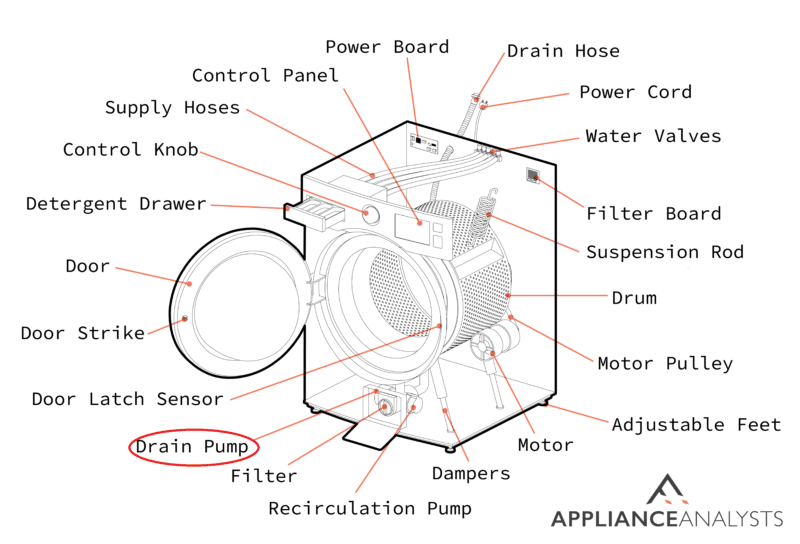
#6: Look at the Water Pump
The water pump drains water from your washer during the spin cycle. If the water pump is clogged or damaged, it can cause a clicking noise.
To access the water pump, you’ll need to remove the washer’s cabinet or front panel. Look for a round plastic component with two hoses connected to it.
Once you’ve located it, check for debris, damage, or leaks. If you find any issues, clean the pump or replace it if necessary.
#7: Preventative Measures and Maintenance
Remember, an ounce of prevention is worth a pound of cure. To keep your washer running smoothly and noise-free, follow the simple tips below:
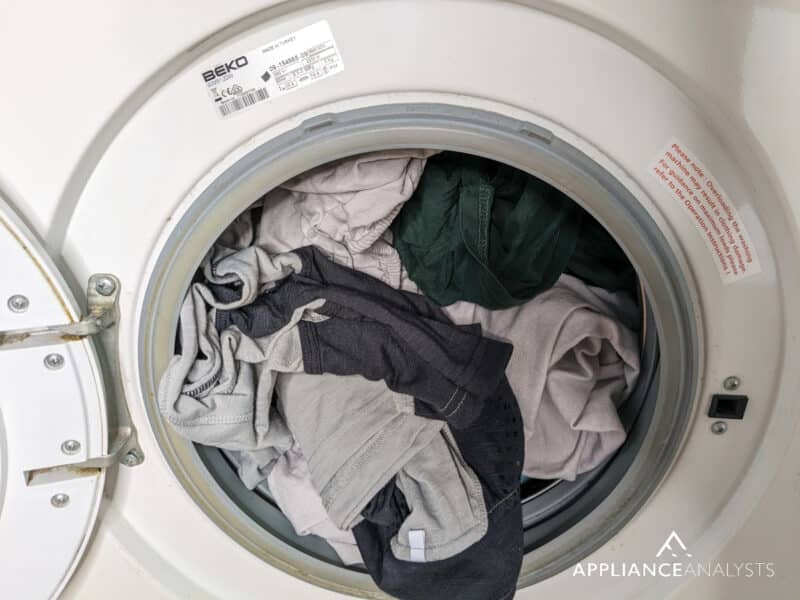
- Refrain from overloading your washer. Be mindful of the weight and size of each load.
- Use the appropriate amount of detergent for your washer and load size.
- Regularly clean your washer’s lint filter if it has one.
- Keep the washer level to avoid any unnecessary strain on the components.
Following the steps above will make you more likely to spot any issues before they become larger inconveniences.
Conclusion
That about covers it!
When your washing machine is making clicking noises while spinning, it’s understandable that you feel worried.
Luckily, as I hope this piece has helped you better understand, addressing the most common causes behind the clicking noises is fairly quick and easy. More often than not, simple actions, like checking the drive belt and looking for loose objects in the drum, will do the trick.
Thank you very much for sticking with me all the way to the end. If this article was useful and answered your most burning questions, please consider checking out our other resources below and subscribing to our newsletter.
Happy washing!
-Craig.


Designing Modern Living Rooms from Iconic Movies

7 Tips for Heating a Room with High Ceilings (On A Budget)