We've independently reviewed this article to make sure it's as accurate as we can make it.
To find out more about our article creation and review process, check out our editorial guidelines.
Does your washer smell like burning rubber?
That sucks! There’s nothing more annoying than opening up your washing machine only to be hit by a burning smell.
But don’t worry; I’m here to help!
If your washer has a burning smell, you’ll need to inspect the drive belt, check the motor, and clean the lint filters. It’s also important to examine the drain pump and electrical wiring.
Read on to get rid of the burning smell!
Washer Smelling Of Burning? Put Out The Fire In 8 Steps
Different reasons can explain why your washer smells of burning. Luckily, there are various solutions you can try.
Here’s the tools you’ll need to fix your washing machine:
- Screwdriver.
- Flashlight.
- White vinegar and water mixture.
- Replacement parts (if required).
#1 Unplug Your Washer
When I see a washer that has a burning smell, I always unplug the unit from the wall outlet.
Unplugging your washer will protect you from any unexpected electrical mishaps and ensure you don’t get harmed.
#2 Inspect the Drive Belt
My usual advice for fixing a washer that has a burning smell is to inspect the drive belt.
The drive belt is like the backbone of your washer—it’s responsible for making everything move and groove. If you’re unfamiliar with drive belts, they’re typically long, rubbery bands that wrap around pulleys to transfer motion from the motor to the drum.
The drive belt plays a crucial role in your washer’s operation, transferring motion from the motor to the drum. Bear in mind that not all washers have a drive belt; some use a rotor and stator system.
If the drive belt becomes loose or breaks, it can generate a burning odor.
For top-load washers: Pull your washer a few feet away from the wall. Lean it back against the wall, and look underneath. Most top load washers have a plastic cover you can remove by removing 2-3 1/4-inch or 5/16-inch bolts. Once you remove the cover, inspect the drive belt for any signs of damage.
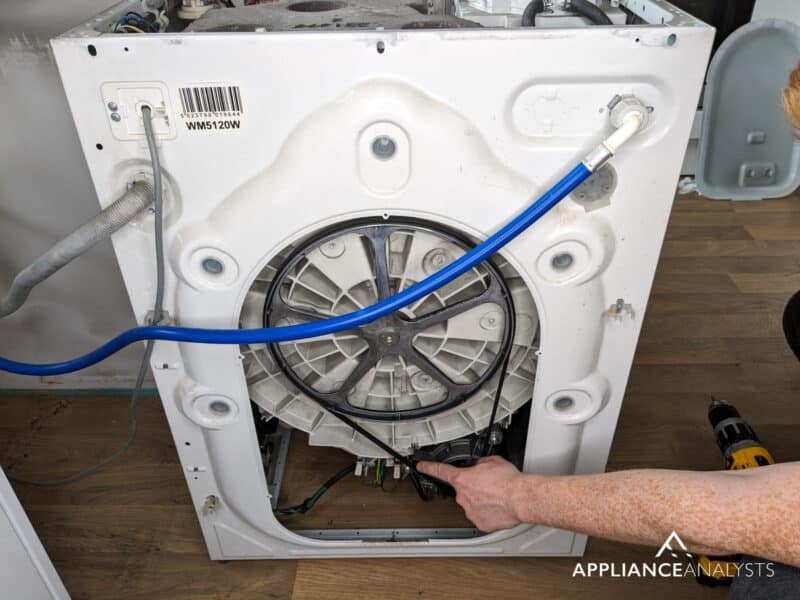
For front load washers: From what I’ve seen, about 90% of front load washers don’t have a drive belt and use a rotor-stator system. However, some brands, like GE, still use drive belts. To check the drive belt on a front load washer, remove the back panel, usually secured with 2-4 screws, and inspect the belt.
If the belt is frayed, cracked, or otherwise damaged, it’s time to replace it.
#3 Check the Drain Pump
When I see a washer that has a burning smell, I always inspect the drain pump.
As its name suggests, this component drains water from your washer after each cycle. The drain pump can get hot to the point you start to smell burning rubber or plastic, especially if something is obstructing it.
The drain pump is usually a small, round component with hoses attached to it, located at the bottom of the washer. To access it, you’ll likely need to tilt your washer forward, ensuring it’s safely supported.
Once you have a clear view, look for debris blocking the pump, such as lint or small items. Remove any obstructions and ensure the pump is working correctly.
If you have a front-load washer, keep in mind that to access the drain pump, a lot has to be removed, and you need to see specific directions for your model and have the right tools to do so.
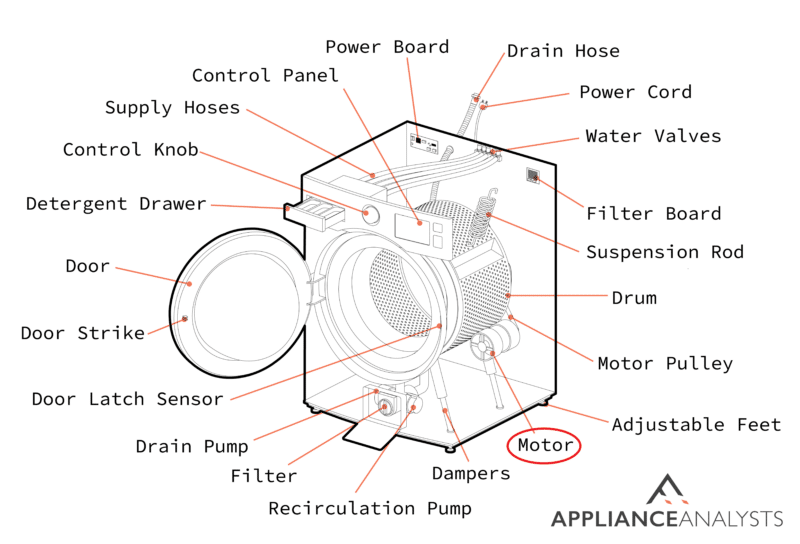
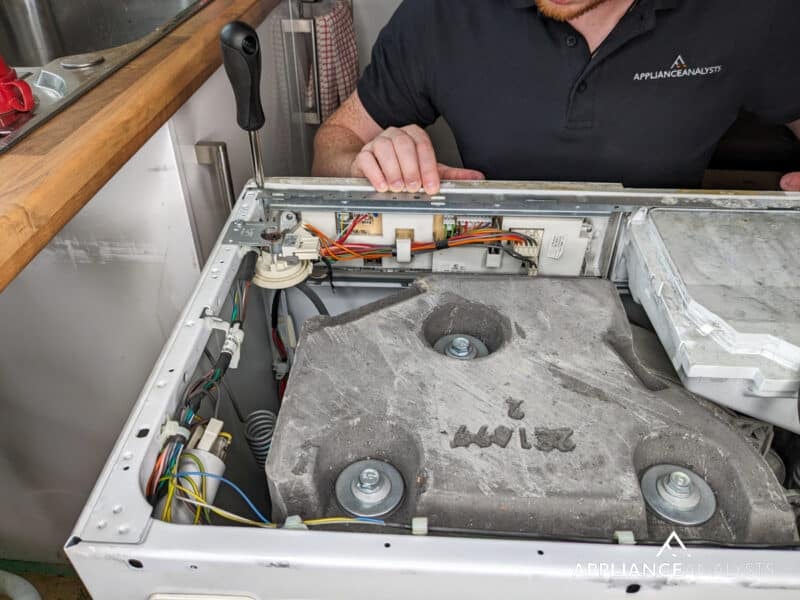
#4 Check for Overheating Motor
If your washer still smells of burning, it’s time for us to check the motor.
The motor is the heart of your washer, pumping power into every cycle. If it’s overheating, you’ll likely notice a burning smell. The motor is typically a cylindrical metal component with wires near the washer’s bottom.
To inspect the motor, you’ll need to remove the appropriate panel (either the front or rear panel, depending on your washer’s design). If it is a top-load washer, tip it back, remove the cover, and inspect the belt.
Next, use your flashlight to get a good look at the motor. If it appears charred, excessively hot, or loose, it’s time to call in a professional for repairs or replacement.
#5 Clean Your Washer’s Lint Filter
I’ve seen that lint can also cause your washer to smell like burning plastic or rubber.
You see, lint filters catch fuzz and debris during the washing process. Over time, these filters can become clogged, reducing airflow and resulting in a burning smell.
Lint filters are usually located at the bottom front of your front-load washer, hidden behind a small door or panel. To access it, remove the front panel or open a small door near the bottom.
Bear in mind that not all washers have lint filters. You’ll need to refer to your user manual to determine if your unit has one.
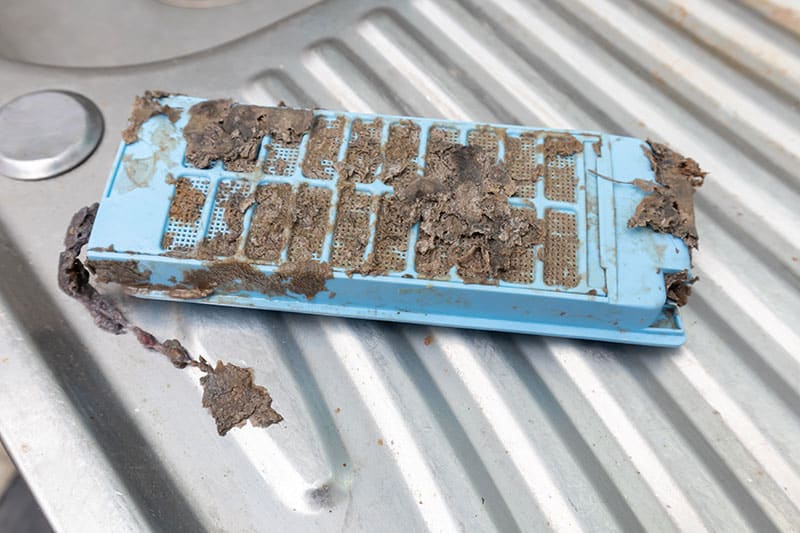
Once you find it, remove the filter and clean it with white vinegar and water. This simple maintenance tip will keep your washer smelling fresh and running smoothly.
#6 Inspect the Electrical Wiring
In my experience, faulty electrical wiring can also cause a burning smell in your washer.
You see, washers with lots of features come with more boards and electrical wires. Unfortunately, the more of those you have, the higher the chance of experiencing a burning smell.
To check your washer’s wiring:
- Remove the right panel again.
- Use your flashlight to examine the wiring for any signs of damage, such as frayed or burnt wires.
- If you spot any issues, call a repair professional—electrical work is not a DIY project.
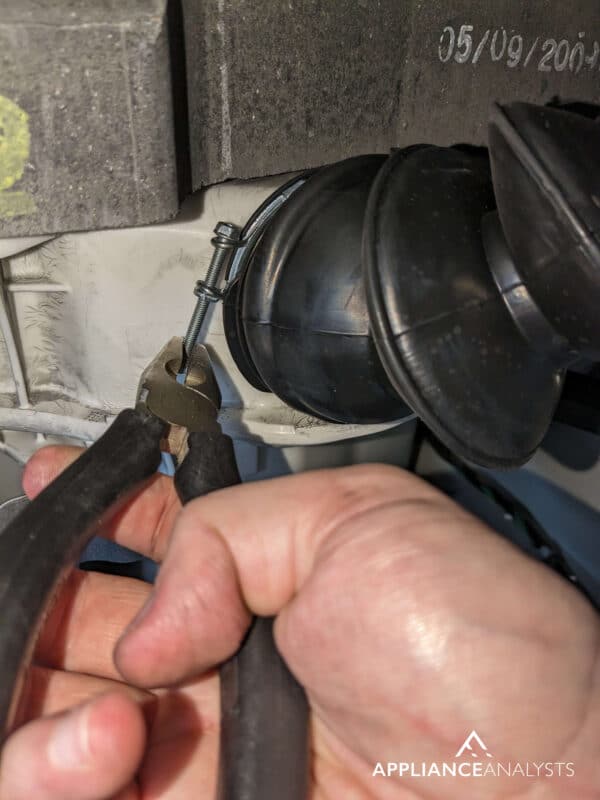
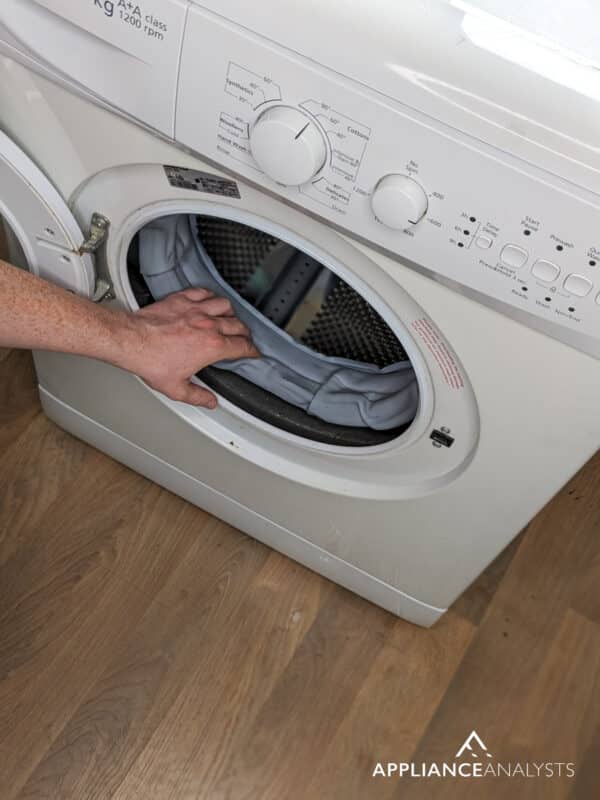
#7 Examine the Tub and Door Seal (Front-load Washers)
Usually, when I fix a front load washer that has a burning smell, I examine the tub seal.
A damaged tub seal can allow water to leak into the components, causing your washer to smell like burnt plastic. To check the tub seal, open your washer’s lid and inspect where the drum meets the tub.
The seal is a rubber or plastic ring that wraps around the edge of the drum to prevent water leakage. If you notice any cracks or damage, it’s time to replace the seal.
While you’re at it, I also recommend checking the door seal, a rubber gasket encircling the door area. Its purpose is to prevent water from splashing out when the drum is spinning with the door closed.
The drum’s stability relies on well-functioning bearings when it spins at high speeds. However, if these bearings fail, the drum loses stability and can wobble excessively during operation.
Consequently, the drum rubs against the rubber door seal, leading to a burning smell. Remember that door seal issues usually result from underlying problems, not the primary cause.
Try replacing the worn-out drum bearings in your front-load washer. If the door seal is damaged, it should also be replaced to ensure proper functioning.
#8 Schedule Regular Maintenance
Finally, my usual advice to prevent future burning smells on your washer is to schedule regular maintenance.
Regular maintenance includes cleaning the lint filter, checking for loose or damaged parts, and inspecting the motor for signs of overheating.
Click here to check out our washer maintenance & care guide!
A well-maintained washer is less likely to develop problems and will keep your laundry room smelling fresh and clean.
Conclusion
Hopefully, now you know how to eliminate the burning smell from your washer and prevent potential fire hazards.
More often than not, inspecting the motor, electrical wiring, drain pump, drive belt, and lint filter will help you eliminate the burning smell.
Remember always to prioritize safety when working on appliances, and feel free to call a professional if you need clarification on any steps or encounter issues beyond your expertise.
Thank you so much for reading! If you found this article helpful, please read our other articles below.
Good luck!


Designing Modern Living Rooms from Iconic Movies

7 Tips for Heating a Room with High Ceilings (On A Budget)