No one wants to be stuck with a cool glass of gloop instead of a delicious scoop of their favorite ice cream.
If your freezer isn’t freezing your ice cream, something is likely preventing it from getting cold enough. While the culprit might be your freezer setting (check the dial at min and max settings), it could also be that cold air is leaking out.
I’ll go into much greater detail below, but here are the steps to ensure your freezer’s working as best as possible. If your freezer isn’t freezing your ice cream, try the following:
- Double-check that the freezer is in the coldest setting.
- Move items around to encourage airflow.
- Check the freezer’s door seals.
- Clean the condenser coils.
- Remove any obstructions from the evaporator fan motor.
- Remove any obstructions from the condenser fan motor.
Ready to get your freezer back to normal? Let’s go!
Why trust us? This article was written by Craig Anderson and Andy Fulenchek.
Craig has helped thousands of other homeowners repair their appliances since 2016.
Andy is one of our resident appliance repair experts with over a decade of experience. He currently runs his appliance repair company with a team of trusted technicians.
6 Ways to Get Your Freezer to Freeze Your Ice Cream
Your ice cream is runny, your ice cubes won’t set, and your frozen peas look more like mush – all tell-tale signs that your freezer is not doing its job.
Ice cream becomes soft at around 15 degrees Fahrenheit, but your freezer should never exceed 5 degrees Fahrenheit. So, if your freezer is not freezing your ice cream and you notice it’s very soft, it means something’s wrong with the appliance’s temperature.
Here are some things I recommend you try.
#1 Move Items Around
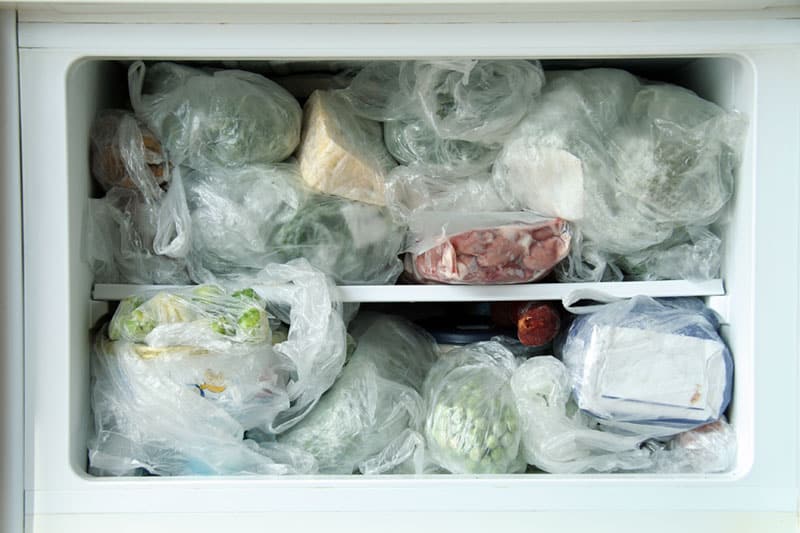
Before tearing the back panel off your refrigerator and redoing the electrics, you should start with some of the simpler solutions to the problem. When your freezer is not freezing ice cream, it can be due to airflow issues and vent blockages.
My usual advice is to move items around and free up some space in your freezer compartment for it to work again as it should. It’s very easy to miss a vent when placing food inside the freezer, so don’t feel bad!
How should you stack your freezer? Here are some guidelines to help your freezer work to the best of its ability.
- Fill the freezer with no more than 2 to 3 pounds (1.36 kg) of food per cubic square foot. There’s an evaporator fan that pulls air through the evaporator, as well as return air vents that need to be unobstructed. If air can’t circulate freely because the freezer is too full, it won’t cool efficiently.
- Allow your food to cool before putting it in the freezer.
- Dry your food before storing it.
- Play a quick game of food Tetris. Shuffle the food around in the freezer to ensure there’s enough airflow between each item.
#2 Check the Seals
When your freezer is not freezing ice cream, my usual advice is to check the seals of your freezer door next. Refrigerators and freezers have rubber seals around their doors to create an airtight environment. When the seals come off slightly or break, cold air is allowed to escape the appliance.
To check whether your freezer’s door seals are undamaged and properly installed:
- Take a sheet of paper.
- Open the freezer door. Take one end of the piece of paper and close the freezer door over half of it.
- With the freezer door closed, try to move the piece of paper up and down by tugging and pulling on it. If the paper moves easily, your door seals may be slack and need replacing.
Another clear sign that the freezer door seal is not placed properly is that the door won’t close all the way.
- Take your phone, start recording, and place it in the freezer.
- Close the door.
- Check the video. If the light didn’t go off with the door closed, the seal is likely not properly positioned.
If your freezer door seal seems to be the issue, I recommend molding it back into the right shape. You can mold the seal using a steamer on the affected area and hold it in the desired shape. Once the seal cools, it should stay that way for good.
Please bear in mind that the molding method only works for small adjustments (about 1/4 of an inch).
Provided the adjustment you need is greater, you’ll have to replace the seal. Fortunately, the replacement process is easy. Simply remove the screws off the old seal and slide a new one on and screw it down.
If you want to get any replacement part – or see how much one would cost – click to enter your model number in the search bar below. Our partners at AppliancePartsPros stock almost every part with free guides on how to install them.

#3 Clean the Condenser Coils
When your ice cream is not freezing in your freezer, cleaning dirt off the condenser coils can help. If the coils are dirty, they will affect the freezer’s ability to stay cool.
Dust and dirt insulate the coils, making it very hard for them to do their job, which is to dissipate the heat collected inside the cabinet over time.
To clean the condenser coils, first, you need to know where they are! You should be able to find the coils in one of the following places:
- Across the bottom of the refrigerator.
- At the back of the refrigerator. On some models, you’ll have to remove a back panel to get to the coils.
From what I’ve seen, certain models will have the condenser located behind the rear panel at the back of the refrigerator, in which case, you’ll have to remove the kick panel to access the coils. Once you have clear access to the coils, clearing dust, debris, and pet hair from them is very easy.
You’ll need the following tools:
- A screwdriver (if your condenser coils are behind a back panel).
- A vacuum with a brush attachment.
- Condenser coil cleaning brush (optional).
- A dusting cloth.
- A spray product called Nu-Blast – a no-wash condenser cleaner (optional). Nu-Blast is super effective but has quite a strong smell, so please ensure proper ventilation if you use it indoors.
Once you’ve collected your tools, here’s how to clean your refrigerator’s coils:
- Unplug the refrigerator.
- Flip the circuit breaker’s switch the refrigerator to the “OFF” position.
- Shut off the water supply.
- Remove the access panel. You can use a screwdriver for the job.
- Use a bristled vacuum attachment to vacuum around the condenser coils. Make sure you remove all the dust from around the coils.
Are your condenser coils under your refrigerator? If so, the process changes slightly:
- Use a cloth to remove the dust from areas that are difficult to reach. This includes any other dusty elements behind the fridge.
- Reattach the back panel.
- Plug in the main power cord.
- Turn the water supply on.
- Turn on the circuit breaker to the refrigerator.
Note: Look closely at the coils and try to spot excess frost. If there’s too much, it could also explain why your freezer is not freezing your ice cream.
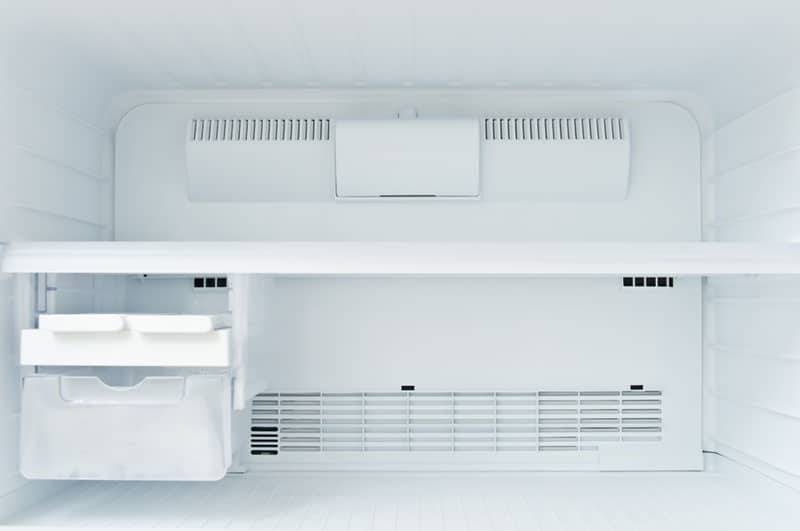
#4 Remove Any Obstructions From the Evaporator Fan Motor
The evaporator fan motor is another part of your freezer that controls cooling, and any fault in it can explain why your ice cream is not freezing. The motor draws air over the evaporator coils to remove the heat from the air. So if your freezer is too warm, the component could be to blame.
In my experience, there are a couple of reasons why your evaporator fan motor is not working properly:
- The fan is partially blocked with ice due to air leaks. You may be able to free the fan manually.
- The motor bearings in the fan have become seized or failed. You’ll need a technician to replace the motor.
But before calling an expert, let’s go through how you can check for fan obstructions yourself. You’ll need the following tools:
- A screwdriver.
- A flashlight.
Here’s what you need to do:
- Plug out the main power cord from your refrigerator.
- Turn off the circuit breaker to the refrigerator.
- Shut off the water supply.
- Remove the freezer shelves.
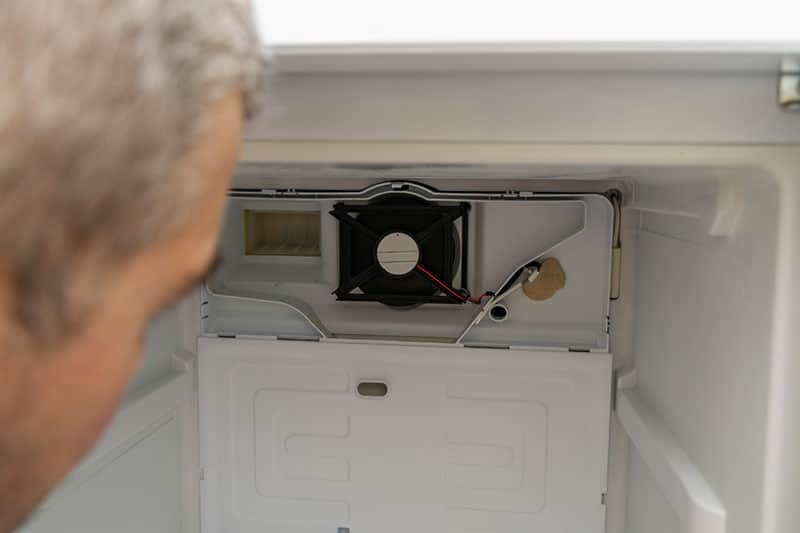
- Use a screwdriver to remove the back panel of the freezer. You’ll now be able to see the evaporator fan motor.
- Check that there isn’t anything blocking the evaporator fan’s motor blades.
- Use a flashlight to inspect the blades. Try moving the blades around with your fingers. The blades should move freely.
- After you’ve removed the obstruction from the blades, screw the panel back into place.
- Put the shelves back in the freezer.
- Plug in the main power cord.
- Turn the water supply on.
- Turn on the circuit breaker to the refrigerator and test your freezer. If there are no loud metal sound sounds when running, you’re likely in the clear.
The bearings are likely seized if the motor hums when attempting to spin.
#5 Remove Any Obstructions From the Condenser Fan Motor
If your condenser fan motor is not working properly, it could affect your freezer’s cooling system. The condenser fan cools the refrigerant as it circulates through the sealed system in your appliance, so if the fan fails, so will cooling.
As with the evaporator fan, there are a couple of reasons why your condenser fan motor might not be working.
- The fan is partially blocked. You may be able to clear any obstructions manually.
- The motor bearings in the fan have worn out. In such a case, you can try replacing the motor yourself, as it’s typically a simple process. However, you must be very careful not to cause a refrigerant leak in the process.
For the job, you’ll need the following tools:
- A screwdriver.
- A flashlight.
- Plug out the main power cord.
- Turn off the circuit breaker to the refrigerator.
- Shut off the water supply.
- Take the access panel off of the back of the refrigerator.
- Check that there isn’t anything obstructing the evaporator fan motor blades. Use a flashlight to inspect the blades.
- Try moving the blades around with your fingers. The blades should move freely and quietly.
- After you have removed the obstruction from the blades, place the access panel back on.
- Plug in the main power cord.
- Turn the water supply on.
- Turn on the circuit breaker to the refrigerator. If there seems to be no loud metal sounds or resistance, you’re probably in the clear.
#6 Check the Damper Door/Consider Compressor Failure
When your freezer is not freezing your ice cream, and you’ve tried everything, chances are there’s something wrong with the damper door or, worse, the compressor.
Your freezer’s damper door allows the freezer and the fridge compartments to share cool air when needed. If the damper door is broken or stuck due to excess frost, too much air can escape from the freezer, raising the temperature.
The best way to identify a bad damper door is to sense the temperature in the fridge and freezer compartment. If both are warm, you have your answer.
A compressor failure, on the other hand, is much more serious. The compressor is what pumps the refrigerant liquid through your freezer, keeping it cool. If the compressor is faulty, cooling is severely affected.
If you suspect your compressor is to blame for your ice cream not freezing, you have a tough decision to make. Typically, a brand-new compressor goes for at least $600, so if your entire fridge was that much or slightly more expensive, in my opinion, it’s better to get a new appliance.
Getting Your Freezer to Freeze Your Ice Cream
When your freezer is not freezing your ice cream, you know you have a problem. And any problem that messes with everyone’s favorite frozen snack is serious. That’s why this article has included 6 simple steps for you to follow to get your unit back in working order.
Has this article been useful to you? Then please check out some of our other articles and free guides below. You could even sign up for our newsletter.
Have a great day!
-Craig.


Designing Modern Living Rooms from Iconic Movies

7 Tips for Heating a Room with High Ceilings (On A Budget)