We've independently reviewed this article to make sure it's as accurate as we can make it.
To find out more about our article creation and review process, check out our editorial guidelines.
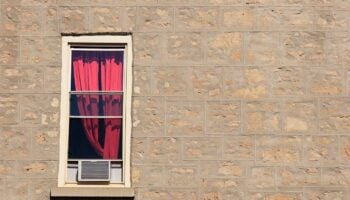
Whether you live in a rented space, or you’d just rather cool the room you spend most of your day in, window units win out over central air. However, installing them can be difficult.
Once you have the right sized unit sitting where you want it, the next question is how to seal a window air conditioner in place.
I’ve put together a step-by-step guide to answer that question for you, so keep reading. By the time you’re done you’ll be able to install and seal your new window air conditioner like a pro.
Or at least, supervise it like a pro.
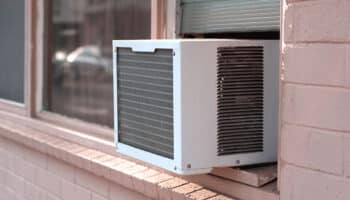
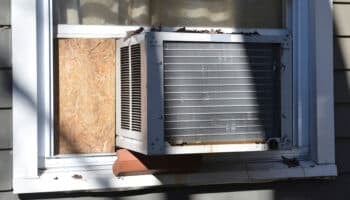
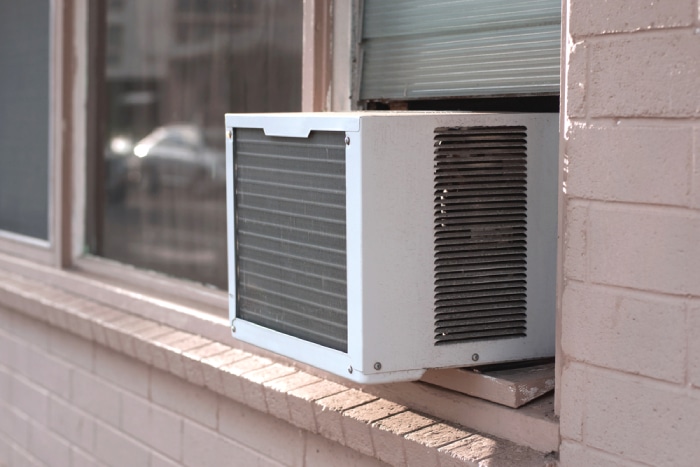
To seal your window air conditioner once it’s properly seated and locked in place, you need to seal both the outside and inside. Use exterior caulk on the outside of the unit but use weather stripping on the inside.
That’s the down and dirty, and I’ll cover it in more detail below. But first, for those who are wondering about the entire install process, here is the A to Z of installing and sealing a window air conditioner.
Before You Start
First, check to make sure there’s a 3-prong power outlet close to your window. Most air conditioning units only have a cord that’s maximum 6 feet long. Extension cords are not to be used with window air conditioners and could void your warranty.

If an extension cord is allowed by the manufacturer, make sure it’s rated for appliances.
Then make sure you have the following in reach:
- Someone to help you lift it if necessary
- Your owner’s manual
- A screwdriver
- Measuring tape
- Pencil
- Whatever brackets and screws came in the box (make sure you have all the parts you should have)
- Scissors (Optional, depending on the unit)
- Weather stripping (If not included with air conditioner)
Before attempting to install anything, you should also make sure your windows are in good condition. They need to be able to support the weight of your air conditioner, so if there is any rot or damage to the frame, this needs to be addressed first.
Make sure the windowsill has been cleared of any debris that could impede a secure fit and make it more difficult to seal.
Finally, make sure you follow all of the manufacture’s recommendations.
How to Install a Window Air Conditioner
As mentioned above, you might need an extra set of hands for this job, since window air conditioning units tend to be heavy.
Be sure you do all you can to install your unit properly. In doing so, you reduce the chances of air leaks in the first place. Meaning there’s less chance you’re going to need worry about how to seal a window air conditioner.
Step 1. Measure
If you have single or double hung windows—meaning they open and close up and down—you want to find the center point of the window. Use your measuring tape and pencil to make a mark on the frame or sill in the middle.
Make a mark on the bottom, center spot on your air conditioner too.
Centering your air conditioner will ensure each side panel can reach the sides of your window.
Step 2. Attach Weather Stripping
If your new air conditioner came with weather stripping, now is the time to attach it. And even if it wasn’t included, make sure to have some available. This is an important step towards properly sealing your unit, so apply it carefully.
Step 3. Install the Extensions
If this is a brand new window air conditioner, there’s a good chance the extensions have come already attached to the unit. If not, they will need to be slid into the channels at the side of it.
Step 4. Install the Mounting Brackets
There is something important to note here. Depending on where you live, it might be the law to have mounting brackets supporting your window air conditioner. It’s up to you to know this and provide brackets if necessary.
If brackets came with your new unit, follow the manufacturers instructions to install them. And since we’re mainly interested in sealing your window air conditioner in, here’s another tip.
As mentioned above, you may have received weather stripping with the purchase of your unit. Place a strip of it beneath the unit as well. If it wasn’t included, make sure to get some before you begin the install process.
One other point on the mounting brackets. They should be installed as to allow the window air conditioner to tilt just slightly. Enough so that as condensate drains, it will do so downward to the ground.
Step 5. Set and Secure the Air Conditioner in Place
If you need the help of another person to do the heavy lifting, make sure someone is available.
Lift the unit onto the window frame, then slide the back end out on the brackets. Be sure to match up the centering marks you made earlier. When it’s in place, pull down the upper window sash so that it meets the unit and offers some stability for it.
Follow the manufacturer’s recommendations to secure the unit in place.
Step 6. Fasten the Accordion Panels
Now that everything is locked in place, extend both side panels until they meet the window frame. Once done, fasten them in place with screws.
Step 7. Seal Your Window Air Conditioner in Place
As mentioned at the outset, you need to seal your window air conditioner on both the inside and outside.
If you followed the steps above, you’ll have already placed weather stripping below and to the sides of the unit. If you’re just here after the fact to do some extra sealing, the choice is yours. Pull out the unit and place some weather stripping under it now, or just place some to the sides and top.
The weather stripping will help address any larger gaps and will keep hot air from entering and cool air escaping.
To get the perfect seal on the outside of the unit, use exterior caulk all around the perimeter.
An alternative to weather stripping is spray foam insulation. The kind you get in a tube from Lowe’s or Home Depot. If you never plan to remove your window air conditioner, it’s fine to apply directly.
If you’re installing and removing your air conditioner seasonally, be aware that the spray foam is hard to remove. One suggestion is to fill gaps with a plastic bag and then spray the foam over the top of that. You can also just grab a foam board at Lowe’s or Home Depot (typically pink or blue).
Finally, you can use plexiglass, rigid insulation, or even plywood on either side of the air conditioner. If your window faces the sun, and you are sealing from the outside, consider using a reflective or white material to help resist extra heat. Especially if the accordion extensions aren’t long enough. Cut what you need to size and then use the sealing tips mentioned above.
Conclusion
If you’re installing a new—or even old air conditioner—it’s the best time to add the additional sealing components. Whether you use weather stripping, foam, or anything else.
Why? Because there’s a good chance you’ll need to remove the unit to get a proper seal.
Either way, sealing your window air conditioner is worth it in the end. That hot air you’re trying to get away from won’t find its way inside, neither will all sorts of bugs.
Hopefully, the info above helped. Thanks for reading. And while you’re here, why not see if there’s anything else we can help you with in the related articles below.


Designing Modern Living Rooms from Iconic Movies

7 Tips for Heating a Room with High Ceilings (On A Budget)