We've independently reviewed this article to make sure it's as accurate as we can make it.
To find out more about our article creation and review process, check out our editorial guidelines.
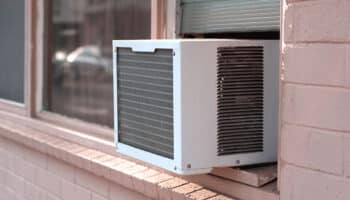
Do you have a window air conditioning unit that you need to install? If so, you have probably heard that a lot of them require screws. Even though it is true that a lot of window air conditioning units will require screws in order to install, this is not be installed. It might be possible for you to install a window AC unit without requiring any screws at all.
The most common method used to install a window air conditioner unit without any screws is to use brackets that hook onto the window instead. These come with most window air conditioners. You need to make sure you use brackets that are large enough and strong enough to support the window air conditioning unit you have. That way, you don’t have to worry about it falling out of the window.
Are you ready to get started with your window air conditioning unit? If so, you need to make sure you have the right materials. We have gone through a lot of research to figure out the best way to help you install your window air conditioner unit. Take a look at the results of our research, and get ready to dive in!
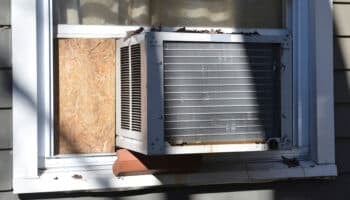
Before we get started, it’s important to note that not all window air conditioners are suited to be supported by only the window frame.
Some need robust brackets or other means to attach them to the wall – so make sure your window air conditioner isn’t too heavy, and is designed for window mounting in this fashion.
Materials Needed To Install a Window Air Conditioner Without Screws
If you want to install an air conditioner unit in the window without any screws, you need to make sure you have the right equipment to do so. There are several steps you need to follow. These include:
- You must make sure you have a screwdriver with you. It is true that you probably think you don’t need a screwdriver if you don’t require any screws, but you should always have one with you just in case. You may need it to tighten something else.
- You need to make sure you have a measuring tape with you as well. It does not need to be super long, but it should have several feet.
- You need to make sure you have weatherstrips as well. There is a good chance that your air conditioner is already going to come with weather strips, but you need to have a few extra ones laying around just in case you need them.
- You could have support brackets as well. These are going to take the place of the screws that are usually required to install an air conditioner in the window.
- Of course, you should have the manual for your air conditioner unit with you. If you need to look something up, you have the necessary information.
- Finally, you need to make sure you have someone who can help you install the window unit. You may think you can do this on your own, but you need someone on the other side of the window to support the air conditioner during the installation process. That way, it will not fall out of the window and clatter on the ground.
Once you have all the necessary materials, it is time for you to start installing the window unit in the window.
5 Steps To Install a Window Air Conditioner Without Screws
If you are ready to put your window unit in the window without any screws, there are a few steps you need to follow. You still need to have a screwdriver with you because the screws in the air conditioner unit itself may require more attention.
The biggest perk of installing an air conditioner window unit without any screws is that you do not need to damage the window or the window frame. There are several steps you need to follow if you would like to complete this process. They include:
Step 1: Pick the Right Air Conditioner
The first step is to make sure you pick the right air conditioner. Not every air conditioner can be installed in the window without using any screws. You need to find window units that don’t require any screws.
Then, you need to take a look at the air conditioner and make sure it is appropriate for the size of the room. If the air conditioner does not have enough power, it could run constantly, driving up your utility bill, without actually cooling down the room.
On the other hand, if the window unit is too powerful, it could lead to humidity issues. It will cool too quickly, and switch off before it can remove the moisture – leaving the room feeling cold and clammy. If you’re not sure – check out our guide to finding the right window air conditioner size.
You should also make sure the unit’s accordion side panels can extend all the way to the edges of the window frame – so you can close the entire opening when the window is open.
Step 2: Prepare the Space for the Installation
After you have the right air conditioner, you need to prepare the location for the installation process. You should locate the central point of the window sill. Then, locate the central point of the air conditioner. Make sure you mark them with something you can remove. The two marks need to line up during the installation process.
Next, you need to use your weather strips to seal the window. That way, your air conditioning is not going to leak around the window unit. Make sure you seal the contact points and the window frame. This is important for making sure there won’t be any gaps between the air conditioning unit and the window frame itself.
Step 3: Prepare the Side Panels
After this, you need to open the manual once again. Check the instructions and make sure you have the right parts to install the air conditioner in the window. You need the installation process to proceed smoothly.
Most manufacturers will give you side panels that are automatically adjustable. They should behave like an accordion that you can use to seal the window entirely.
You need to install the window side panels at the desired with. Then, you should fasten them using the tensioning screws. This is where you might need the screwdriver. After you are finished with this process, the side panels should cover the window completely, preventing air conditioning from leaking outside.
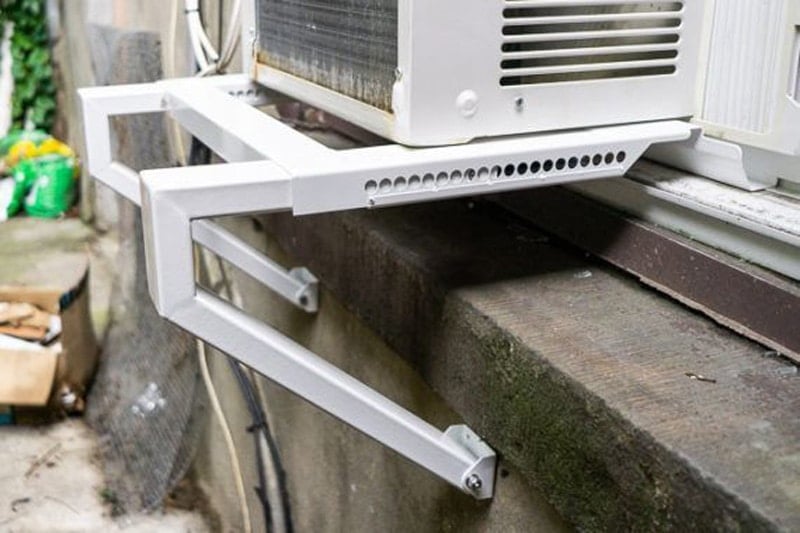
Step 4: Install the Support Bracket
Now, it is time for you to take out the support bracket. There are plenty of companies that make a quality support bracket, and you need to find one that fits your air conditioning unit.
You should install the support bracket by connecting it to the windowsill, using the hook on the inside wall while making sure the platform is on the outside of the wall. You need to check the tilt of the window unit as well. The vast majority of manufacturers make an air conditioning unit that has a tilt of approximately 1.5 in.
Make sure the unit is slightly tilted to the outside. That way, any condensation from the drip tray will stay on the outside of the window and will not leak all over your floor. This is important for preventing floor damage, particularly when it comes to the warping of your hardwood floors.
If you are having trouble installing your support bracket, make sure it is hooked firmly on the window before you try to finish the process. You may require someone to help you install the support bracket, making sure it is anchoring your window unit accordingly.
Make sure the brackets are attached to the framing, not just the siding, brick, or other exterior material.
Step 5: Install the AC Unit
Finally, it is time to physically place the air conditioning unit in the window. This is another step that will require an assistant. Make sure the marks from the earlier steps are appropriately lined up. That way, you know the air conditioner is in the right location.
Make sure the window is directly behind the frame of the air conditioning unit. If it is not in the right location, the air conditioning unit is not going to be secured.
Make sure the side panels have been completely extended all the way out. They need to seal against the weatherstripping installed on the window. This can prevent you from losing cool air to the outside.
After this, you need to plug in the power cord to make sure the air conditioner has power.
You may need an extension cord to help you reach the nearest outlet. If you do, make sure it’s as short as possible (no longer than 6 feet) and the same gauge wire as the AC unit.
If the air conditioner is not turning on when you plug it in, you need to make sure the outlet is activated. You may want to plug in another device to make sure the outlet is working appropriately.
If the outlet is working but the air conditioner does not have any power, you may need to replace the power cord itself.
After you follow these steps, the air conditioner should be secured. It should also be cooling whatever room you have placed it in. Remember that it may take some time for the temperature in the room to get stabilized. Therefore, give the window unit time to do its job.
Wrapping Up
If you are able to follow these simple steps, you should be able to install an air conditioner in your window unit without any screws at all. If you don’t require screws, it should be much easier for you to get your window air conditioner unit in the window. You might not have to worry about it falling out either.
At the same time, you always need to take a close look at the manual and make sure it is safe for you to install your window air conditioner without any screws. There are some window units that require screws, and you need to listen to the instruction manual if it states that you require screws. Window air conditioner units can be expensive, and you don’t want them to fall out of the window unnecessarily.
Finally, remember that you do not have to do this on your own. If you need help getting your window air conditioner unit to stay in the window, you should reach out to a professional who can help you. This can help you prevent a disaster from taking place.


Designing Modern Living Rooms from Iconic Movies

7 Tips for Heating a Room with High Ceilings (On A Budget)