We've independently reviewed this article to make sure it's as accurate as we can make it.
To find out more about our article creation and review process, check out our editorial guidelines.
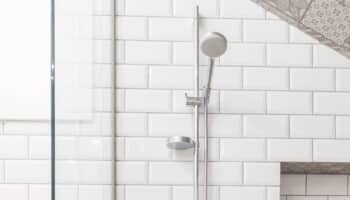
Stuck trying to figure out how to fix a leaking shower without removing tiles?
You’re not alone! Not only can a shower leak be frustrating, but it can also lead to costly repairs.
But don’t worry. In this article, I’ll guide you through the shower repair process to help you complete this DIY project, save money, and forget all about the problem.
To fix a leaking shower without removing tiles, you’ll need to remove the old grout, clean between the tiles, and regrout. Then, clean the surface, seal it with silicone, and apply two coats of waterproofing.
Read on to learn more about this shower leak repair process!
How to Fix Leaking Shower Without Removing Tiles
Fixing your shower leak without removing tiles is an affordable way to prevent other problems from developing.
You see, leaks can cause stained ceilings, dampness, and mold growth, which can pose a threat to your health.
In this section, I’ll guide you through the six steps to seal leaking showers.
Note that we are specifically looking at repairing a leak caused by grout. Before starting the repair, confirm that the leak isn’t due to loose tiles, or a supply pipe behind the wall leaking.
#1 Remove the Old Grout
The first step to repairing your shower leak without removing tiles is to take out the old grout and any moldy or deteriorated sealants.
Remove all the grout to make your shower repair look as professional as possible. Don’t just concentrate on the deteriorated areas, as I’ve seen that old grout can leak under the surface, although it doesn’t look bad.
To remove the old grout on your shower, you’ll need:
- Safety glasses
- Rotary tool
- A tough, dull blade
- Flathead screwdriver or another grout-removing tool
Once you’ve gathered all the materials, please follow these instructions:
- Put the safety glasses on.
- Turn the rotary tool on and run the blade up and down the grout. Use a steady hand, and don’t press too hard. Try to keep the tool away from the edges of your tile.
- Use a flathead screwdriver or another tool like a Grout Removal Kit to remove any stubborn grout pieces. You can also do the same with a tough, dull blade to free stubborn bits of grout.
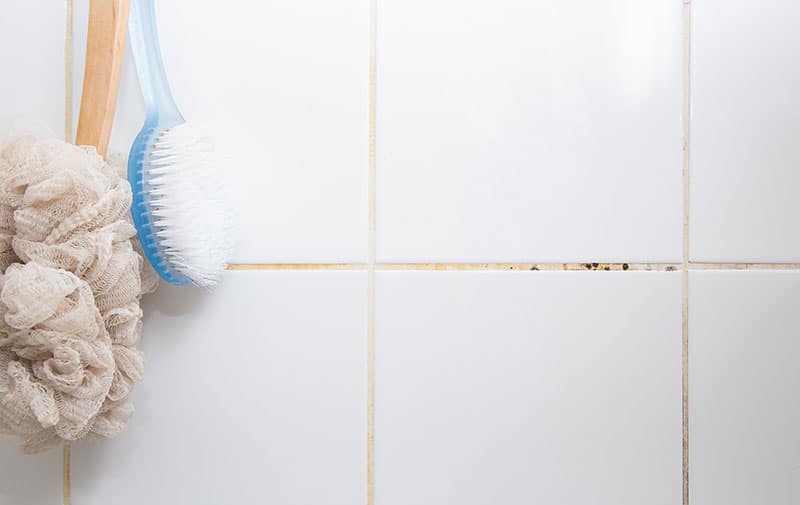
#2 Clean Between the Tiles
Now, you need to clean between the tiles to repair your shower leak. I recommend gathering the following tools:
- Vacuum cleaner
- Hand broom and dustpan
Once you have all the tools, please follow these steps:
- Sweep up large pieces of grout with a hand broom and dustpan.
- Use a vacuum cleaner to remove the smaller pieces of grout and dust from between the tiles.
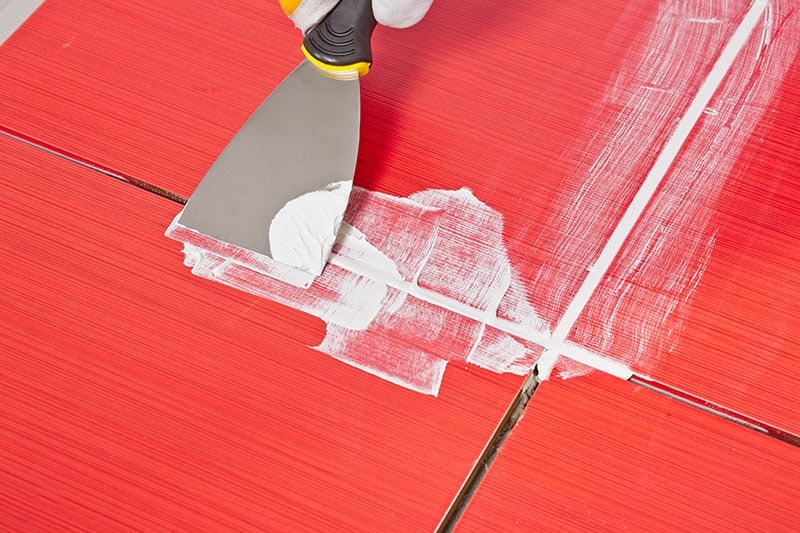
#3 Regrout
The next step in the shower leak repair process is to apply the new grout.
You should take advantage of the opportunity to remove damaged tiles from the walls and floor as needed. This isn’t a “MUST”, but anything damaged is always worth a quick replacement.
I find that it’s best to wait a few days between removing the old grout and applying the new to give the wall time to dry and help kill off any mold and mildew.
If the wall is wet, the water in the grout will not be absorbed, and the dry grout will sit in the groove without actually being attached to the wall.
In my opinion, regrouting tiles is one of the most fun steps in the shower repair process. Here’s how to do it:
The tools you will need
- Safety gloves
- Pre-mixed grout
- Grout spreader (rubber tile float)
- Grout shaper
- Sponge
Once you’ve gathered the materials, please follow these steps to regrout your shower:
- Put the safety gloves on.
- Spread some grout across the grout spreader. Pass the spreader along the groove between the tiles using long strokes; doing so will help work the grout into the grooves.
- Remove any grout that spreads onto the tiles with a damp sponge.
- Once the grout has hardened slightly, pass a grout shaper across it. The shaper should be passed in one smooth movement.
- Fill in gaps that appear with a little more grout and wipe the excess away with a damp sponge.
- Repeat the steps above on all the tiles.
#4 Clear Away Waste Materials
The next step in repairing your leaking shower is to wait for the tiles to dry completely. Then, clean the surface with warm water.
Grab a bucket filled with warm water and a sponge. Then, you’ll need to:
- Wash the shower using the sponge dipped in warm water. In my experience, passing the sponge over the tiles in circular motions helps remove debris and waste materials much easier.
- Allow the bathroom to dry completely before continuing. Open the window or run the exhaust fan to help speed up the process.
#5 Seal the Shower With Grout Sealer
When I seal leaking showers, I always use a grout sealer and masking tape.
You see, the tape can help you keep a steady hand. You’ll need to place two masking tape lines around where the sealer should sit, one above the groove and one below. So, if you go outside the line, it won’t matter.
Here’s how to seal the joints:
- Apply the masking tape above and below the groove. (Optional).
- Start at the edge. In one clean sweep, squeeze the sealer across the groove.
- Ensure there are no air gaps by pressing your finger down across the length of the silicone.
- Apply a second layer of sealer on top of the first in one smooth motion.
- Wet your finger with a wipe. Gently run your finger across the grout sealer to create a smooth finish, or use a caulk shaping tool if you have one.
- Repeat the steps above around all the joints.
#6 Apply Two Coats of Clear Waterproofing
Now, the last step to repair your leaking shower without removing tiles is to apply waterproofing.
Once you have finished applying silicone to the joints, clean the shower. Allow it to dry thoroughly before moving on to the next step.
Once the shower is dry, apply two coats of clear waterproofing to keep your shower stain-free for up to 10 years!
Note: Don’t apply waterproofing to ceramic or porcelain tiles, as they have a baked on finish that will not absorb any form of waterproofing. Waterproofing of shower bathroom tiles applies to natural materials, like slate, terra cotta, and sandstone, as they are porous and will absorb moisture.
To waterproof your shower, you’ll need:
- Safety gloves
- Paintbrush
- Paint roller
- Clear waterproofing sealant
Once you’ve gathered all the necessary materials, you’ll need to:
- Put the safety gloves on.
- Dip the paintbrush into the clear waterproofing sealant. Apply the sealant to the walls and floor of the shower as you would apply paint to the walls.
- Wait for the layer to dry.
- Once dry, apply the sealant to the roller. Run the roller over the tiles of the floor and walls. Apply the sealant carefully as you would apply paint to a wall with a roller.
Can You Waterproof Over Old Tiles?
Now that you know how to fix a shower leak without removing tiles, you’re probably wondering if there’s a way to skip the regrouting process. Can you apply a clear waterproofing sealant over old tiles?
Yes, you can. But it depends on the status of your tiles. If you have a brand-new bathroom, for example, you will not need to regrout. Simply pass the waterproofing sealant over the existing tiles.
But unfortunately, we don’t all have swanky new bathrooms. And chances are, if you’re reading this article, you have a problem with your bathroom tiles. How can you know whether it will be worth it for you to waterproof your existing tiles? For waterproofing to be effective, your old tiles will have to be in excellent condition:
- The tiles should be firmly attached to the substrate.
- The tiles should not be cracked or chipped.
- The tiles should not be hollow sounding.
Wrapping Up: Repairing a Leaking Shower Without Removing Tiles
Hopefully, you now know how to fix a leaking shower without removing tiles.
Remember that to repair a shower leak, you’ll need to remove the old grout, clean between the tiles, and regrout. Don’t forget to clean and seal the surface with silicone. Then, apply waterproofing.
If this article has helped you, why not support us by checking out some of our other free guides? You could even sign up for our email list!
Have a great day!
-Craig


Designing Modern Living Rooms from Iconic Movies

7 Tips for Heating a Room with High Ceilings (On A Budget)