We've independently reviewed this article to make sure it's as accurate as we can make it.
To find out more about our article creation and review process, check out our editorial guidelines.
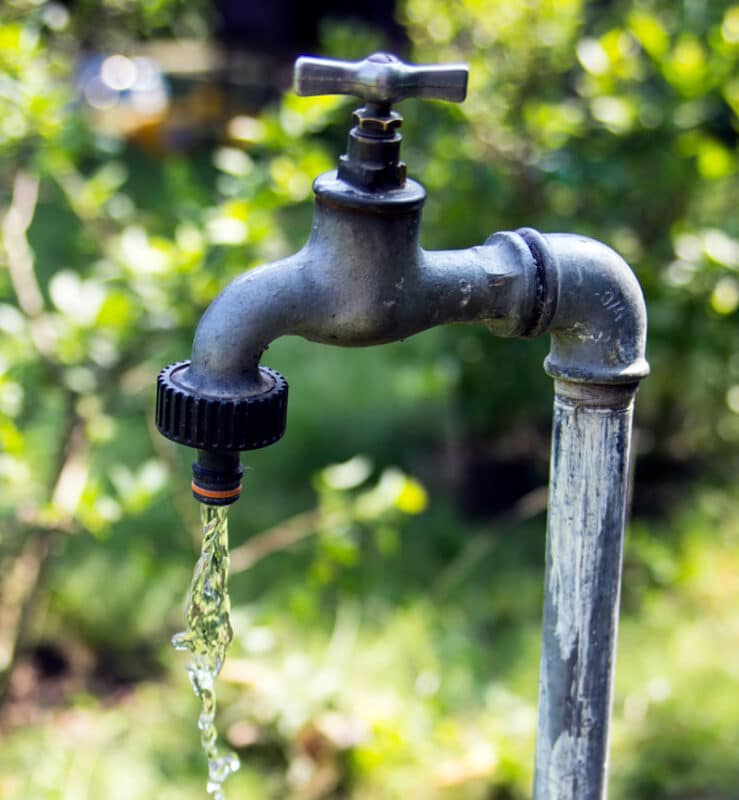
Your outdoor faucet won’t turn off no matter what you do?
You’re not alone! An outside faucet that refuses to turn off is quite a common problem that affects thousands of people daily.
But don’t worry; you’ve come to the right place for answers. Below, I’ve prepared a small article listing 5 steps that will help you get your outdoor faucet from waterfall to watertight in no time!
Here’s how to fix an outdoor faucet that won’t turn off:
- Turn off the water supply to the faucet.
- Drain the water from the faucet.
- Remove the packing nut.
- Remove the valve stem.
- Reassemble the faucet with a new part where necessary.
Ready to get started? Let’s go!
Fixing A Running Faucet
As with any other leak-related issue, when your outdoor faucet won’t turn off, it’s understandable that you feel annoyed and worried about your utility bill.
But wait! Don’t call a plumber just yet. In my experience, fixing a broken faucet is simple and often quicker than you think.
Below are the tools you will need to complete the job:
- Pliers.
- Two adjustable wrenches.
- Penetrating oil (optional).
- Flathead screwdriver.
- Plumber’s grease.
Now that you’re all geared up, it’s time to get started! Below are the 5 easy steps you need to fix your faucet.
Step 1: Turn Off the Water Supply to the Faucet
When your outside faucet won’t turn off, I first recommend you turn off the water supply to the faucet from the source.
Here’s how to turn off the water supply:
- Open the faucet all the way.
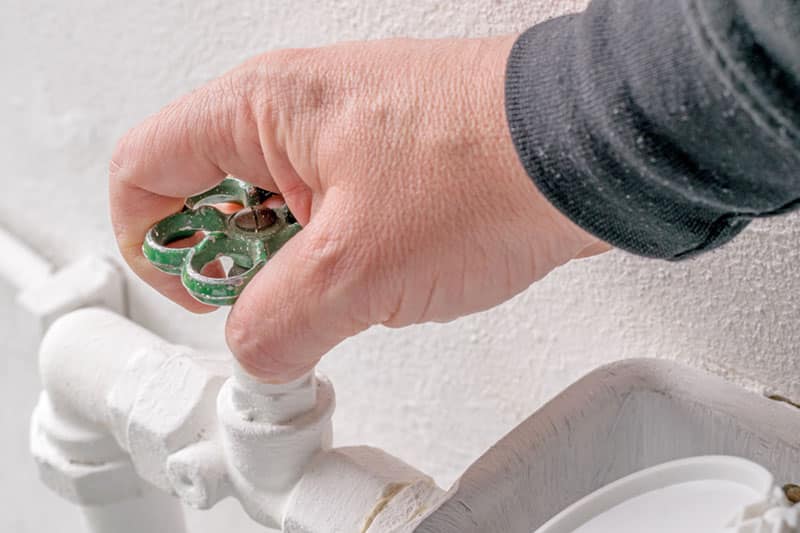
- Locate the shut-off valve.
- Turn the valve clockwise to close it fully.
- Ensure that the water flow from the faucet has stopped completely.
Not sure where to find your main water supply shut-off valve? That’s ok; here are some common places you’ll want to check:
- The basement.
- The garage.
- Close to the water meter
- On the ceiling of the inside wall, closest to the outside faucet
- You may also find an outdoor cutoff, which needs to be accessed with a curb key
From Our Home Improvement Expert: 80% of the time, the incoming water shutoff is on the top/right of the water heater marked ‘cold’. Usually the pipe splits into two, with one side going to the water heater and the other going to the next fixture.
When dealing with an old water shut-off valve that doesn’t have a handle or a knob, a good set of pliers will come in handy. Press your pliers around the square post of the water shut-off valve. Then turn the pliers and the square post clockwise until the water stops flowing.
Step 2: Drain the Water From the Faucet
My usual advice after you’ve turned off the water supply valve is to drain the remaining water from the faucet. Why? For the following reasons:
- It keeps your faucet in good working order.
- It reduces your chances of bursting a pipe.
- It gets rid of any trapped water in a safe way.
Here are the steps you need to drain the water from your outdoor faucet:
- Open the outdoor safety valve. You should be able to do this by pulling a handle or turning a knob.
- Wait for the remaining water to drain.
Step 3: Remove the Packing Nut
The next thing you must do when your outdoor faucet won’t turn off is to use an adjustable wrench to remove the packing nut from the faucet.
Here’s what you have to do:
- Wrap the wrench just behind the packing nut.
- Turn the wrench counterclockwise to loosen the valve assembly. Keep another wrench clamped to the faucet connection that runs to your home to stop the faucet from moving while you work.
- Then use your hands to remove the entire valve assembly.
- Remove the faucet handle fastener by turning it counterclockwise.
- Wiggle the handle and pull it straight up to remove it.
- Then unscrew the packing nut and slide it up the stem to remove it.
If you’d like to see the above instructions in action, please make sure you have a look at the following helpful step-by-step video.
If the valve assembly or packing nut is stuck and can’t be removed with the wrench, try the following:
- Apply oil to the stubborn areas of the faucet (WD-40 works great).
- Wait for the oil to work its magic.
- Once the stubborn sections are loose, try turning them again with a wrench.
From Our Home Improvement Expert: A professional plumber would likely use a MAPP gas torch and heat either the nut or the stem, but not both. Whichever side is heated will expand, loosening its grip on the other side. It won’t matter if you melt the rubber seal or plastic because you’re replacing it anyway.
Step 4: Remove the Valve Stem
If there wasn’t an issue with the packing nut, removing the valve stem is the next step to fix an outside faucet that won’t turn off.
Removing the valve stem will help you to take a closer look at the problem. You can remove the valve stem using a pair of pliers and a flathead screwdriver.
Here are all the steps you need to remove the valve stem:
- Use the pliers to hold the pipe still.
- Remove the washer from the valve stem using a flathead screwdriver.
- Inspect the washer and the O-ring.
Step 5: Reassemble the Faucet
When reassembling your faucet, you’ll need to replace any broken, corroded, or worn parts. Replacing damaged parts will ensure that your faucet works once you have put it back together. But which broken or worn parts should you look out for?
I recommend you check the following first:
- The packing nut.
- The washer.
- The O-ring.
To replace the parts mentioned above before you assemble your faucet, take a look at these steps:
| Part to Replace | How to Replace It |
|---|---|
| Packing Nut | 1. Remove the old packing nut using the instructions included in step 3 of this article 2. Slide a new packing nut over the valve assembly 3. Turn the packing nut clockwise to tighten it. Ensure that you do not tighten the nut too much. |
| Washer | 1. Remove the washer from the valve stem using the instructions included in step 4 of this article 2. Replace the washer with one that has the exact same measurements as your old washer 3. Place a coat of plumber’s grease on the washer before reassembling it 4. Make sure that the O-ring is in place 5. Replace the screw on the washer with a new brass screw |
| O-ring | 1. Remove the washer from the valve stem using the instructions included in step 4 of this article 2. Replace the washer with one that has the exact same measurements as your old washer 3. Place a coat of plumber’s grease on the washer before reassembling it 4. Make sure that the O-ring is in place 5. Replace the screw on the washer with a new brass screw |
Once you’ve replaced your broken parts, you’ll be halfway to assembling your faucet. But you must still do a couple of things to complete the job.
Here are the final steps to reassembling your outdoor faucet:
- Reinsert the valve assembly.
- Tighten the valve assembly (don’t overdo it, you may break the seal). You can use an adjustable wrench for this step.
- Ensure that the faucet is closed.
- Turn the water back on at the water supply valve.
- Open the faucet and check that the water is flowing properly and that the faucet can close.
Conclusion
If you’ve ever had a problem with an outside water faucet that won’t turn off, you know it can make you feel stressed and annoyed.
I hope this article has helped you see how easy it can be to fix the broken or worn parts of a water faucet that are keeping it from turning off.
Has this post been useful to you? Then check out some of our other articles below and consider subscribing to our newsletter. You’ll find various resources on the site, including solutions for everyday appliance issues and useful DIY content, such as a simple 3-step guide to repair a dog-torn carpet.
Have a great day!
-Craig.


Designing Modern Living Rooms from Iconic Movies

7 Tips for Heating a Room with High Ceilings (On A Budget)