We've independently reviewed this article to make sure it's as accurate as we can make it.
To find out more about our article creation and review process, check out our editorial guidelines.
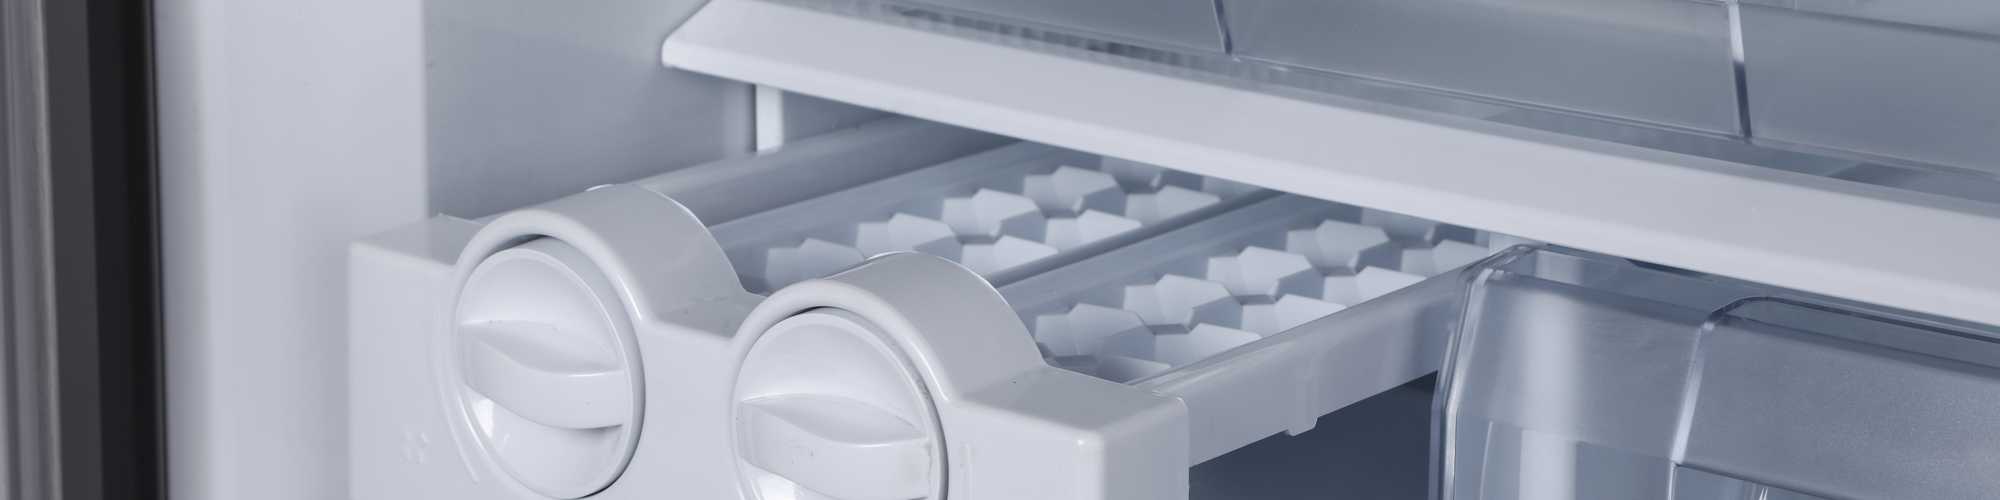
Like any other appliance, ice makers come with their own set of faults and challenges.
A leaking ice maker can be very annoying, and understandably, the potential cost of repairs has you worried. Let’s look at what’s going on with your ice maker when it leaks and, more importantly – what you can do about it.
Ice makers typically leak for several reasons. The most common causes of a leak are an unsecured water line, a punctured water line, an ice buildup within the ice maker, or a clogged drainage tube.
If you’re in a rush, here are some quick tips to fix a leaking ice maker:
- Use a layer of newspaper or old towels under the fridge to catch drips and mess.
- If you do any DIY to your fridge, disconnect it from the power source FIRST.
- NEVER use boiling water to melt ice – you may crack shelves or housing components in the fridge due to the extreme change in temperature.
- Look after your ice maker’s components and finish – never use metal implements, steel wool scourers, or abrasive cleaning agents on your appliance – as these lead to damage, scratching, and wear.
- DIY can void your appliance warranty, so check with the manufacturer/retailer before you dig in!
- Keep your appliance manual safe and easily accessible, for example, in a kitchen drawer, and refer to it often for advice, technical information, and warranty information.
For those of you who want details and not fast fixes – let’s dive into the details and fix this ice maker properly.
Why trust us? This article was written by Craig Anderson and Andy Fulenchek.
Craig has helped thousands of other homeowners repair their appliances since 2016.
Andy is one of our resident appliance repair experts with over a decade of experience. He currently runs his appliance repair company with a team of trusted technicians.
Why Is Your Ice Maker Leaking Water?
What could be the reason behind your ice maker leaking water? Well, often, a clogged defrost drain line is what’s causing water buildup inside the freezer. Many times the clogged line is misdiagnosed as a leaking ice maker. So, look carefully.
If it’s your ice maker that’s leaking – keep reading! Here are some common causes for the problem:
- You have an ice jam. The ice in your ice maker is getting jammed up and causing the ice maker to over-fill or preventing the ice maker arms from rotating fully.
- Your fridge is not level.
- The ice cube fill valve and ice fill cup are not aligned properly.
- The defrost drain line is clogged.
- There’s a faulty or leaking water supply pipe.
- There’s a loose or leaking connection.
- The ice maker’s fill tube is damaged and leaking.
Solve Leaky Ice Maker Problems With These Quick Fixes
| PROBLEM | SOLUTION |
| Ice jamming, built up, or clogging the ice maker. | Put a large, sturdy bowl below the ice maker to catch residual water. Pour a cup of warm water down the chute and wait a few seconds, then test the dispenser again. Repeat several times. |
| Ice jamming, built up, or clogging the ice dispenser. | The fridge isn’t standing level. |
| The fridge isn’t standing level. | Put a large, sturdy bowl below the ice maker to catch residual water. Pour a cup of warm water down the chute and wait a few seconds, then test the dispenser again. Repeat several times. |
| The fill Valve & Ice Fill Cup are not aligned. | Using a bubble/laser level reader, check if the fridge is standing level. If it isn’t – either extend the fridge’s feet to level it or use a wooden wedge to level the appliance. |
| Clogged Defrost Drain Line. | If either the fill valve or fill cup looks out of place, carefully refasten them into alignment. Once they’re properly lined up, the leak should stop. |
| Water Supply Pipe Fault. | If there’s a layer of ice over the defrost drain line, pour hot (not boiling) water over it to melt it. Soak up all water afterward to avoid that water freezing and causing another ice block. Verify that the drain line is clear of any debris or other blockages. Many brands will utilize a black rubber duck bill on the end of the drain line designed to allow water to exit while keeping air from entering. However, it’s also a very common place to develop a clog. It’s recommended to enlarge the water drain opening slightly by using a razor blade to cut a small triangle in the rubber duck-bill piece, thus allowing for better water flow while only allowing a small amount of air to enter the cabinet. |
| Leaky or loose connections. | Check that the water supply line to the ice maker is not kinked, damaged, or pierced anywhere. If the supply line is leaking, either perform a good quality seal yourself or have a technician replace the whole line. |
| The water filter needs replacement. | Check along the whole length of the water supply line for leaks and blockages. Repair any leaks or replace the water supply line if needed. Check all the connection points along the line, and if they’ve worked loose, tighten them. Use caution not to over-tighten water lines or bolts. |
| Water Dispenser needs checking. | If your water filter hasn’t been changed in 6 months or longer, replace it with a new one. If water is leaking from the water filter housing, call a technician, as the replacement will require skilled repair and replacement parts. |
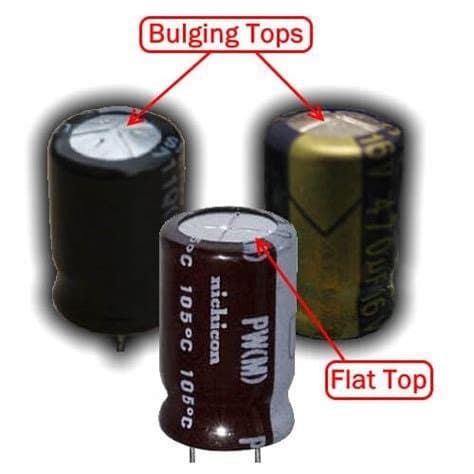
For the last point, see the image below to compare a bulged (failed) capacitor compared to the normal flat top:
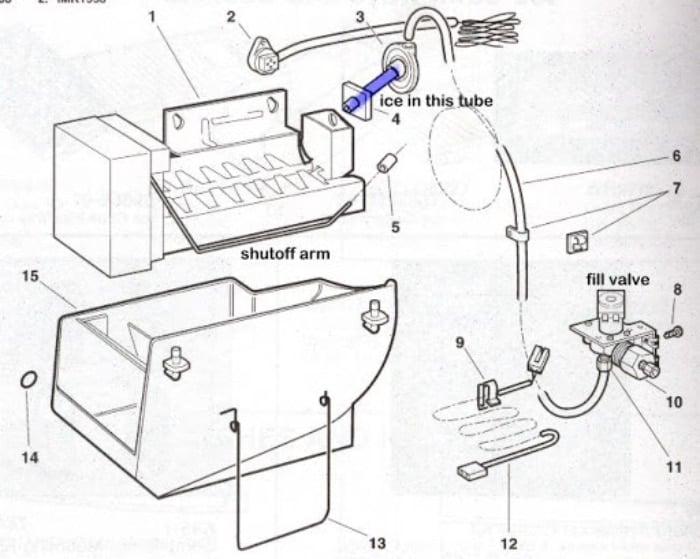
What if it’s the Fill Tube that’s Leaking?
I’ve found that when your ice maker is leaking water, a possible cause can be the fill tube leaking due to freezing. Freezing may cause a cracked tube or ice obstruction.
If your fill tube is cracked or blocked, use a hair dryer on low heat (move it along the fill tube) to melt the ice and remove the obstruction. Soak up any melted water as you go to prevent it from refreezing, which can cause more leak problems.
Also, make sure that the fridge is disconnected from the power source. Water and electricity combined can be very dangerous.
If you don’t have a hair dryer, don’t worry! You can also use a turkey baster to drip warm water along the fill tube and melt the ice. Have a large bowl or basin ready underneath to catch drips.
You’ll also want to check the fill valve (pictured above). In my experience, a failing or misaligned water valve/fill tube will often have a slow/intermittent drip from the side of the appliance, which can cause a fill tube to clog with ice.
If so, remove the ice from the fill tube and replace the faulty water valve. Here’s how to replace the valve:
- Unplug the ice maker from the wall outlet, leaving the water supply open to the valve.
- Remove the outgoing water valves to check for drips.
- Look for any misalignment in the fill tube. Please align the tube back into the right position if you spot any.
- Check whether the water valve drips without any power going into the appliance; it’s a sign of failure.
Typically, replacing your ice maker’s water valve can cost anywhere between $175-$300, depending on the appliance and the complexity of the repair.
Will an Ice Maker Burn Up Without Water?
Since ice makers cycle based on the temperature of the ice mold, they won’t continuously run if the ice mold is not filled with water. In other words, an ice maker with no water will likely not be an issue.
However, an ice maker mold can that does fill up with water but is cracked or rusted can cause a water leak. From what I’ve seen, the common symptoms of a damaged ice maker mold are dripping from the bottom and freezing up along the base.
If you suspect your ice maker mold is broken or rusted, I usually advise leaving the ice maker in the “OFF” position to play it safe.
Typically, when an ice maker mold is damaged, the entire ice maker must be replaced, which can cost between $175-$400, depending on the nature of the repair.
What Causes an Ice Maker to Stop Working?
None of us like broken-down appliances and expensive repair bills, so here’s a list of the most common ice maker faults to help you understand your appliance better:
- Ice cubes aren’t ejected from the ice maker: Usually, failure to eject means that the control arm/shut-off arm for the ice maker is out of place or in the OFF position. Look carefully at the arm; if it’s out of alignment, simply move it gently back into its proper position.
- The water supply is obstructed/cracked: In other words, no water is getting to the ice maker. Replace your water filter every 6 months or so, or AT LEAST once annually – if the water filter is clogged or cracked, it’ll block your water supply and likely cause leaking.
- Electrical issues with the water valve solenoid: An electrical fault can mean that the solenoid is prevented from opening the water valve. If it’s a solenoid problem and you’re handy, undertake a DIY repair. Alternatively, contact an appliance technician for help.
- No water from the water supply line: It sounds obvious, but many problems have obvious solutions! Turn the water supply tap on, and check the water supply line for obstructions, tears, or holes that may be leaking water. Also, check any connections or valves along or connected to the line. Tighten and seal any loose connections or valves – but don’t over-tighten them.
- Ice mold is not ejecting ice: Check that the gearbox or ejection fingers aren’t damaged, obstructed, or frozen over and causing the motor to stop working.
Stopping Your Ice Maker’s Leak
Ice makers are fantastic appliances, but they can be frustrating when they’re doing their best waterfall impression. I hope this short guide has helped you find and fix the solution to your ice maker leak.
If this content has helped you, please consider checking out our related articles below and subscribing to our newsletter!
Thanks for reading, and have a great day.
-Craig.


Designing Modern Living Rooms from Iconic Movies

7 Tips for Heating a Room with High Ceilings (On A Budget)