We've independently reviewed this article to make sure it's as accurate as we can make it.
To find out more about our article creation and review process, check out our editorial guidelines.
If there’s one appliance we can love or loathe, it’s a dishwasher.
When a dishwasher works well, it is INCREDIBLE! Tons of time saved, sparkling clean dishes, and no hassle at all.
But when a dishwasher has issues? Man, is it a nightmare! Your dishes smell weird, the dishwasher is leaking, or just making tons of strange noises.
If you want to fix (or avoid) living with a horrible dishwasher, then you’re in the right place.
In this guide, we’ll walk you through dishwasher maintenance tips from 4 dishwasher experts. This is everything you need to know about owning a dishwasher.
Everything in this article is super simple, and in return, you will:
- Get your dishwasher to produce cleaner dishes
- Add YEARS to the working life of your dishwasher
- Lower your monthly energy bills
- Reduce the chance of a breakdown and repair
Just a little bit of elbow grease can save you up to $550 on running costs and repair bills.
Not bad, right?
If that sounds good, then let’s dive in!
Why trust us? I’ve helped thousands of homeowners by sharing appliance advice online since 2016. This article is also written in combination with:
- James Blackford, our resident appliance repair expert with over 16 years experience,
- Dave Bringer, a veteran technician who has a appliance repair company in Kentucky, and
- Sean Richardson, an expert plumber, who runs his own plumbing company in Ireland.
Before we get started, it’s worth grabbing your dishwasher’s manual. Don’t have it to hand? Check out our guide to find it online.

How to Keep A Dishwasher Working Optimally – 7 Simple Tips
Taking care of your dishwasher can extend your dishwasher lifespan, lower your bills, keep your dishes sparkling clean, AND prevent bad odors.
Here are my six tips for keeping your dishwasher working at its best.
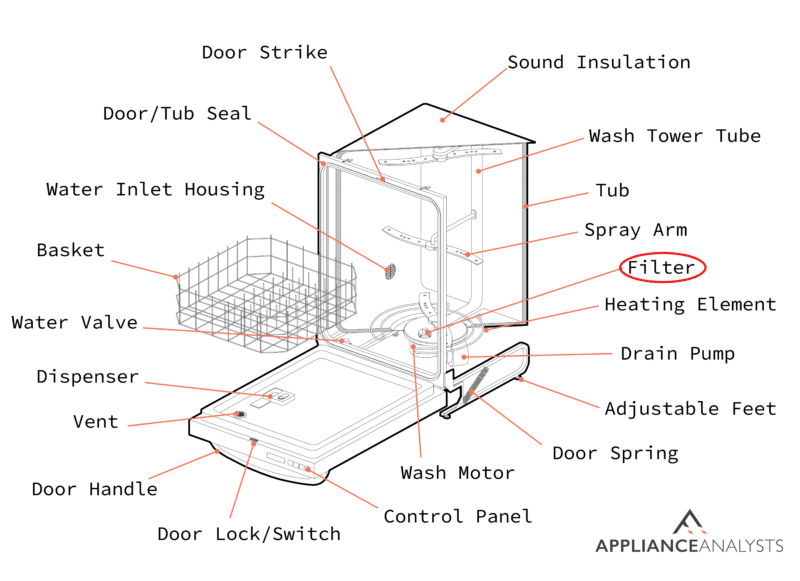
Dishwasher Tip #1 – Keep the Filter Clean
The dishwasher filter is your guardian to keep your drains from blocking. But if not taken care of, that filter can become the source of many problems.

If you use your dishwasher often, you should clean the filter every month.
Don’t worry – it only takes 5 minutes! Here’s how to do it:
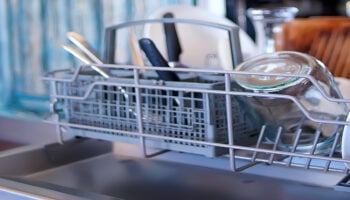
- Pull out the bottom rack of your dishwasher to locate the filter.
- Remove the cylindrical filter by turning it counterclockwise and pulling it up gently. You should also remove the second flat filter (if your dishwasher has one).
- Prepare the cleaning solution. I recommend filling a large bowl with hot water and a few drops of dish soap.
- Place the filter in the soapy water and wait for a few minutes.
- Scrub the inside and outside of the cylindrical and flat filters (a wire brush is typically fine).
- Rinse the filters with warm water.
- Check the filter housing to make sure there’s no food debris.
- Put the filters back in place.
A clogged filter is one of the most common causes of problems with a dishwasher.
It means that food can’t flow out of the dishwasher during a cycle, resulting in a dishwasher that can’t clean everything properly.
Weird smells and gritty glasses are symptoms of a clogged dishwasher filter.
When you’re cleaning the filter, give it a quick look. If you notice that it is damaged or broken, finding a replacement can prevent future issues (they’re like $10).
Dishwasher Tip #2 – Use Eco Modes Whenever You Can
When it comes to dishwasher best practices, eco mode is the easiest one to adopt.
Most dishwashers offer an Eco mode that saves energy by lowering the water temperature during the washing cycle.
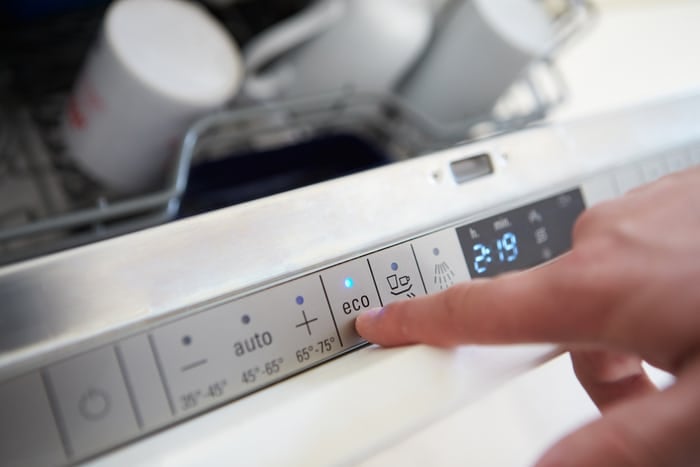
Bear in mind that the eco mode setting can make your dishwasher cycle run for longer. It needs to get the same level of performance while using lower water temperatures.
Eco mode uses about 523 kWh less per year than regular cycles (on average). Using this mode can help you save more than $80 USD!*
*Based on the average residential electricity rate in the U.S. of 2023 ($0.16 USD per kWh). These values may vary depending on your dishwasher’s model.
I know you might be thinking, “If I run on eco mode, my dishes aren’t going to get cleaned properly!”.
Well, thankfully, that’s where you’re wrong. A manufacturer wouldn’t introduce something that stops the appliance from functioning correctly. It just sacrifices a bit of time and temperature to reduce a LOT of demand on the dishwasher. Although for super-soiled dishes, yes, you’ll still want a more intense mode.
Dishwasher Tip # 3 – Load It Properly!
You’d be surprised how many people load their dishwashers totally wrong. If you don’t load it properly, you’re asking for trouble.
Here’s how I recommend you load your dishwasher:
- Relax with the Pre-Rinse. Some people pre-rinse so much that they don’t need a dishwasher! You don’t need to rinse every plate before you load it. As long as there are no solids or excessive buildup, you can load dishes and glasses straight into the dishwasher. Rinsing just adds to your water bill. Save yourself time by just scraping food into the bin and only rinsing extra dirty dishes.
- Don’t Overload or Under-Load. Overload prevents proper cleaning, and underload can cause damage with nothing to stop water jets from flying into the container walls. Just like Goldilocks, we want it juuust right. Aim for a balanced load.
- No plastic on the bottom rack. It can melt, and melted plastic smells horrible! Keep Tupperware and any other plastics on the top rack.
- Point curved items down and towards the middle. Don’t leave them pointing toward the dishwasher walls.
- Make sure both spray arms can spin freely. If something blocks them, it’ll throw off the whole cleaning process (not to mention potentially causing damage to the arms).
- Use the right amount of detergent. Yes, too much isn’t a good thing! It’s going to leave a lot of buildup on your glasses. Stick to the recommended amount on your detergent label.
- Select the right cycle for your load. The best guide for this is in your dishwasher’s manual. The wrong cycle can mean inadequate cleaning or overworking the dishwasher.
Dishwasher Tip #4 – Check the Rinse Aid Dispenser Regularly
Rinse aid contains some chemicals called “surfactants”, which reduce the tension of the water and avoid spots.
Rinse aid is dispensed during the final part of the cycle to help remove water from your dishes.
I recommend making it a habit of checking your rinse aid dispenser before a cycle. If it’s empty, your dishwasher may not dry your dishes properly.
You can check your manual to find the rinse aid dispenser, but it’s usually located right next to the detergent dispenser. (At this point, I’m sure some readers might be thinking “Oh, THAT’S what that is!”)
Remove the cap from the rinse aid dispenser and if it’s empty, remove any residue left, and rinse with water, then refill to the max line.
Dishwasher Tip #5 – Always Open the Door After A Cycle
Once your dishwasher’s finished, it’s so important to open that door to release all the humid air.
I know, if you’ve got young kids, you don’t want them jumping on the dishwasher door. But even just leaving it slightly open by wedging something in the door will do the trick.
Mold thrives in warm, dark, and moist environments. Unfortunately, dishwashers check all of these boxes.
As you may already know, mold can cause bad odors, and a bad case can even result in needing to repair your appliance.
For a bonus point, throw open a door or window to help encourage the air to ventilate out of the dishwasher.
Dishwasher Tip #6 – Run Your Dishwasher at Night
If you run your dishwasher right after lunch or dinner, you might want to think twice!
Many energy companies charge higher rates for energy used during peak hours. So, if you want to save a few extra bucks, run your dishwasher at night.
This can help you save up to 50% on your energy bill!
Night cycles can be done just by setting your dishwasher on a delay timer. Set it to start once the off-peak hourly rate starts (or in the morning before it ends). But I wouldn’t recommend running it in the middle of the night, just in case it causes any noise that wakes you up.
Aim for the dishwasher cycle to finish while you are awake, though, so you can open the door slightly and let out the humid air.
Dishwasher Tip #7 – Dry Naturally
A lot of modern dishwashers have a ‘Heated Dry’ option. But unfortunately, heat is just about the most expensive use for electricity!
Unless you’re hosting the whole family for Thanksgiving, you can probably afford to wait 20-30 minutes for your dishes to dry. Over the long run, this can save you hundreds of dollars in energy bills!
All you need to do is ensure you’ve got your rinse aid topped up and open the door (even slightly) after the dishwasher has finished a cycle.
Your dishes will dry naturally, and your wallet will thank you.
Dishwasher Maintenance Guide
With the general tips and good habits covered, let’s get into the nitty-gritty. Maintenance!
Here are the simplest dishwasher maintenance tips I recommend you use.
Dishwasher Maintenance #1 – Clean That Filter!
We mentioned cleaning the filter above, but in my experience, it’s the #1 cause of most dishwasher problems.
Dishwasher maintenance is also so easy to keep on top of.
Here’s a quick recap:
- Remove the dishwasher filter.
- Soak it in hot water + soap/vinegar.
- Clean it with a good scrubbing (a wire brush is typically fine) and replace it.
I know it’s not fun, but it’s what prevents you from ending up with gritty and stinky dishes!
You should clean your dishwasher filter once a month – or more if required.
Dishwasher Maintenance #2 – Roll Up Your Sleeves
As well as the filter, there’s 3 key elements that need a scrub down once a month. Don’t worry – most of the time, it’s just a quick wipe. These are:
- Your dishwasher’s door seal. Having a dirty or moldy seal can prevent the dishwasher door from closing – which can cause leaks and bad smells.
- Underneath the dishwasher door – a common area of buildup for gunk, causing bad smells.
- The dishwasher spray arms – can get blocked over time, especially if you have hard water.
This whole process takes around 10 minutes. You just need to:
- Fill a large bowl with hot water and dish soap.
- Soak a microfiber cloth or an old toothbrush in soapy water.
- Wipe down the door seal/gasket. Make sure to also wipe the area underneath the door when the door is opened. These can quickly build up mold and residue.
- If there are any stubborn stains, I recommend using baking soda.
- Use paper towels to dry the door seal and keep mold from growing.
- Remove the dishwasher racks and inspect the spray arms. If there’s a clog buildup, give them a light scrub with a wire brush or toothbrush to keep them clear.
If you notice that the door seal is damaged, please replace it with a new one (it’s easier than you think!).
Dishwasher Maintenance #3 – Run A Cleaning Cycle With Pods
The last but SUPER important dishwasher best practice is to run cleaning cycles.
A cleaning cycle runs without any dishes and at a super high temperature, with a dishwasher cleaning product. The idea is to kill off any mold and cleanse the dishwasher of any residue.
Most people NEVER do this! Not because they can’t be bothered, it’s just because no one tells us this is even needed.
I recommend running a cleaning cycle once every 1-2 months. You can do this by:
- Make sure the filter is cleaned out first. We want to ensure good water flow.
- Picking up some dishwasher cleaning tablets (as a backup, fill half a cup with vinegar and place upright on the top rack – but, really you want the tabs). You can usually get them at Walmart.
- Selecting a cleaning cycle. If you don’t have one, run it at the highest temperature allowable.
After the cleaning cycle is finished, leave the door open to let the air escape.
A cleaning cycle only takes a few minutes to set up, but trust me it’s SO worth it!
Dishwasher Maintenance #4 – Use A Dishwasher Sanitizer
Lastly, for a heavy clean, you can use a dishwasher sanitizer.
I’d only recommend doing this once every 6-12 months or if you think your dishwasher needs a seriously good cleaning.
You can use these sanitizer bottles from Amazon. You just open the cap, place it upside down on your rack, and then run a clean cycle. And if you don’t have a clean cycle, run it on the longest + hottest settings.
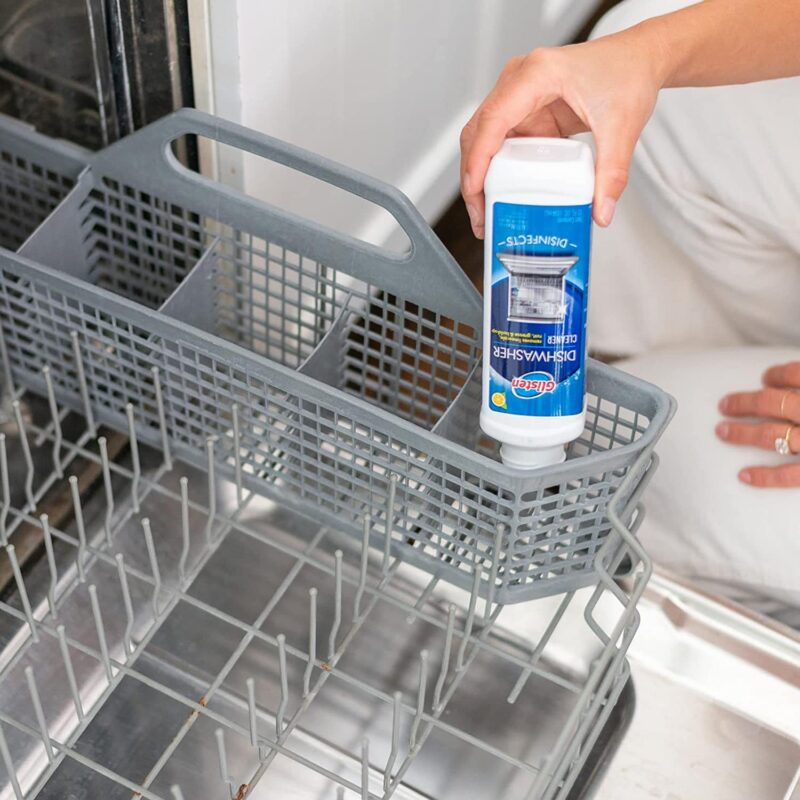
The sanitizing bottle will release some serious cleaning elements throughout the cycle – it’s the strongest weapon we have to fully cleanse any kind of mold or grime buildup in our dishwasher.
Job Done!
You made it! If you followed this guide, you may have just saved yourself $550, or even more.
Dishwashers are complex appliances, but I hope you’ll agree that their maintenance is quite simple.
By following this guide, you’ve made sure:
- Your dishwasher is able to work correctly
- You’re loading the dishwasher correctly
- You’re using the right cycle and settings
- The dishwasher’s parts and filter are clear of grime and debris
- The dishwasher door is clean and sealed correctly
- The dishwasher is getting regularly cleaned and sanitized.
With your effort today, I’m positive you’ve added YEARS of good working life to your dishwasher – not to mention lowering your energy bills AND giving yourself cleaner dishes. Nice job!
If you found this guide helpful, please check out the rest of our appliance challenge.
Our guides can save you over $1,000 a year by following simple walkthroughs like this one.


Designing Modern Living Rooms from Iconic Movies

7 Tips for Heating a Room with High Ceilings (On A Budget)