We've independently reviewed this article to make sure it's as accurate as we can make it.
To find out more about our article creation and review process, check out our editorial guidelines.
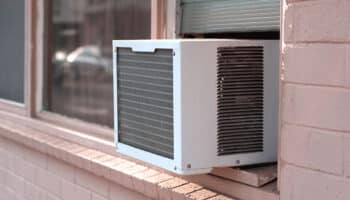
Is your window air conditioner acting more like a tropical breeze than a frosty Arctic gale?
When the summer heat is relentless, and your AC starts blowing lukewarm air, it’s enough to make you contemplate moving to the North Pole.
But before you pack your bags and say farewell to civilization, let’s explore some fixes together.
In this article, I’ll uncover 20 easy fixes to transform your window AC to a cool, refreshing oasis.
Let’s dive into the exhilarating world of window AC repair.
What You’ll Need:
- A screwdriver
- A multimeter
- A soft brush
- A vacuum cleaner
- A damp cloth
- Replacement parts (as needed)
Window Air Conditioner Air Not Cold? Try These 20 Easy Fixes
#1: Check the thermostat settings
Before diving into the depths of your window AC, let’s start with your thermostat settings. Sometimes, the solution is as easy as adjusting the temperature. First, ensure your thermostat is set to “cool” at a temperature lower than the room temperature.
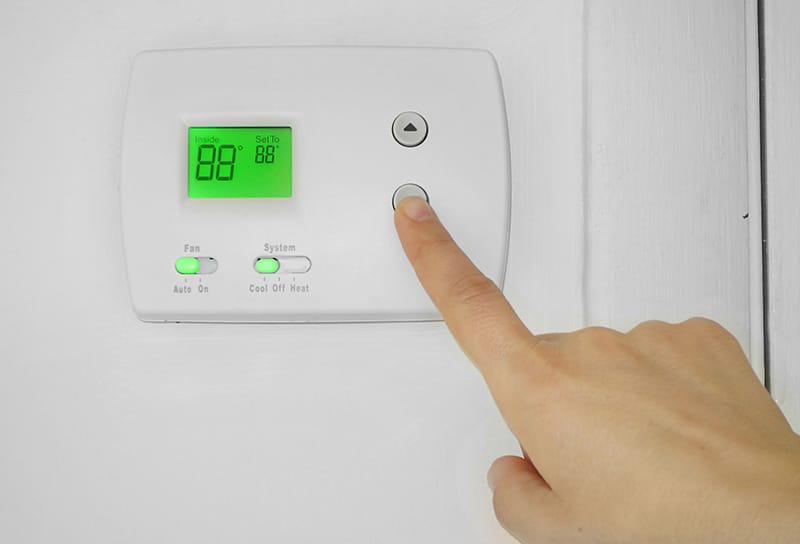
If it’s set to “fan” or a temperature higher than the room’s current temperature, you might as well ask for a warm breeze instead of a chilly gust.
#2: Clean the air filter
A dirty air filter can be your window AC’s worst enemy. When the filter gets clogged with dust and debris, it can restrict airflow and reduce the unit’s cooling efficiency. To clean the filter:
- Please remove it from the unit and give it a gentle vacuum.
- If it’s still looking grubby, wash it with warm, soapy water and let it air dry completely before reinserting it.
- Remember, a clean filter is a happy filter, leading to a relaxed and comfortable home.
Tip: Aim to clean your air filter every 30 days during peak usage and replace it as the manufacturer recommends (usually every 3 to 6 months).
#3: Inspect the evaporator coils
Next up, let’s take a look at the evaporator coils. These bad boys are responsible for absorbing heat from the air and cooling it down. However, they’ll need help to do their job if they’re covered in dirt and grime.
To access the evaporator coils, you’ll need to remove the front panel of your window AC unit.
If the coils look like they’re wearing a dirt tuxedo, use a plastic bristle brush to clean them gently. It cleans well and it is hard to cause any damage to the coil.
#4: Clean the condenser coils
On the flip side of the evaporator coils, we have the condenser coils. These coils release the heat absorbed by the evaporator coils but can also become dirty and less efficient. You’ll need to access the backside of your window AC unit to clean the condenser coils.
Again, use a soft brush or vacuum to gently clean the coils, and be mindful of the fins. A clean set of condenser coils can affect excellent air production.
Tip: Use a coil cleaner designed for air conditioners to gently and effectively clean the coils.
#5: Check for refrigerant leaks
If your window AC is still blowing warm air, it’s time to check for refrigerant leaks. Refrigerant is the magical substance that keeps your AC cooling, but your unit will need help to do its job if there’s a leak.
Look for oily residue around the refrigerant lines, coils, and connections to check for leaks. If you spot a leak, don’t try to fix it yourself – refrigerant can be harmful if mishandled.
Instead, call a professional HVAC technician to repair the leak and recharge the refrigerant.
#6: Inspect the fan motor
A faulty fan motor can lead to warm air blowing from your window AC. To check the fan motor, you’ll need to remove the unit’s front panel and locate it (usually near the evaporator coils).
Then, give the motor a gentle spin with your hand – if it doesn’t spin smoothly or makes a grinding noise, it might be time to replace it.
If you’re not confident in your motor-swapping abilities, it’s best to call a professional for help.
#7: Examine the fan blades
While you’re inspecting the fan motor, take a peek at the fan blades. If they’re damaged or warped, they won’t be able to circulate cool air efficiently.
You can either straighten the blades or replace them to fix this issue. Just ensure the power is off before you start tinkering with the fan blades – safety first, my friend.
#8: Test the compressor
The compressor is the heart of your window AC – it pumps refrigerant through the system. If the compressor isn’t working correctly, your unit won’t produce cold air. To test the compressor, you’ll need a multimeter to check its electrical resistance.
If the resistance is out of the manufacturer’s specified range, it’s time for a new compressor. Replacing a compressor can be complicated, so it’s best to call a professional for help.
#9: Look at the capacitor
The capacitor is like your window AC’s cheerleader – it helps the compressor and fan motor start and runs efficiently. However, if the capacitor is faulty, your unit might struggle to produce cold air.
To test the capacitor, use a multimeter to check its capacitance. The capacitance is usually marked on the capacitor and expressed in microfarads or MF. There may be two values as the manufacturer uses one capacitor to feed both the compressor and the fan. If it’s not within the manufacturer’s specified range, it’s time to replace it.
If you’re uncomfortable replacing a capacitor, don’t hesitate to call a professional for assistance.
#10: Examine the control board
The control board is the brains of your window AC, and if it’s malfunctioning, your unit might not cool properly.
To check the control board, look for any visible damage, like burn marks or loose connections.
If you spot any issues, you must replace the control board. Swapping out a control board can be tricky, so be bold about calling a professional if you need help.
#11: Check the temperature sensor
Your window AC has a temperature sensor that tells the unit when it’s time to start cooling. If the sensor is faulty, the unit might not know when to kick into action.
To check the sensor, look for it near the evaporator coils – it’s usually a small, thin wire. If the wire is damaged or disconnected, you’ll need to repair or replace it.
Be gentle when handling the temperature sensor, as it’s quite delicate.
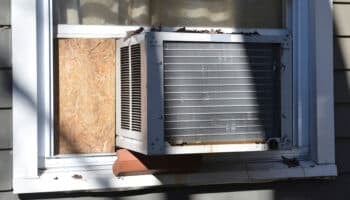
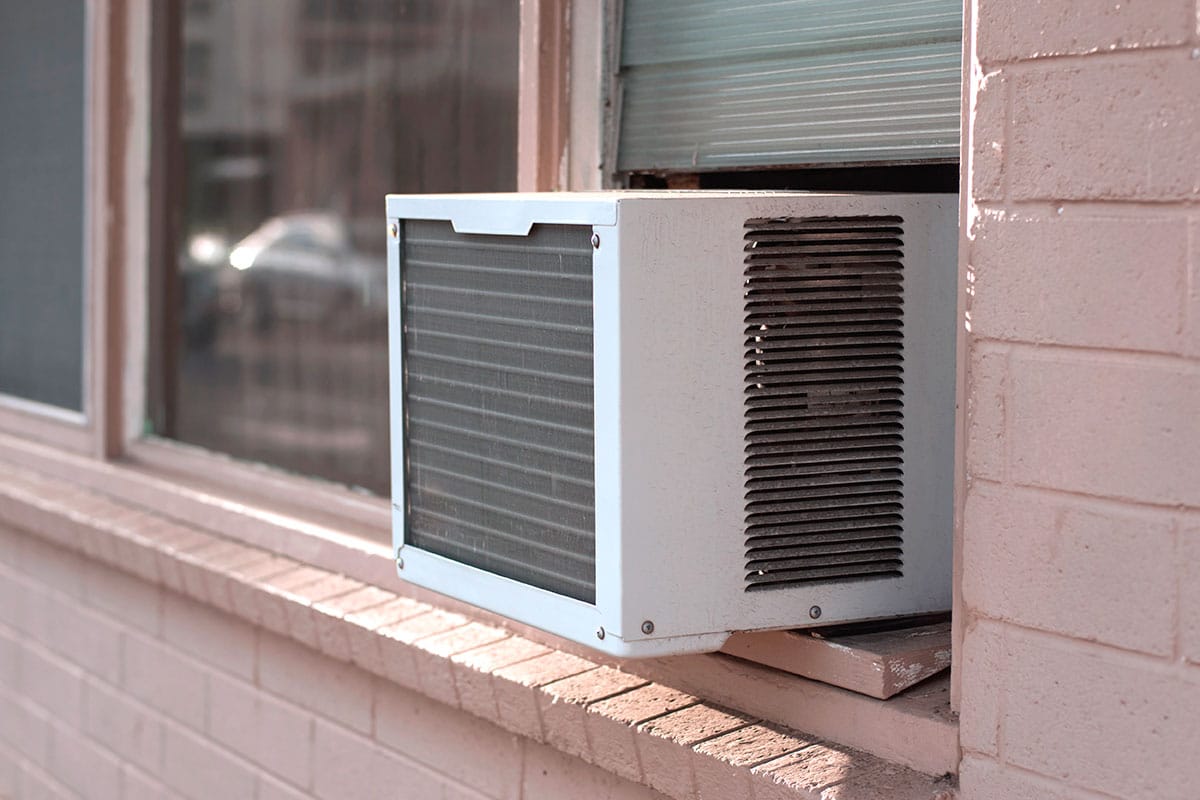
#12: Ensure proper installation
If your window AC isn’t installed correctly, it can struggle to cool your space. Make sure the unit is level, secure, and properly sealed to prevent warm air from entering your home.
If you need more clarification about your installation skills, it’s always a good idea to consult a professional for help.
#13: Examine the power supply
An adequate power supply can prevent your window AC from underperforming. Ensure the unit is plugged into a dedicated outlet with the appropriate voltage and the power cord isn’t damaged.
If you find any issues with the power supply, address them promptly to ensure your AC can work its cooling magic.
#14: Verify the correct voltage
Your window AC unit needs the right voltage to run efficiently. First, check the manufacturer’s specifications to confirm the required voltage and ensure your electrical system can supply it.
If you’re not getting the correct voltage, consult an electrician to troubleshoot and resolve the issue.
#15: Check the vents
Blocked or closed vents can hinder your window AC’s cooling capabilities. Ensure all the vents on your unit are open and free of obstructions, like furniture or curtains. If your vents are adjustable, try directing the airflow toward the center of the room for better cooling coverage.
Tip: If your vents are adjustable, try directing the airflow toward the center of the room for better cooling coverage.
#16: Inspect the air intake grills
Dirty or blocked air intake grills can reduce your window AC’s cooling efficiency. Inspect the grills thoroughly and clean them with a vacuum or damp cloth if necessary. A clean air intake means better airflow and cooler air for your home.
#17: Look for obstructions
External obstructions, like plants or debris, can restrict airflow around your window AC unit and affect its cooling performance. Clear obstructions and ensure adequate space around your unit to promote proper airflow.
#18: Check for a frozen coil
Sometimes, the evaporator coil in your window AC can freeze, decreasing cooling efficiency. First, turn off the unit and remove the front panel to check for a frozen coil. If you see ice on the coil, let it thaw before attempting to use the unit again. If the problem persists, consult a professional to diagnose and fix the issue.
#19: Inspect the exhaust hose
Window AC units with a heat pump function have an exhaust hose that releases hot air outside. If the hose is damaged, kinked, or blocked, it can impact the unit’s cooling performance. Inspect the hose and fix or replace it if necessary to keep your AC running smoothly.
#20: Consider the unit’s age
If you’ve tried all the fixes above and your window AC still won’t blow cold air, consider the unit’s age. Most window air conditioners have a lifespan of 10 to 15 years; if your unit is getting older, it may be less efficient or nearing the end of its life. In this case, investing in a new, energy-efficient unit that will keep you cool for years might be time.
Tip: If you decide to replace your window AC, consider investing in an energy-efficient model that can save you money on your energy bills while keeping you cool and comfortable.
Conclusion:
And there you have it! Twenty easy fixes to try if your window AC won’t blow cold air. With some patience and handy know-how, you can turn your warm, tropical breeze of an AC into a refreshing, icy blast machine. roll up your sleeves, and let’s get your window air conditioner back in action.


Designing Modern Living Rooms from Iconic Movies

7 Tips for Heating a Room with High Ceilings (On A Budget)