We've independently reviewed this article to make sure it's as accurate as we can make it.
To find out more about our article creation and review process, check out our editorial guidelines.
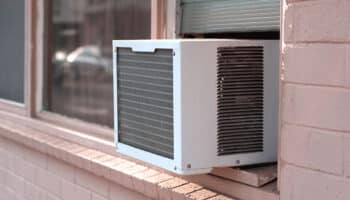
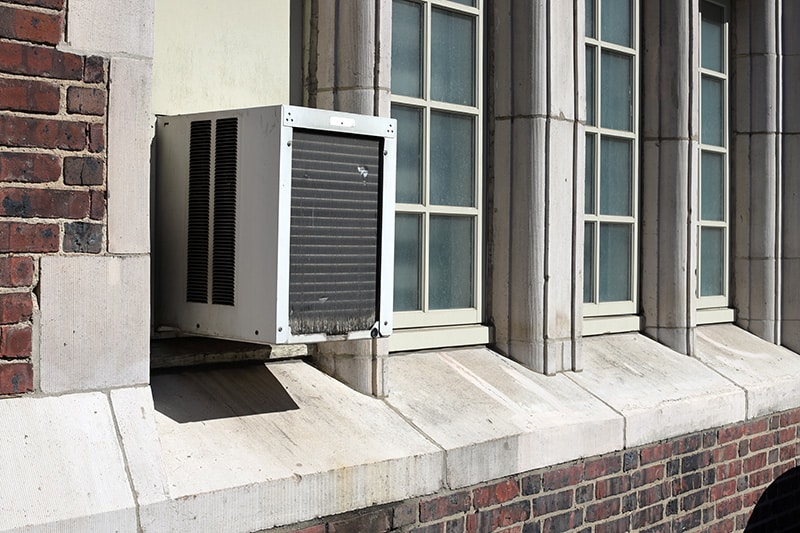
Is your window air conditioner leaking?
Don’t worry – it’s a common issue. As amazing as air conditioners are, they’re quite complex and prone to things going wrong.
A leak in a window air conditioner can lead to mold forming that can make your air smelly, and also potentially damage your window air conditioner or window frame.
So let’s get that fixed!
In this article, I’ve covered how to investigate and solve all the common causes of a leaking window air conditioner.
If that sounds good, then let’s get started.
What You’ll Need:
- Screwdriver
- Level
- Soft brush
- Vacuum cleaner
- Warm, soapy water
- Replacement air filter
- Replacement seals
Window Air Conditioner Leaking? Try These 20 Steps
#1: Identify the Source of the Leak
Before you can fix the problem, you need to find the source of the leak. Start by turning off your window air conditioner and unplugging it from the wall.
Next, examine the unit inside and outside your home to determine where the water is coming from. This will help you pinpoint the specific component or area that needs attention.
#2: Inspect and Clean the Air Filter
A dirty air filter can cause your window AC to leak. When the filter is clogged with dust and debris, it restricts airflow, causing the evaporator coil to freeze. As the ice melts, it can cause excess water to overflow and leak.
To inspect the air filter, locate it in the front panel of your AC unit. It’s usually a rectangular or square panel that you can slide or snap out.
Check for dirt and dust buildup, and clean the filter with warm, soapy water or replace it if it’s damaged or worn. After cleaning or replacing the filter, reinstall it and see if the leak stops.
#3: Check for Clogged Drain Holes
Your window air conditioner has drain holes at the bottom of the unit that allows water to escape. If these holes become clogged with dirt or debris, water can back up and cause leaks.
To check for clogged drain holes:
- Turn the unit off and unplug, and remove it from the window.
- Inspect the bottom of the AC unit for any visible blockages in the drain holes.
- Use a soft brush or a toothpick to clear away dirt or debris.
- Be gentle to avoid damaging the unit.
- Once the drain holes are clear, reinstall the air conditioner and see if the leak has stopped.
#4: Ensure Proper Installation and Leveling
An improperly installed or unlevel window air conditioner can cause water to pool inside the unit and leak out.
To check the installation and leveling of your AC unit, grab a level and place it on top of the unit. If the bubble isn’t centered, you must adjust the unit until it’s level.
Sometimes, the installation brackets or supports may be bent or damaged, causing the unit to sit at an angle.
If so, replace the damaged parts and reinstall the unit. Once the air conditioner is level and properly installed, the water should drain correctly, and the leak should stop.
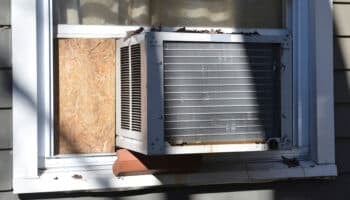
#5: Inspect and Replace Damaged Seals
The seals around your window air conditioner help keep warm air outside and cool air inside. However, if these seals become damaged or worn, warm air can enter the unit, causing condensation and water leaks.
To inspect the seals:
- Examine the area around the AC unit that meets the window frame.
- Look for any gaps, cracks, or signs of wear.
- If you find damaged seals, replace them with new weatherstripping to create a tight seal. This should prevent warm air from entering the unit and causing condensation, leading to leaks.
#6: Examine the Condensate Drain Pan
The condensate drain pan is designed to collect water that drips from the evaporator coil. If the drain pan is cracked, rusted, or damaged, it can allow water to leak from the unit.
To examine the condensate drain pan, you’ll need to remove the front panel and the air filter of your window AC unit.
Next, look for the drain pan beneath the evaporator coil, which may be a shallow, plastic, or metal tray. Inspect it for damage, and if you find any cracks or rust, replace the drain pan. Once you’ve installed a new drain pan, check if the leak has stopped.
#7: Check the Evaporator Coils
The evaporator coils in your window air conditioner can become dirty or clogged, causing the unit to leak.
Dirty coils can reduce the unit’s efficiency and cause the evaporator coil to freeze, leading to water leaks when the ice melts.
To clean the coils, turn off and unplug the unit, and then remove the front panel and air filter. Use a soft brush or vacuum cleaner with a brush attachment to gently remove dust and debris from the evaporator coil.
Be careful not to bend the delicate fins on the coil.
For the condenser coil located at the back of the unit, you may need to remove the unit from the window to access it properly. Clean the condenser coil in the same manner as the evaporator coil, and then reinstall the unit. Check to see if the leak has stopped.
#8: Make Sure the Fan is Working Properly
A malfunctioning fan can cause your window air conditioner to leak. If the fan isn’t running at the correct speed or is damaged, it may be unable to keep the evaporator coil from freezing, leading to leaks.
To check the fan, turn on your window air conditioner and listen for unusual noises, such as grinding or squeaking.
If the fan seems to be running slower than usual or is making strange noises, it may need to be repaired or replaced. Consult a professional HVAC technician for assistance.
#9: Examine the Refrigerant Levels
Low refrigerant levels can cause the evaporator coil to freeze, leading to water leaks when the ice melts.
If you suspect your window AC unit is low on refrigerant, it’s best to call a professional HVAC technician to check the levels and recharge the system if necessary. Working with refrigerants can be dangerous, it’s not recommended for DIY repairs.
#10: Assess the condenser coil
It’s time to play detective and assess the condenser coil. Dirty or damaged coils can lead to leaks, ensure you thoroughly investigate them. Clean off any dirt or debris, and if you spot any damage, call in your favorite HVAC sidekick for backup.
#11: Examine the thermostat
Are your thermostat settings fighting against your AC unit? An incorrectly set thermostat can contribute to leaks – ensure it’s set to the appropriate temperature and mode.
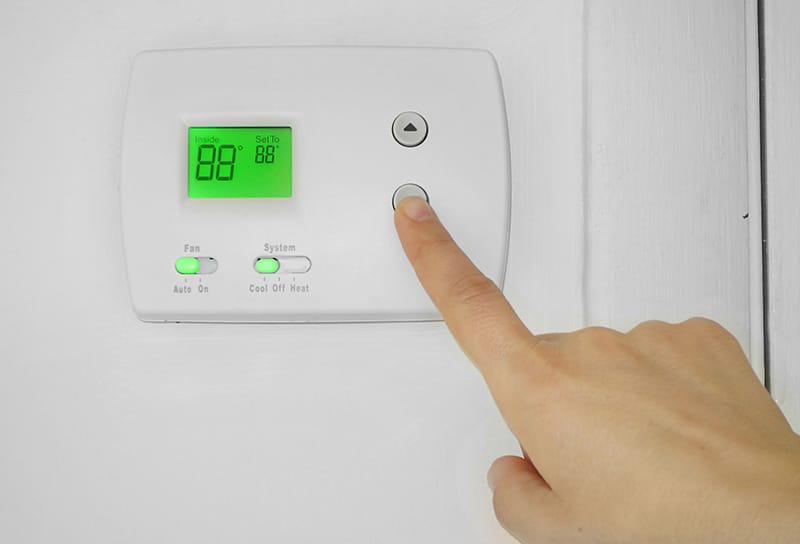
Give it a gentle nudge to a higher setting if it’s too low, and see if your AC can breathe a little easier.
#12: Inspect the fan motor
Is your fan motor going wild? A faulty fan motor can cause leaks, give it a good once-over for signs of wear or damage. Then, enlist a professional HVAC technician to tame that wild motor if you find any trouble.
#13: Check the compressor
When your compressor’s throwing a fit, you might be dealing with a leaky AC. First, check for strange noises or other signs of a struggling compressor.
If it seems unhappy, call a professional HVAC technician to come to the rescue and put your compressor’s woes to rest.
#14: Investigate the drain line
The drain line in your AC unit can sometimes take center stage with clogs or damage, causing water to back up and leak.
Clear out any blockages, and fix or replace damaged sections to ensure a smooth, leak-free performance.
#15: Examine the unit’s casing
Is your AC unit’s casing cracked, damaged, or loose? That could be an open invitation for leaks. Give the casing a thorough examination, and fix or replace any problematic areas.
With a sturdy casing, your AC will be better protected from unwanted leaks.
#16: Look for frost or ice buildup
If your AC unit looks like it belongs in a winter wonderland, you’ve got a frost or ice buildup problem.
This can lead to leaks when the ice melts. Defrost your unit by turning it off and allowing the ice to melt, and then troubleshoot the cause, which could be a dirty filter, low refrigerant, or a faulty fan.
#17: Consider the room’s humidity
High humidity levels can turn your room into a leaky jungle. If your window AC unit seems overwhelmed by the room’s humidity, consider using a dehumidifier to help reduce moisture levels and prevent leaks.
Your AC will thank you, and you’ll feel like you’ve escaped the rainforest.
#18: Test the Electronic Control
Time to test the electronic controls. Malfunctioning controls can cause your AC unit to behave erratically, leading to leaks. If you suspect your controls are on the fritz, consult your AC’s user manual or call a professional HVAC technician to get those controls back in line.
#19: Determine if it’s time to replace your AC
If you’ve tried everything, and your AC unit is still leaking like a sieve, it might be time for a grand adventure: AC replacement. Sometimes, the best solution is to invest in a new, more efficient window air conditioner to keep you cool and dry without leaks.
#20: Call in a Professional if Needed
If you’ve tried all the steps above and your window air conditioner is still leaking, it’s time to call in a professional HVAC technician. They can diagnose the issue and provide the necessary repairs to get your unit back up and running without any leaks.
Conclusion:
With these 20 steps, you’ll be well-equipped to tame that wild window air conditioner leak and protect your home from water damage.
Remember, patience is vital, as some fixes may require a bit of trial and error. Be bold and call in a professional if you need help, and soon you’ll be enjoying a dry, comfortable, and leak-free home. Cheers to your leak-busting journey.


Designing Modern Living Rooms from Iconic Movies

7 Tips for Heating a Room with High Ceilings (On A Budget)