We've independently reviewed this article to make sure it's as accurate as we can make it.
To find out more about our article creation and review process, check out our editorial guidelines.
Does it feel like your washer keeps filling with water as if it’s getting ready for a pool party?
Imagine you’re all set to tackle your laundry, but when you check your trusty washer, it’s constantly filling with water.
Don’t worry; I’ve got your back. You don’t need to be a certified technician to solve this issue – I’ll walk you through 6 simple steps that could be causing the problem.
In this helpful guide, we’ll discuss common reasons for washers that won’t stop filling, such as inlet valves and pressure switches. When you’re done reading, you’ll feel more confident and prepared to fix your washer.
So, let’s roll up our sleeves and dive into the world of washer troubleshooting.
Together, we’ll conquer this laundry day obstacle, and you’ll soon have your washer running like a champ. Ready to get started? Let’s go.
Ready to take control and conquer this watery foe? Keep reading to discover the steps to restore your washer’s good behavior.
What You’ll Need
- Screwdriver
- Adjustable wrench
- Multimeter (optional)
- Replacement parts (if necessary)
Washer Always Filling With Water? Follow These Six Steps
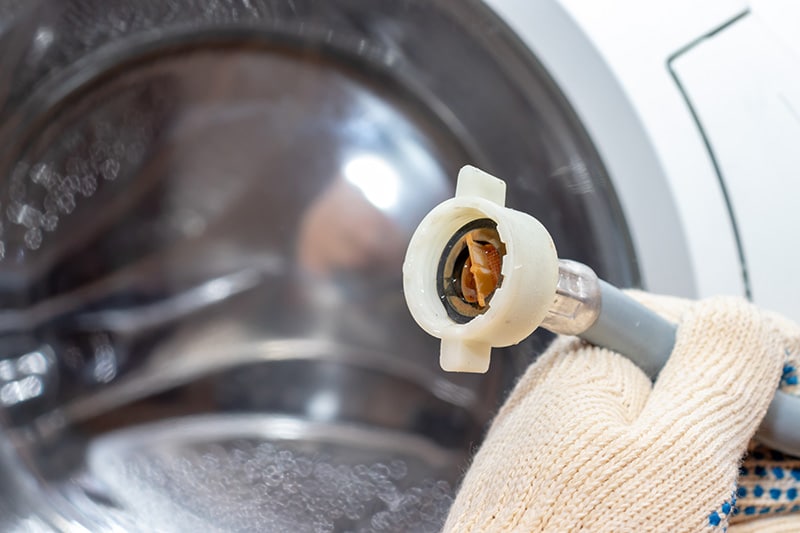
#1: Examine the Water Inlet Valve and Filters
The water inlet valve controls the flow of water into your washer. It’s like the club bouncer deciding who gets in and who stays out. If faulty, it might let too much water in, causing your washer to overflow. Here’s how to check the water inlet valve and filters:
First, turn off the water supply valves, then unplug your washer. Safety first.
Locate the water inlet valve, typically at the back of your washer, where the hoses connect. It resembles a plastic or metal box with electrical connectors and water hoses attached.
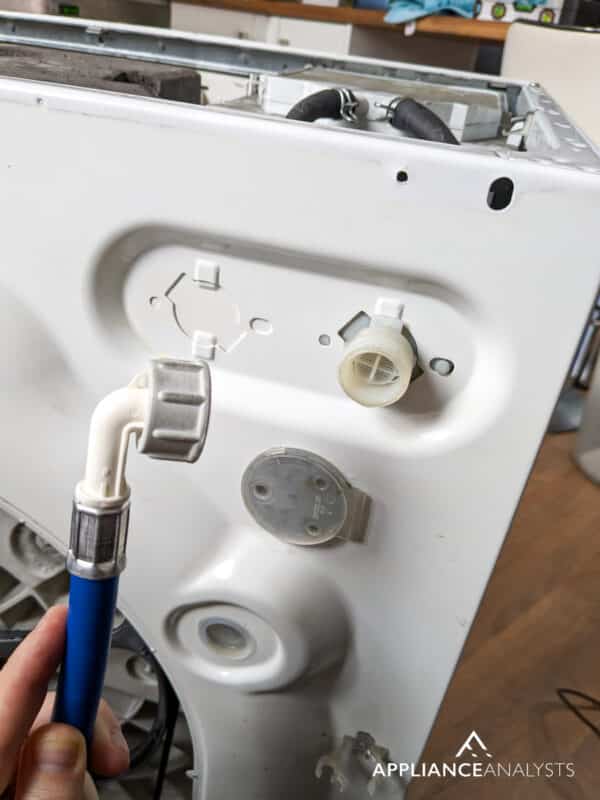
Disconnect the hoses and inspect the filters. Some models have metal mesh filters, while others have one or two plastic filters. Use needle-nose pliers to remove the filters and clean them in the sink, as they can become clogged.

Once the filters are clean, inspect the valve for any visible signs of damage or wear. If it looks like it’s seen better days, consider replacing it.
Test the valve’s solenoids for electrical continuity with a multimeter. If there’s no continuity, it’s time to bid farewell to your old valve and install a new one.
#3: Test the Water Level Sensor:
The water level sensor monitors the water level in your washer and communicates with the control board to stop filling when the correct level is reached. If it malfunctions, it could cause the washer to overfill. To test the water level sensor in a modern washer:
- Unplug the washer and turn off the water supply to ensure safety.
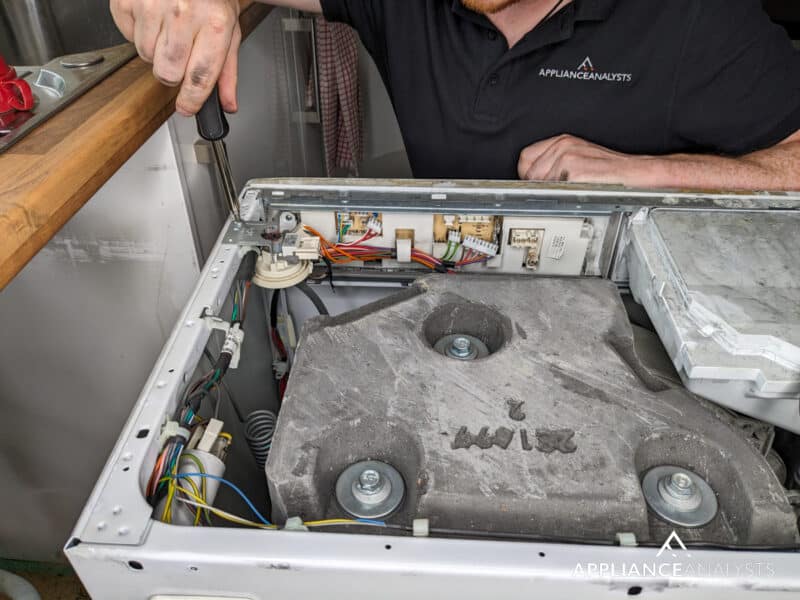
- Locate the water level sensor, typically found inside the control panel or attached to a thin hose running to the tub.
- Consult your owner’s manual or the manufacturer’s website for instructions on entering your washer’s service mode. Service mode allows you to run diagnostic tests on various components, including the water level sensor.
- Enter the service mode, following the specific instructions for your washer model. Once in service mode, run the diagnostic test for the water level sensor.
- Observe the display or indicator lights as the washer fills with water. If the sensor readings don’t change according to the water level, the sensor may be faulty and need replacement.
Always consult your owner’s manual or manufacturer’s website for specific guidance on testing the water level sensor for your appliance, as instructions may vary depending on the make and model of your washer.
#4: Verify the Flow Meter Functionality
The flow meter is responsible for measuring the amount of water entering your washer and signaling the control board when the correct level is reached. A malfunctioning flow meter may cause your washer to overfill. To check the flow meter:
- Unplug the washer and turn off the water supply to ensure safety.
- Locate the flow meter inside your washer near the water inlet valve. It’s a small, cylindrical device with electrical connectors and hoses attached.
- Check for any visible signs of damage or wear. If the flow meter appears damaged, consider replacing it.
- Disconnect the electrical connectors and hoses from the flow meter. Test the flow meter’s electrical continuity with a multimeter. If there’s no continuity, it’s time to replace the flow meter.
- Reconnect the electrical connectors and hoses, and reassemble your washer.
Please consult your owner’s manual or the manufacturer’s website for specific guidance on locating and testing the flow meter for your appliance, as instructions may vary depending on the make and model of your washer.
#5: Assess the Water Mixing Chamber
The water mixing chamber is the DJ of your washer, responsible for mixing hot and cold water to create the perfect temperature for your laundry. If it’s faulty, your washer may overfill. To check the water mixing chamber:
- Locate the water mixing chamber, typically situated near the water inlet valve. It’s a small, cylindrical component with hoses attached.
- Inspect the chamber for any visible signs of damage or wear. If it looks like it needs an upgrade, replace it.
- Test the chamber’s electrical continuity with a multimeter. If there’s no continuity, it’s time to install a new water mixing chamber.
#6: Look for Siphoning Issues
Sometimes, a washer fills with water because it’s draining simultaneously, creating an illusion of never-ending filling. This phenomenon, known as siphoning, can be caused by improper drain hose installation. To check for siphoning issues:
- Locate the drain hose, usually attached to the back of your washer. It’s a thick, flexible tube that leads to the drainpipe.
- Ensure the end of the hose is inserted into the drain outlet of your house 6-8 inches deep. This helps prevent the hose from falling out and siphoning to occur.
- Ensure the drain hose’s tip doesn’t fall below the water level inside the washer. The end of the hose should be elevated at least 30 inches above the floor and secured to a utility sink or drainpipe.
- Use a zip tie or similar fastener to secure the drain hose, preventing it from falling out of position and causing siphoning issues.
Conclusion
Well, my friend, we’ve journeyed together through the wild world of washers and uncovered why your washer keeps filling with water.
By following these steps, you’ve not only become a washer-detective extraordinaire, but you’ve also taken the necessary steps to keep your laundry room from turning into a mini water park.
Don’t forget to share your newfound knowledge with fellow retired homeowners – they’ll be forever grateful. Now conquer your washer’s watery woes, and celebrate your success with some freshly laundered, perfectly dried towels.


Designing Modern Living Rooms from Iconic Movies

7 Tips for Heating a Room with High Ceilings (On A Budget)