If you’re like a great many other people throughout the world, you’ve probably heard of and invested in these things called cordless power tools. If you haven’t, you should check them out. The total convenience they bring to the table is a game changer.
Well, that is, if the batteries charge up.
Yes, the convenience of cutting the power cord from the outlet to the tool is a magical thing that provides freedom of movement without the concern of having enough extension cord.
But with those batteries comes the battery charger, which still plugs into an electrical outlet.
So, if you’re having trouble with dead batteries charging, in this case, Milwaukee lithium-ion batteries, there are two things to take a look at: the charger and the battery.
The good news is, that if either one’s having issues, there are 7 solid tips you can try to, one, determine if it is the charger or battery, and two, how you can possibly fix it without having to get help or consider a replacement.
Now, let’s check out those tips.
1. Inspect the Power Cord
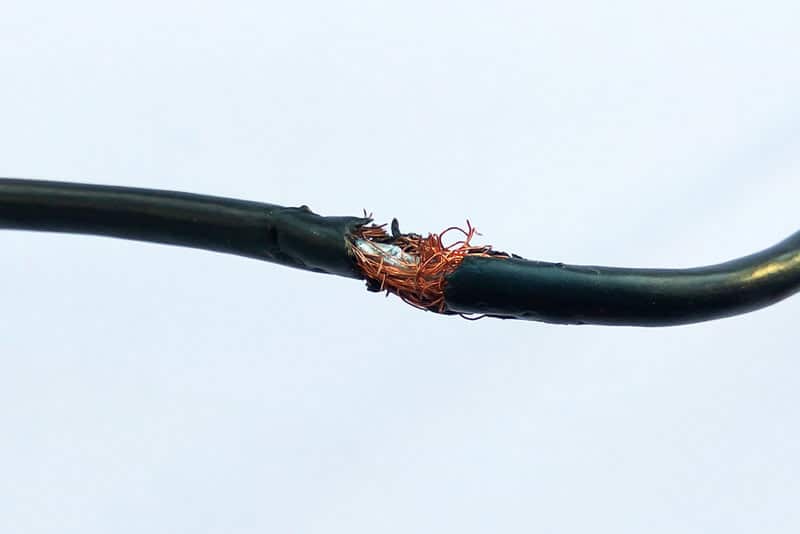
When you’re dealing with anything electrical that seems to be having power issues, the first thing you should usually check is the status of the cord. After all, if there’s a problem with it, it would make sense that there’d be an issue with power being transmitted from the outlet to the charger, in this case.
If there’s an issue with the charger’s cord, then of course there’ll be an issue with charging dead batteries.
After making sure the charger is unplugged from the wall outlet, what should you be looking for?
Cuts, abrasions, or any other sign of damage that would impact the operational capability of the charger.
If you find any damage, stop using the charger. You can attempt to replace the cord if it’s detachable and has an external transformer. You may have an issue finding an official Milwaukee replacement cord. As noted on page 5 of this manufacturer’s manual, there may not be serviceable parts for repairs.
That doesn’t mean the cord can’t be replaced. But if you have a warranty or the charger’s a recent purchase, you may want to contact a customer service center first.
2. Is Your Milwaukee Charger Getting Power?
Yes, it’s time to ask the obvious question, “Is the charger getting power?”
Notice, the question wasn’t, “Is the charger plugged in?”
Let’s just assume it is.
Now, how do you know if the charger’s getting power?
Well, with a Milwaukee charger, you can do a couple of things.
First, you drop the dead battery in the charger, or another battery in the charger, and see if any lights come on or start blinking, etc. Don’t worry about what the color of the light is or what it means yet. Right now, your only concern is if there’s power.
If you do get some form of light of some kind, you know there’s power.
If you don’t get any lights, and if you have a multimeter, you can check to see if the charger is getting voltage to determine if it’s just an LED problem. It should be reading at least 18V for adequate power to charge a battery.
At this point, if you’re getting voltage at the charger but no lights once a battery is placed on the charger, you still may be dealing with a battery or charger issue but you know for sure something up with the LEDs (more on this later).
At least you’ve eliminated the question of whether power’s getting to the charger, right?
But what if you’re not getting any power at the charger? Is it time to toss it and get a new one?
3. Milwaukee Charger isn’t Getting Power
Before you run out and buy a new charger, let’s eliminate one more thing. In this case, make sure the outlet you’re plugged into is good to go.
How do you do that?
Well, if you’ve got a multimeter or a 3-wire receptacle tester, you can check to see whether the outlet is hot.
Or you can plug something else into the outlet and see if it’s getting power.
If you’re not getting any electrical distribution at the outlet, check the breaker and make sure it’s good to go.
Now if the outlet is an issue, you still need to check the charger on another outlet to make sure it’s okay. If you plug it into a different one, and you’re getting lights or voltage at the charger when you weren’t getting anything out of the first outlet, you now know you have a bad outlet that needs to be addressed.
Do that later, though.
Let’s focus on the charger and battery some more first.
4. Milwaukee Charger’s Getting Power but Not Charging Batteries
If you’re getting power at the charger but not getting any light indicators when a battery is on, there may be some things you can do to fix those LEDs.
At this point, you know there’s electricity at the outlet, the cord is in good shape, and you’re getting voltage at the charger. But when you put several different batteries on the charger, it’s like they don’t exist because you’re not getting indicator lights.
If the charger isn’t recognizing any batteries, it’s time to inspect the contacts on both the charger and battery sides. Before you do this, please make sure the charger is unplugged from the wall outlet. Once it is, you’re going to be looking for and correcting the following:
- Dirt. Your charger may not “see” the battery if the contacts are dirty. Basically, the dirt acts as a barrier between the metal-to-metal contacts of the charger and the battery. To correct this, use a clean cloth and rubbing alcohol. And let it dry before testing it out.
- Rust. Like dirt, rust can also inhibit the metal-to-metal contact necessary for a charger to work with a dead battery. To correct this, use some sandpaper and be gentle.
Once you’re done cleaning the contacts, test a couple of different batteries and see if you’re getting indicator lights. If you are, you know the charger is now effectively talking to, and trying to work with, the battery.
5. What’s Your Milwaukee Battery Telling You?
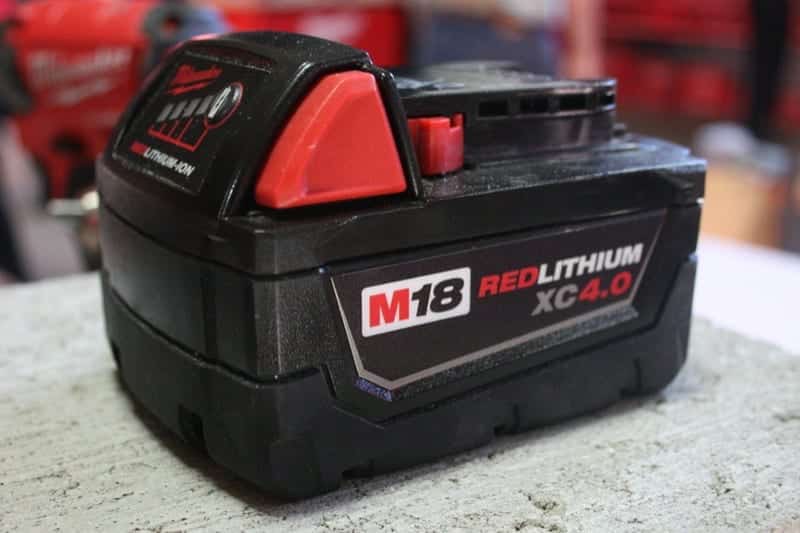
Milwaukee batteries come with a series of four lights (referred to as a fuel gauge) that tell you different things about the status of your battery. Here’s what those lights mean and what your battery is trying to tell you:
- Lights 1-4 Solid. Run time remaining. 4 solid lights mean fully charged whereas 1 solid left is the least amount of run time left. Continue working as long as the lights are solid.
- 1 Light Flashing Slowly. Less than 10% run time remaining. Prepare to charge the battery.
- 1 Light Flashing Quickly. The battery is effectively dead. Place on the charger.
- Lights 1 – 4 Flashing Quickly. Battery draw is too high due to high torque, binding, stalling, or short circuits. The battery pack will automatically shut off to protect equipment from damage. To reset from SHUT DOWN mode, the battery must be placed on the charger.
- Lights 1 and 3 / 2 and 4 Flashing Alternately. The battery pack is too hot and will shut down. Allow the battery to cool down.
So, if your battery enters SHUT DOWN from too high a draw or being too hot, it doesn’t mean the battery is dead, even if it’s acting like it. But it does need to go on the charger to reset.
If you get the quick flashing light then you know the battery is dead and ready to go on the charger for sure.
Speaking of the charger, let’s get back to it.
6. What’s Your Milwaukee Charger Telling You?
Well, enough has been made about whether your charger was getting electricity and if there were indicator lights illuminating it. Now that you know what the lights on the battery mean, let’s take a look at what the charger’s lights mean and what they’re telling you about your battery.
- Continuous Red Light – Battery is charging. So, if you’re seeing this, you know the charger is talking to the battery and charging. Whether the battery will hold a charge is a different story.
- Blinking Green Light – The battery is nearing full charge. If you never see this and only a red light then you’ve probably got a battery that’s no longer holding a charge.
- Solid Green Light – The battery is fully charged. The fuel gauge will shut off while the battery is on the charger and once it’s fully charged. To be sure, you can remove the battery and test the fuel gauge and see how many solid lights you have.
- Fast Flashing Red – This indicator means the battery is either too hot or too cold. It will not start charging until the temperature is just right (yes, like Goldilocks). So, if you thought your battery wasn’t charging before, this may have been the problem if you never noticed the flashing red or didn’t know what it meant.
- Flashing Red and Green – Well, if you’re seeing this, you may officially have a battery that’s damaged or defective. Try another battery on the charger to make sure it’s not indicating the same issue. If it is, you probably have a defective charger. But if it’s only the one battery causing the flashing red and green, it’s time to recycle it.
7. What Else Can You Do?
At this point, if nothing else has worked and the charger is good, you can try to basically jump the battery. Like jump-starting a car, you need to connect a good battery to the one you’re trying to resurrect. To do so, you need to connect positive to positive, and negative to negative.
If you’re unsure of how to do this, don’t have the connectors to do it with, or you’re not okay with trying this at all by yourself, don’t do it.
The other option is to recycle the battery and get a new one. Repair work usually isn’t an option for dead batteries at this point.
Conclusion
Dealing with dead batteries for your portable Milwaukee tools shouldn’t be a hassle. Ideally, the solution would be to simply place the battery on the charger and let it charge.
But sometimes it isn’t that simple and the dead battery simply won’t charge. That doesn’t mean it’s a problem with the battery itself. It could be a bad electrical connection, a bad charger, dirty or rusted contacts on the charger or battery, an overheated battery, or, yes, a defective battery.
Before jumping to the conclusion that the solution is buying a new battery, eliminate the other possible issues, too. The last thing you want to do is buy a new battery to replace a battery that might be perfectly fine, and still have to fix a charger or other electrical problem.
Thank you very much for reading!
— Craig.


