We've independently reviewed this article to make sure it's as accurate as we can make it.
To find out more about our article creation and review process, check out our editorial guidelines.
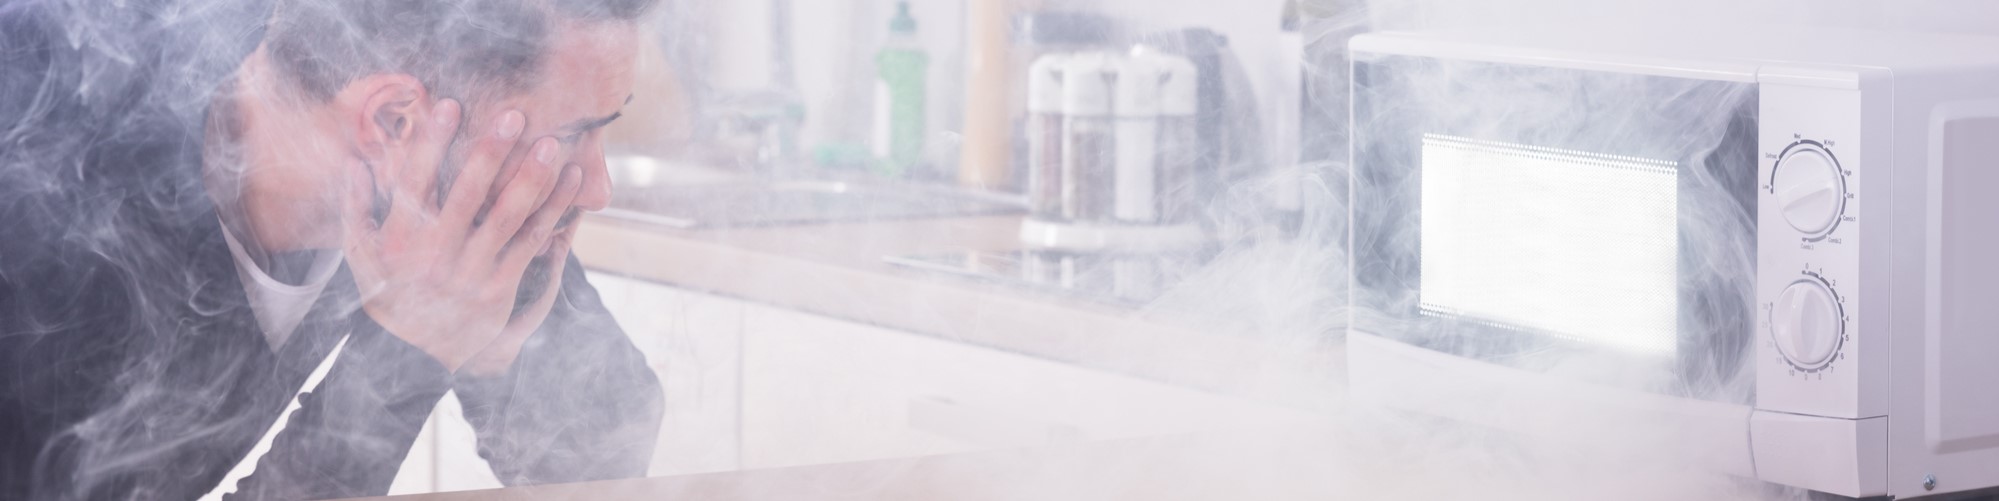
Does your microwave smell like burning?
You’re not alone! I know how concerning it can be to notice a burning smell, especially when you’re unsure of what’s causing it.
Don’t worry, though. I’m here to help.
If your microwave smells like burning, please clean the interior thoroughly, as food residue can be the source of the odor. It’s also important to use only microwave-safe materials, check the door wires, and examine the power cord.
Read on to learn how to get rid of your microwave’s burnt smell!
Getting the Burnt Smell Out of Your Microwave: 4 Steps
In this section, I’ll walk you through the steps you need to follow to get the burnt smell out of your microwave and also explain how to prevent the issue from happening again.
Are you ready? Let’s get started!
Before trying any of the fixes mentioned in this article, please keep in mind that microwaves contain a voltage capacitor that can still retain a charge even after you’ve unplugged the device from the power outlet. Unless you’re certified or experienced, avoid attempting any electrical repairs on your microwave to prevent any accidents.
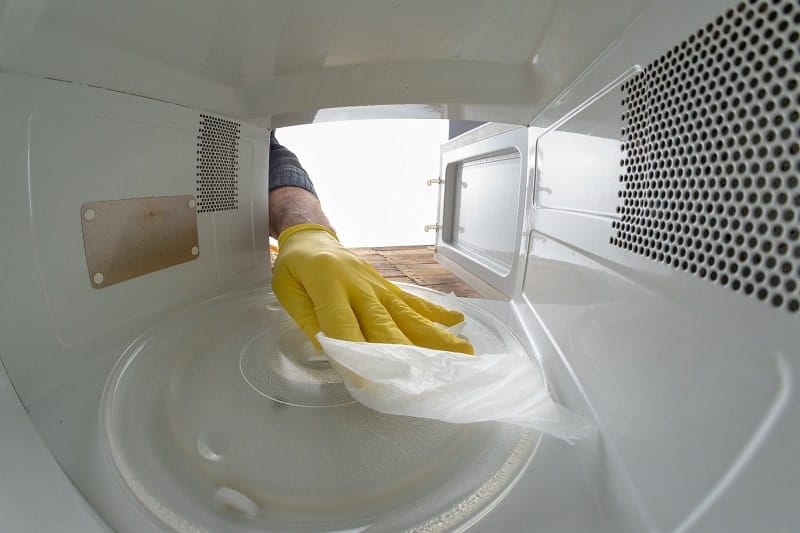
#1 Clean Your Microwave
I find that when a microwave smells like burning, it’s usually due to burnt food residues, grease, and oil accumulation.
To effectively get rid of the burnt smell, it’s important to clean your microwave thoroughly. The cleaning process not only helps get rid of the odor but also extends your appliance’s lifespan while reducing health risks and fire hazards.
You can clean your microwave with natural products like vinegar and baking soda. Alternatively, you can also use a kitchen cleaner or degreaser.
To clean your microwave with natural products, you’ll need to:
- Mix one cup of water with one tablespoon of vinegar in a microwave-safe bowl. When using natural cleaning solutions, I like adding a drop of essential oil to the mixture. Doing so can mask the scent of vinegar and leave your microwave smelling fresh.
- Drop a toothpick into the bowl to keep the water from boiling over the edges.
- Place the bowl in the microwave and close the door.
- Choose the highest setting and microwave the bowl for about 5 minutes.
- Once the timer goes off, do not open the door. Wait for a few minutes. The steam will loosen the grease and food residue accumulated on the microwave’s walls and ceiling.
- Wipe the interior with a sponge. If needed, use a mild detergent to remove any stubborn residue.
- Don’t forget to clean the turntable with warm, soapy water or place it in the dishwasher (only if it’s dishwasher-safe). While you’re at it, please wipe the area beneath the turntable.
- Allow the interior to dry to prevent mold growth. You can speed up the process using paper towels.
To clean your microwave with a commercial kitchen cleaner or degreaser, please follow these instructions:
- Unplug the microwave to avoid any electrical hazards.
- Spray the kitchen cleaner or degreaser inside your microwave.
- Let the cleaner or degreaser sit for 1 to 24 hours. Please read the product’s label for specific recommendations.
- Scrub the interior gently with a sponge to remove food residues, grease, or grime.
- Wipe the interior with a clean, damp cloth to remove the cleaner.
- Remove the turntable and roller ring and wash them with warm, soapy water. If the turntable is dishwasher-safe, you can use your dishwasher instead.
- Allow your microwave to dry completely to prevent mold. You can also use paper towels or a dry microfiber cloth to dry the interior.
- Reassemble the roller ring and turntable. Then, plug your microwave back into the power outlet.
Once you’ve cleaned your microwave with vinegar or the kitchen cleaner, I recommend placing a box of baking soda inside and allowing it to sit for 12 hours. Baking soda is great at neutralizing odors.
Note: It’s important to remember that if there are any spills in your microwave, you should clean them immediately. Doing so can prevent the spills from hardening, which can result in an annoying burning smell.
#2 Use Microwave-Safe Materials
If you’ve already cleaned your microwave but still notice a burning smell when you heat your food, I recommend checking the materials you’re using.
Certain materials, like plastic, can melt or warp in your microwave, resulting in a burning smell.
It’s worth noting that using containers that aren’t safe for microwaves not only leads to bad smells but also poses health risks and increases the potential for a fire hazard.
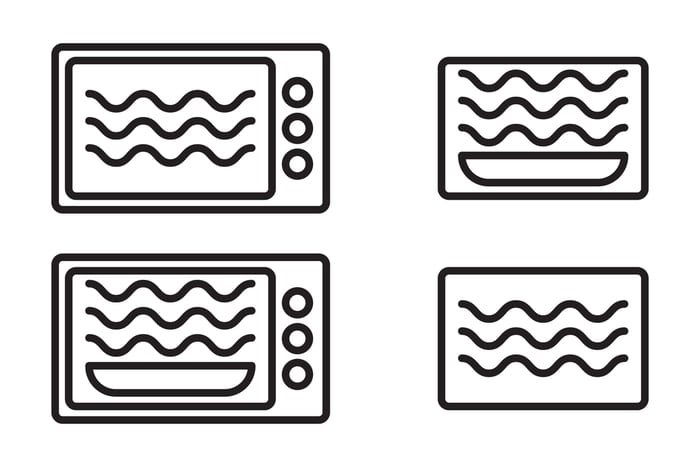
To identify microwave-safe materials, look for a label featuring a square with wavy lines inside it. Another common symbol shows a microwave with dishes inside.
If you often reheat leftovers in your microwave, make sure you use glass, ceramic, or other microwave-safe materials. Please avoid the following materials:
- Styrofoam: If it’s not microwave-safe, it can melt and release harmful chemicals.
- Cardboard and paper bags: They contain glues and waxes that can emit harmful fumes and unpleasant odors when heated.
- Metals and aluminum foil: They reflect waves, which can lead to arcing and sparking. Sparks can damage your microwave and cause a fire.
- Containers with paint: Some paints are flammable and often contain chemicals that can release toxic fumes when heated.
- Non-microwave-safe plastics: They can melt and warp, resulting in a burning smell.
#3 Check the Door Wires
If you continue to notice a burning smell in your microwave, you’ll need to check the door wires.
The wires within the door and other components are typically insulated with plastic. Unfortunately, the insulation around the wires can become damaged or frayed over time, resulting in an electric-burning smell.
In such cases, you should unplug your microwave from the power source to prevent any electrical hazards. Then, carefully open the door panel and examine the wires. If required, replace any damaged cables.
It’s worth mentioning that while experienced DIYers can handle wire repairs, it’s still a challenging task. I find it best to consider the microwave’s age. If it’s over ten years old, please replace the entire unit.
#4 Examine the Power Cord
In my experience, if your microwave’s power cord becomes damaged, it can also cause a burning smell.
You see, keeping the power cord bent or pressed against the wall can damage the internal wires or the insulation around them. As a result, your microwave won’t work correctly, and you’ll notice a burnt smell.
In such cases, you’ll need to inspect the power cord for any visible signs of damage or wear and tear. If the power cord is indeed the issue, please replace it with a new, compatible one.

Remember that replacing some of your microwave’s components can be challenging and dangerous. Therefore, if you’re uncomfortable inspecting or replacing the power cord yourself, it’s best to call a certified technician.

Additionally, if your microwave is over ten years old and experiencing other issues, consider replacing it with a new one.
Once you’ve addressed the problem, avoid bending the power cord and keep it away from heat to prevent the burning smell from recurring.
Quick Solutions to a Burnt-Smelling Microwave
Hopefully, now you know how to get the burnt smell out of your microwave.
Remember that if your microwave smells like burning, you’ll need to clean it with vinegar and baking soda or a commercial degreaser. It’s also important to clean spills right away and use microwave-safe materials to prevent the issue from happening again.
If the burnt smell persists, don’t forget to check the door wires and power cord. Replace any necessary components, call a professional, or get a new microwave.
Thank you so much for taking the time to read this guide. If you ever experience a different issue while using your microwave, please check out our site. We love fixing all sorts of problems.
Have a wonderful day!


Designing Modern Living Rooms from Iconic Movies

7 Tips for Heating a Room with High Ceilings (On A Budget)