If your freezer doesn’t freeze your food, is it really a freezer? Or is it just a big, expensive box?
Don’t ask us – we’re not philosophers. We’re the people who are going to tell you how to get your freezer back in working order.
In short, a freezer not freezing properly is often due to it being overloaded, frosted over, struggling with a bad door seal, or not have sufficient airflow around it.
With that said we have good news and bad news. The bad news is that a freezer that isn’t functioning properly may be trying extra hard to get that temperature down – meaning your electric bill will be a lot higher than it needs to be. The good news is that these issues can be fairly simple to fix. So following this guide could fix your freezer, AND lower your electric bill.
Read on and let’s get your freezer back into it’s full working condition.
What You’ll Need
Before we get started, I always like to let readers know anything in particular they’ll need. In this case, we might be moving the freezer a bit so you could need backup from a friend or family member. We could also be chipping away at ice so a good ice scraper, knife, or similar tool could help.
Finding your freezer’s manual would also help. If you’ve lost it, don’t worry! Everythings available online these days.
To find your freezer’s manual, just search Google for the brand, model #, and “manual PDF”. So it would look like this (replacing the brackets for your model’s info):
“[Brand] Freezer Model [Model] Manual PDF”
Lastly there’s a small chance you might need a new door seal, but we’ll cross that bridge when we come to it.
Let’s get started!
Fixing A Freezer That Isn’t Freezing
Let’s walk through each of the most common solutions, from easiest to needing a bit of effort.
#1 Does Your Freezer Have Power?
If you are rolling your eyes at the first step, you might be surprised at just how many people do not have a freezer that is working because it is not appropriately plugged in. If your freezer is cold but not freezing, you can skip this step. But if it isn’t getting cold altogether, read on here.
The freezer’s outlet is often hidden, so it’s worth making sure that the power cord hasn’t fallen out or been damaged. The circuit breaker may have also been tripped, or the freezer could have an on/off switch on the rear.
Make sure all of these are plugged in, not damaged, not tripped, and switched to ‘on’.
#2 An Overfilled Freezer
If your freezer is overstocked the air will not be able to circulate fully. This could lead to a buildup of ice in the back, and only cooled food in the front. In particular, you have to make sure there is no food blocking the air vents. If there is food in the way of the air vents, cold air will not be able to get into the freezer.
I’m sure you can guess the solution to this one! Try clearing out some room in the freezer, particularly leaving just the essentials in there. You can place any removed food + ice in a fridge tray for the time being.
Check back in an hour or so to see if the remaining food is freezing properly or not.
#3 Let’s Defrost
Strange solution, I know. We’re going to look at defrosting in order to get the freezer cooler. How does that make sense?
Similar to overstocking your freezer, a build up of ice and frost can block the air vents and prevent proper air circulation. Depending on your freezer, your free time, and the frost build-up, the best course of action can be:
- Initiate a defrost cycle. Some modern freezers have an automatic defrost option which can automatically allow it to reach a temperature to melt the ice, while still keeping food cool.
- Get hackin’. If you’ve got an older freezer and you see there’s a clear ice build-up, this is where you want to grab a suitable tool (ice pick, knife, chisel, etc) and work through breaking apart any ice build up.
- Full defrost. If you want to make certain everything gets defrosted – including any unseen frost buildup in the internal components – nothing works better than an oldschool defrost. You want to move all of the food into an alternative cold spot, ideally covered in ice, and turn the freezer off for a good few hours. This can be anywhere between 2 and 8 hours. You can see when it’s done just by checking to see if it’s fully defrosted or not. We recommend leaving the freezer open, but NOT attacking it with a hairdryer or anything that could cause rapid temperature changes to the system.
If you’re attempting any level of freezer defrosting, make sure to put some old towels under the freezer wherever you can Depending on the level of ice, you could end up with your own personal swimming pool!
#4 Check the Door Seal
After this, you need to check the door seal to make sure it is still working properly. There is a piece of rubber that is responsible for sealing the door to the frame using magnetic strips. If this seal is not working properly, cold air is going to leak from the freezer.
The best way to tell this is by testing it yourself. If you can open the door by just using the slightest pull, then the seal likely isn’t strong enough. It should need a good tug before it opens up.
There are a few possible reasons why your freezer’s door seal may have lost strength. The first problem is that the door seal might be dirty. If there is a bunch of gunk between the seal in the frame, the door is not going to be able to seal appropriately. You will need a cleaning solution and a warm washcloth to clean the door seal. Then, it should be able to seal firmly once again.
It is also possible that the door seal is simply worn out if it’s quite old. If that is the case, you should look in the manual to see what type of door seal you need. That way, you can order the right one and replace it. Don’t worry, this is a pretty simple process of pulling it off and popping a new one on.
If you see a bunch of cracks around the door seal, this is a sign that it has reached the end of its life. It is time to replace it.
If your door seal has lost strength, whatever you do DON’T try to re-magnetize it by running a magnet up and down it! This can cause complete loss of strength in your seal, which one of our readers unfortunately reported. Stick to these recommended methods, and a replacement if they don’t work.
#5 Check the Temperature Control of the Freezer
After this, you should check the temperature control to make sure it is working appropriately. There should be a dial that you use to set the temperature inside the freezer. You should make sure the freezer is at the same temperature as the one shown on the display if it’s digital, or at least functioning if it’s a manual wheel.
This is a relatively simple process. What you need to do is get another thermometer to put in the freezer. Once the thermometer is settled, compare the temperatures shown on the thermometer to the freezer. If the temperature on the thermometer is the same as the temperature on the dial, then you know the temperature control is working properly.
If the temperature shown on the thermometer is different from the temperature shown on the dial, then you know you have a problem with the temperature control, or the freezer is simply having a problem cooling.
You may have to call a professional to come and take a look at your temperature system. Then, he or she may say that you have to replace the thermostat. You should always compare the cost of the replacement part to the cost of the appliance itself.
#6 Ensure The Freezer Has ‘Breathing Room’
While this sounds strange – it’s quite simple.
Fridges and freezers – both lifechanging appliances – run using the same process. Refrigeration. This involves heating and cooling a refrigerant liquid/gas which can then be pumped in to cool the fridge or freezer compartment and exhausting heat outwards.
These appliances ideally need a good inch or two of open air on the sides and rear to exhaust that heat properly. I know this isn’t always possible, especially with installed appliances, but try to do what you can to help your freezer breathe a little better.
This can also include removing objects or dust buildup around the appliance. Otherwise, when it exhausts heat it could be warming itself back up, which defeats the whole purpose of the refrigeration process! Not to mention skyrockets your electric bill.
#7 Make Sure It’s Level
Similar to #6 above, the refrigerant process relies on the appliance being level.
This is a simple one to diagnose but tricky to fix. Just grab a spirit level and place it in or on top of the freezer. Make sure it’s close to exactly level (i.e. not tilted to one side).
If it is tilted, try to see if there’s anything you can do to help fix it, like placing some cardboard underneath the legs of one side.
#8 Check the Condenser Coils
Another possible reason why your freezer is not getting cold is that something is wrong with the coils. There are condenser coils located at the back or base of the freezer are an essential part of the refrigeration process, cooling and condensing the refrigerant.
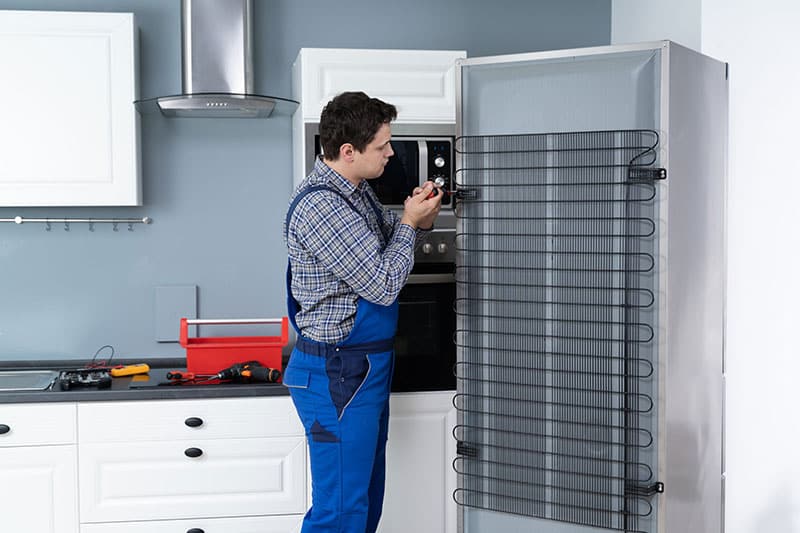
It is possible that the condenser coils could get dirty from time to time. They won’t be able to release the warm air to cool the refrigerant fully. Therefore, the coils will not be able to do their job. You need to take a closer look at the condenser coils to see if they are dirty.
If you decide to clean your condenser coils, you have to be careful. They are fragile, and you do not want to break them. Take a delicate brush and gentle brush in the same direction as the coils run – don’t apply any lateral force to them. Think of this more like a dusting than a cleaning.
Step #9 Check the Evaporator Fan Motor
Finally, you may also want to take a look at the evaporator fan motor. The motor is responsible for powering the rest of your system. If there is a problem with the motor, the rest of the freezer is not going to work properly. Your freezer will have a difficult time removing warm air, and the freezer will have a difficult time returning cold air to the system.
If you feel like your freezer is making a bunch of strange noises, this is a sign something might be wrong with the evaporator fan motor. You should take a look at the manual to see where the evaporator fan motor is located.
In the end, you might want to reach out to a professional who knows how to evaluate the fan motor. If something is wrong with the motor, you might be looking at a very expensive repair bill. You should think carefully about whether or not a professional should be able to let you know how much it will cost to replace a fan motor. You might be better off replacing the entire freezer.
Figure Out Why the Freezer Is Not Freezing
These are just a few of the most common reasons why your freezer might not be freezing appropriately. Even though this can be a difficult problem to overcome, there are solutions available. Remember that you can also reach out to a professional if you have questions. Any of these issues.
You rely on their freezer to work appropriately. It can be frustrating if your freezer is not getting cold. You might be worried that a lot of your food is going to go bad, and you could be concerned that you will have to replace the freezer. A few of the most common reasons why the freezer is not getting cold is that it might not be plugged in, there could be an issue with the door seal, and there might be issues with the coils or the evaporator fan motor.
If you have questions or concerns about any of these potential problems, you might want to reach out to a professional who can help you. That way, you can figure out if it is worth it to fix the freezer or simply purchase a new appliance.


Designing Modern Living Rooms from Iconic Movies

7 Tips for Heating a Room with High Ceilings (On A Budget)