Looking to make your oven last longer than it takes to get a child from birth to university?
Yes, really!
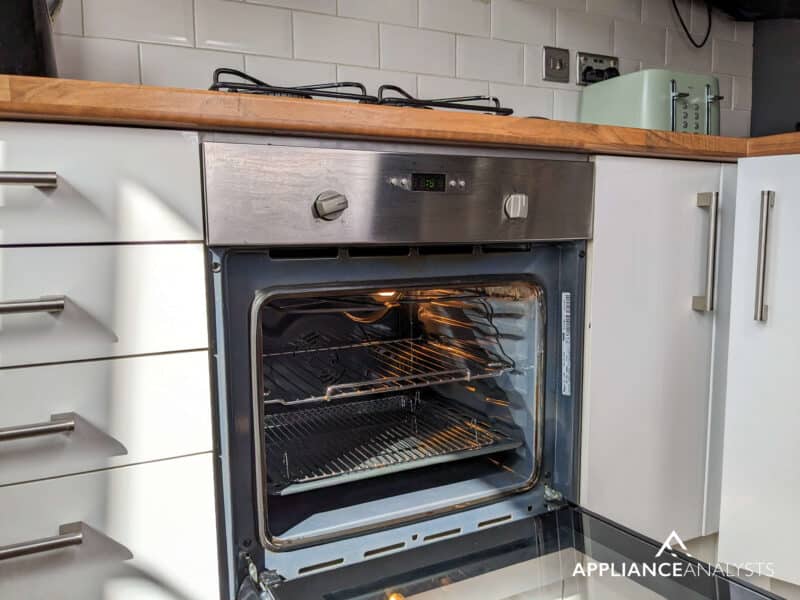
An oven that’s properly looked after can last longer than 20 or more years! It’s one of the simplest appliances in our home – just a well insulated box with a couple heating elements, fans, and a thermostat.
The simplicity ovens can last for decades… if they’re looked after properly. Ovens also don’t tend to get outdated. Their design doesn’t change much and there’s not too many modern features that can be added.
The good news is that keeping your oven well maintained is super simple. I’ve got over 7 years of experience in covering major appliances and I’ll walk you through every step of the way.
Following this guide can help reduce the running costs of your oven – and add years of good working life to it. Saving you up to $1,700 in the long run!
If that sounds good, then let’s dive right in.
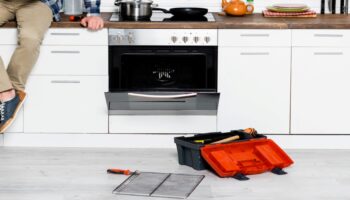
Grab Your Gear
Before we get started, it always helps to get everything we might need first. This means we can sail through the steps – and not spend time looking for the right tool.
The main thing you may need is your oven’s manual. Lost it? Don’t worry! Manuals go missing so easily. The good news is you can almost always find one online.
To find your oven’s manual, just do an online search for:
–> “[Brand] Oven [Model #] Manual PDF”
Just replace [Brand] with the oven’s brand and [Model #] with the model #. Not sure what yours is? You should be able to find the model number printed on a label inside your oven door or wall.
As well as the oven’s manual, you may need:
- A thermostat – ideally an infrared one
- Optional: an adjustable wrench
- Not so optional: a positive attitude!
Oven Health Check – Essentials
Before installing your oven, and even after many years of use, there are various things that you need to take into account and include frequently in your routine to guarantee proper oven functioning. In this section, we’ll be covering essential practices, from simplicity to a little complexity.
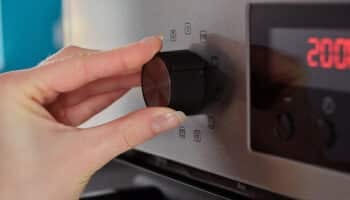
#1 Make Sure the Internal Temperature Matches the Thermostat
Our first task is to check that your oven actually gets to temperature properly.
If your oven can’t reach the right temperature, you could be damaging heating components – not to mention cooking things at the wrong temperatures!
As you may know, there’s a little component inside your oven called a thermostat, which detects the appliance’s internal temperature and regulates it to match what you dialed in. When it works normally, your oven should be very accurate, but when it fails, all hell breaks loose.
Having your thermostat read temperature incorrectly can cause a lot of issues, including burned or undercooked food, as well as damage to internal components.
The best way to test your thermostat’s accuracy is by placing a small pan inside it, setting a certain temperature on the dial, and letting the oven heat until it says it’s up to temperature. Once this has happened, carefully open the oven door and use an infrared thermometer to check the temperature of the pan.
Note: You can also place a thermometer inside your oven to check the temperature.
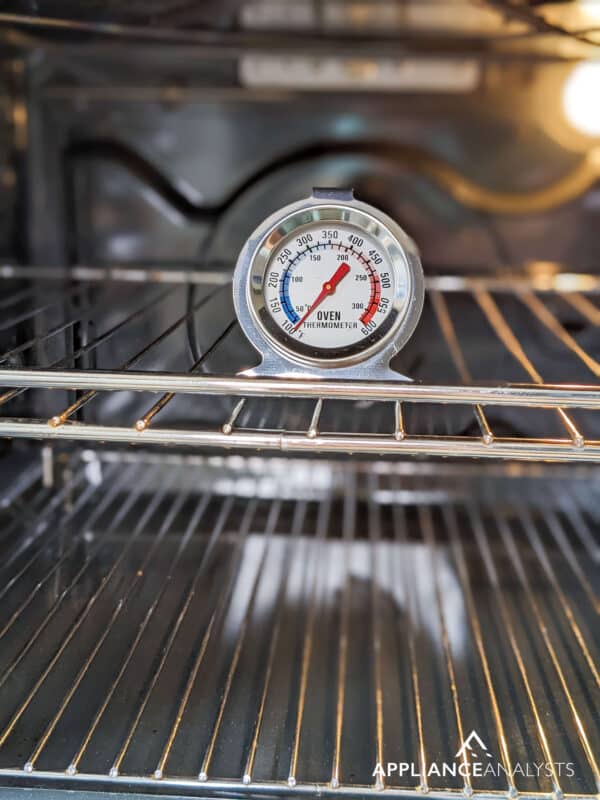
If it’s within 10 degrees of the temperature you’d set, your thermostat’s ok. But if it’s not, you’ll may need to replace the thermostat. This will often need a professional to help, but we’re also planning to create a guide to this in future.
You CAN try to work around a faulty thermostat, like setting the oven a little higher or lower to offset the difference, but this difference can change over time.
#2 Clean the Oven Frequently
Assuming your thermostat is working as expected, the next essential best practice for keeping your oven healthy is cleaning it frequently.
Cooking is one of life’s pleasures, but if you’ve been doing it long enough, you know that certain foods can leave traces of grease and other unwanted substances on your appliance.
This might not seem like a big deal at first (you know, except for bacteria and other gross stuff). But as it turns out, grease buildup and food residue can make your oven have to work harder to cook your meals.
An oven that’s full of gunk can block the heating element (making it overheat), burn into the oven walls, and end up burning or smoking so bad the oven just starts to smell really bad. And that really isn’t easy to fix.
This is why it’s essential to clean your oven often (the more you cook, the higher the frequency), especially around the heating element. A quick scrub down with a de-greaser once a month or so is a good idea – it should only take around 10 minutes – with a real big deep clean once a year.
#3 Use Deep Pots and Lids
Following along the lines of cleanliness and how it can impact the way your oven works, let’s talk about spillage.
As mentioned in the section above, cooking certain foods will make your oven dirty much quicker than others, and this includes liquid spillage. Some soup and stew recipes require oven time, which makes for the perfect scenario to have the contents of your pot leak all over the appliance.
In most cases, even if it happens, the situation can be quickly addressed. But when the liquid seeps into the inside of the unit, removing the food residue can be a challenge. Over time, this can not only cause a bad smell to come out of your oven but also cause some components to stop working.
To prevent this, it’s recommended to always use deep pots and seal-tight lids to ensure that no liquid will spill onto your oven.
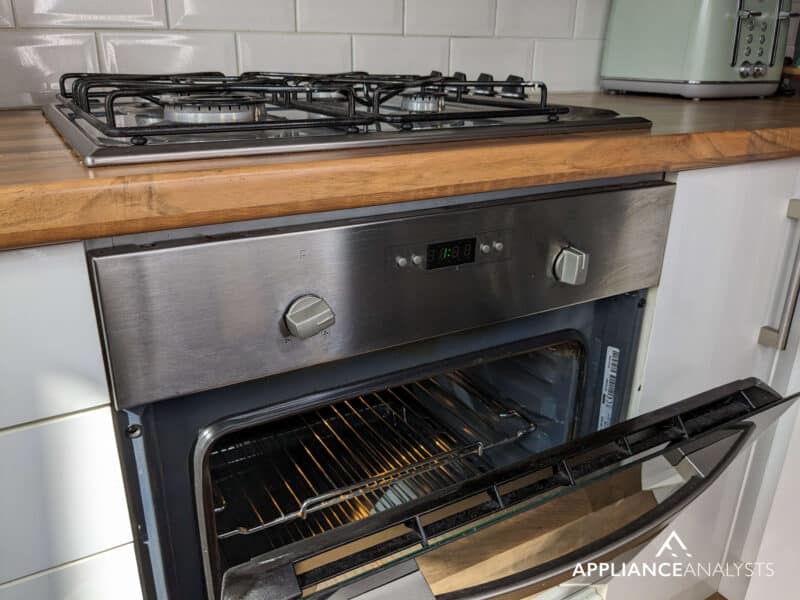
#4 Make Sure the Oven’s Level
Our last essential tip is a lot more related to cooking food properly than keeping your oven in good condition, but still, it’s worth considering.
Having your appliance be slightly imbalanced might not sound like a big deal, but it can be the make or break of several of your favorite dishes. You see, cooking food evenly is all about heat distribution, which means that if your oven is not level, one side of your dishes will cook more than the other. It can also cause vibrations, and affect the range on top of the oven.
The best way to tell whether your appliance is level is by using a spirit or ‘bubble’ level. Just place it on the bottom of the oven interior (ideally when it’s off!) and check the level.

If you need to adjust it, you’ll typically need to remove the door and storage drawer, so you can access the levelling legs, then use an adjustable wrench to adjust the legs. You can find specific instructions in your oven’s manual.
GE have a great video on this:
Oven Health Check – Habits
With the essentials covered, let’s touch on some good habits you can follow with your oven. These are all simple changes – but can make a real difference when followed over time.
#1 Minimize Preheating
While there’s nothing wrong with preheating your oven, but there’s really no added need to do it for more than around 12 minutes.
Preheating for longer won’t damage your oven, but it can skyrocket your energy bill.
I’d recommend getting an infrared thermometer, so you can measure your appliance’s internal temperature as it preheats. This will help you know when it’s all set to cook.
#2 Be Smart With Mode Selection
First off, it should be obvious that if your oven has a fan setting, use it! Fan assistance is great for decreasing cooking time, improving heat distribution, and making batch baking possible.
The other option you can include is using the oven’s grill and traditional heating at the same time. While not a large cost saving, this can help finish off dishes quickly with heat from the grill. It’s a great option when finishing a meat dish to really brown the top of the dish and save on some cooking time.
#3 Thaw Out Your Food Beforehand
This one can be a little tricky, as it’s a concept that depends strongly on timing.
Most people will tell you that leaving your food on your kitchen countertop to thaw out is a great way to cut defrosting times in half. And while this will, in fact, save you time, it can also be harmful to your health if done wrong.
According to the USDA, you should never thaw out your food like this, as it makes for the perfect environment for bacteria to grow and spread. You should thaw out your food in the fridge before placing it in the oven to cook.
#4 Leave the Oven Door Open After Cooking
Next, let’s talk about how your oven could actually replace your home’s heating system for a couple of hours every day.
These appliances are not only great for cooking. They also do a great job of preserving heat after they’re turned off, which is something you can use to your advantage. Once you’re done cooking, try leaving the door open for a while to let the remaining heat warm up the air in your home.
The effect won’t last all day, but it can keep several areas of your house comfortably warm for a couple of hours.
Depending on how often you cook, you could be saving as much as $20 a month in heating, which might not seem like much, but over the course of a year it quickly adds up!
#5 No Peeking!
It goes without saying, but opening your oven’s door anytime you don’t need to is a pretty bad idea!
First – you get a huge blast of hot air in your face (I know I always get more caught up on checking the food, and let myself get hit by a tornado of heat whenever I open mine!). But really, all of that hot air now needs to be recovered by the oven.
While ovens are great heat preservation, as soon as we open the door the temperature can drop quickly. It’s not all bad – as most of the heat is in the oven walls and other materials, but that amount of hot air loss does matter. Opening the oven door too often to check on your food can cause heat to escape, reducing the unit’s internal temperature, and thus increasing cooking times.
This not only raises the risk of having your food burn but also causes more gas to be used, which is not very efficient.
Try to resist temptation and just look through the glass – sticking to the expected cook times.
#6 Choose Thin Trays Over Large Pans
Believe it or not, even the size and depth of the pans you use matters, as this will determine how fast your food is cooked and how even the result is.
Using deep, large pans means longer cooking times for the same results, which directly translates into more expensive gas and electricity bills. Ideally, you’ll want to place your food in smaller, thin trays, as this will ensure better heat distribution and overall superior results in terms of efficiency.
I know this isn’t possible with dishes like beef stew or any other type of soup, but it works wonders for meatloaf, cakes, and much more!
#7 Avoid the Self-Cleaning Feature
If your oven has this option, by all means, go ahead and use it, but do so sparingly.
In case you’re not familiar with this feature, let me briefly explain it to you. Basically, some ovens have the ability to “self-clean”, which is a fancy name for incinerating any crumbs and food residue that might be making them dirty.
When this option is activated, the appliance can reach a temperature of up to 932 degrees Fahrenheit (ca. 500 °C)!. As you can imagine, this sweltering temperature is terrible for baking but great at removing any and all impurities.
That being said, the reason I don’t recommend using this option too often is gas consumption, house climate, and tempered glass integrity. Bringing your oven to such high temperatures does not only mean paying more every month for utilities, but also it exposes your oven’s components to an extra-strong heat. They should be able to handle this, but why take the risk? A simple scrub-down every few months will do a much better job.
#8 Turn off the Heat Early
The last good habit I’d like to encourage is using your oven’s residual heat in a smarter, more efficient way.
Since food remains hot after being removed from the grill/pan/oven, it keeps cooking for a little while longer. This is also why sometimes you might follow a recipe to a tee only to find that you slightly overcooked the dish in the end.
By taking advantage of your dishes’ internal heat, you can safely turn off your oven a couple of minutes early every time you bake, which can add up to some good savings over time.
Oven Health Check – Maintenance
Let’s wrap this up by going through the real maintenance tips. These will need you to roll your sleeves up a bit, but they’re the real difference-makers when it comes to properly caring for your oven.
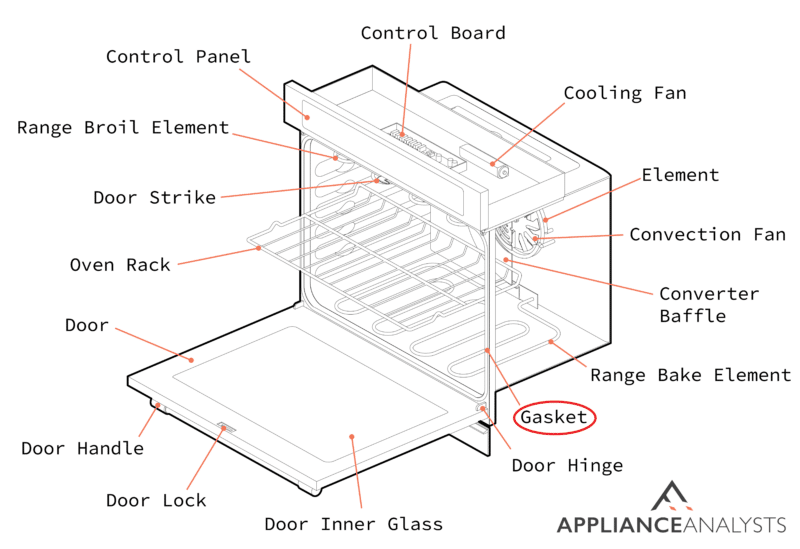
#1 Inspect the Door Seals Regularly
Just like refrigerators, ovens rely heavily on temperature preservation inside their compartments to work normally. Cooking your favorite meals would not be possible if the appliance’s internal heat kept escaping through small crevices.
That’s where the rubber door seal comes in.
This part of your oven ensures that whatever heat is produced within the appliance stays inside, regardless of any external factors. Now, if you keep peeking constantly, there’s nothing the seal can do, but if not, you can rest assured that the unit will slowly but surely reach the temperature you set.
That is… unless the seal is damaged or broken altogether.
When this happens, your oven will not only not heat up as efficiently, but it will also use a lot more gas than necessary to reach the desired temperature. This can leave you with high utility bills month after month, and all because of a simple rubber strip.
If you notice your oven is not working as it used to, check the door seal. If it’s just covered in food gunk, it needs a good clean to get back to functioning normally again. If it’s damaged though, you may need to replace it. Thankfully this is generally easy and cheap to do. All you have to do to find the right one is either call your manufacturer or go to Google and search for “<Your Oven’s Make And Model Go Here> Door Seal”. Then follow your owner’s manual for replacement instructions (it’s generally just a pop-off and pop-on process).
#3 Inspect the Gas Line
This one’s not recommended, but rather necessary.
Gas leaks are dangerous, and they can create enormous problems in a matter of seconds. Between 2007-2011 U.S. municipal fire departments responded to 51,600 fires per year on average, and most of these events had natural gas as the source of ignition.
This is why constantly looking out for any signs of a gas leak coming from your oven’s gas line is necessary.
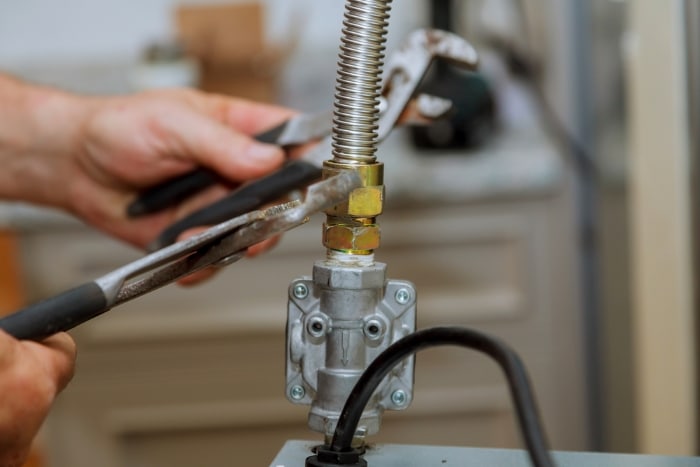
Now, I’m not saying you should check every day! But if you get a gas smell coming from your kitchen, you should immediately remove the oven from your kitchen countertop and look behind it while also turning off any active fire on the burners.
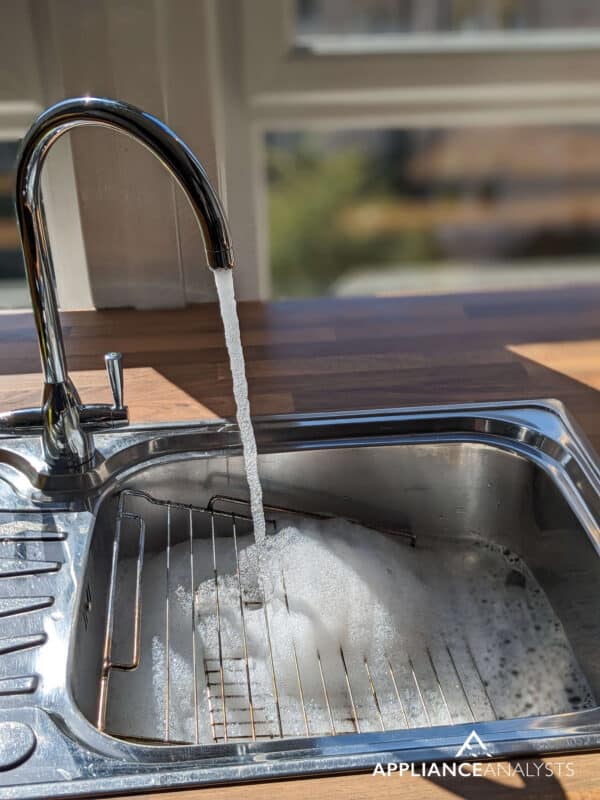
Solution: The best way to tell whether there’s a leak on your gas line is by using a little soap and water. Carefully apply this mixture to the outside area of the gas line and look out for any bubbling.
If you spot this at any point, make sure to turn off the gas valve in your home and find a replacement gas line. Just like the door seal, you can usually find a new one by either calling your manufacturer or going online.
Fixing the gas leak will not only keep you and your family safe but also save you hundreds of dollars every year in utilities.
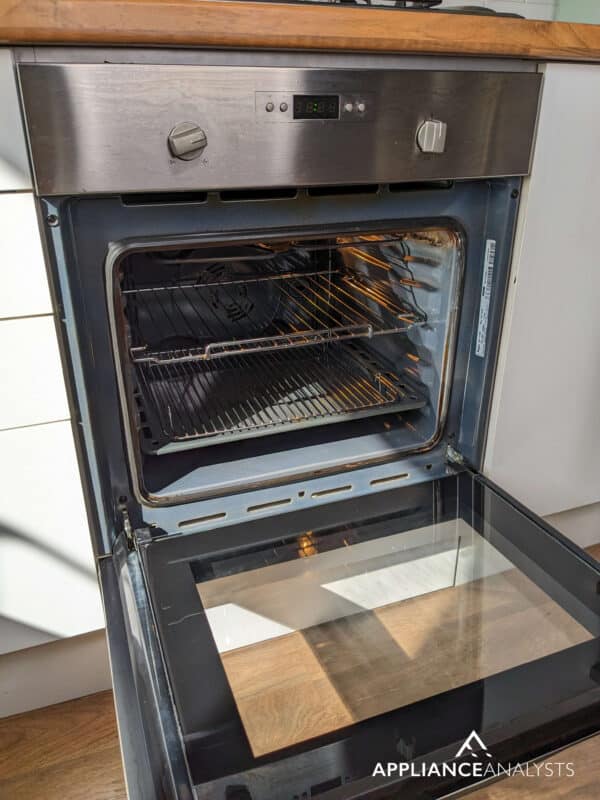
#3 Take Proper Care of the Glass Door
Ever had a friend or family member complain to you about how their oven glass door broke, and you’re worried that the same thing will happen to you?
Well… that’s a reasonable concern, but this can be easily prevented with proper care.
As you might know, oven doors are made out of tempered glass, which is much more resistant than regular glass thanks to its production process. Not to mention that it’s also much safer when it breaks as it explodes into tiny pebbles rather than dangerous sharp spikes.
Now, if it’s so resistant, why does it sometimes crack?
The answer lies in either user error or factory defects. If it’s the latter, there’s not much you can do except call your manufacturer and make your warranty valid. But if it’s the former, let me provide you with a couple of oven best practices that can help prevent this:
- Avoid using the self-cleaning feature as much as possible.
- Watch out for the handles in your pots and pans, as they could hit the door and crack it.
- Do not slam the oven door shut.
I know most of these sound very obvious, but since house appliances make our lives so much simpler, it can be easy to forget to treat them delicately.
#5 Check on the Blower Motor
Lastly, let’s make sure that one of the most important parts of your oven is working normally – the blower motor. If you’re not certain what this is, I’m more than happy to explain it to you.
In a nutshell, this is a fan that typically sits in the back of the oven’s internal chamber. It helps distribute heat more evenly throughout the inside of the appliance, making your food cook better and aiding in heat preservation.
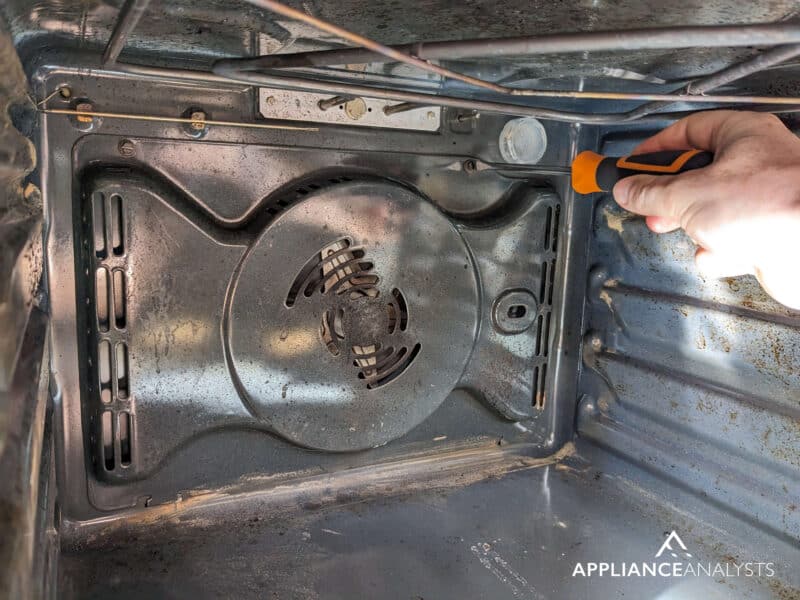
In most cases, it works rather well for the entirety of the appliance’s lifespan. But sometimes, it can stop working or start tripping your breakers, in which case, you’ll want to check on it and replace the part if necessary.
Frequently checking on your blower motor can prevent short circuits and will keep your oven in great condition for longer.
Solution: To check this component and replace it should anything be wrong, please follow these steps:
- Kill the power and gas supply to your kitchen.
- When the oven is cool to the touch, carefully remove the 4 screws holding the backplate of the internal chamber in place.
- Once the fan is exposed, unscrew it (some models have a reverse mechanism, so you might have to turn the screw in a clockwise motion to loosen it).
- After removing the fan, undo the 4 screws connecting the oven to your kitchen countertop, or turn the unit around if it’s a freestanding model.
- When you have comfortable access to the unit’s back side, remove the backplate to expose its internal components.
- The blower motor will be directly behind where the fan was located. If you suspect it’s faulty, carefully disconnect all cables attached to it.
- Once you have the new motor, simply reconnect the wires, screw it safely back into place and reassemble the oven.
- Test the fan and the motor to see if anything needs to be adjusted. If not, you’re good to go.
This process might vary from model to model, but the broad strokes should be fairly similar for most non-commercial ovens.
Conclusion
That about covers it.
Knowing how to take care of your appliance and what things to avoid will always come in handy. I hope these oven best practices have helped you better understand the most common mistakes people tend to make, so you don’t repeat them yourself.
Thank you very much for sticking with me all the way to the end. If this article was helpful and left you wanting to learn more, you’ll be glad to know that there’s plenty of resources to read below.
On the site, you can also find solutions for everyday appliance issues, such as a dishwasher that keeps restarting, or a garbage disposal that keeps tripping your breaker.
Make sure to also check out more of our Appliance Challenge articles to save yourself up to $1,000 a year!


Designing Modern Living Rooms from Iconic Movies

7 Tips for Heating a Room with High Ceilings (On A Budget)