We've independently reviewed this article to make sure it's as accurate as we can make it.
To find out more about our article creation and review process, check out our editorial guidelines.
Stuck trying to get rid of the OE error on your LG washer?
You’re not alone! I know how annoying it can be when your washer stops working, especially when you’re in the middle of laundry day.
But don’t worry; I’m here to help!
You can fix the OE error on your LG washer by unplugging it, inspecting the drain hose and pump, and examining the water supply hoses. Checking the water level sensor, wiring, and pressure chamber can also help you clear the error code.
Let’s dive in and get your LG washer up and running again.
Why trust us? This article was written by Craig Anderson and James Blackford.
Craig has helped thousands of other homeowners repair their appliances since 2016.
James is one of our resident appliance experts with over 16 years of experience. He currently works as a Master Technician for SquareTrade, and runs his own appliance repair business.
Fixing the OE Error on Your LG Washer: 9 Simple Steps
The OE error on your LG washer indicates a drainage issue. So, in this section, I’ll guide you through all the solutions that can help you drain the water and clear the error code.
You’ll need the following tools:
- A bucket or container to catch excess water.
- Towels or rags to clean up any spills.
- A flashlight or good lighting to see all parts of the washer.
- A pair of pliers.
- A screwdriver.
Are you ready? Let’s dive in!
#1 Unplug and Prepare Your LG Washer
When I come across an OE error code on an LG washer, I always unplug the machine from the electrical outlet.
Safety always comes first, especially when dealing with appliances. Unplugging your LG washer will prevent electrical hazards and keep you and your family safe.
#2 Get to Know Your Drain Hose
As mentioned above, the OE error on your LG washer is likely due to a drainage issue. So, now it’s time to check the drain hose.
The drain hose carries water out of your washer and into the drain. It’s usually at the back of the unit and can be hidden behind a panel or connected to a standpipe. It resembles a thick, ribbed tube made of flexible plastic or rubber.
Please ensure the drain hose is not bent, twisted, or kinked. If it is, gently straighten it out, and while you’re at it, check for any visible clogs or debris.
If the hose is damaged, you’ll need to replace it.

#3 Check the Drain Pump Filter
When I see an OE error code on an LG washer, I also inspect the drain pump filter.
You see, the drain pump filter catches lint, coins, and other debris, ensuring a smooth draining process. If it’s blocked, your LG washer won’t be able to drain the water, resulting in an OE error code.
First, look for a small access panel on the front lower part of the washer to access the filter. It’s typically square or rectangular and has a small handle or indentation to help you open it. Gently pry it open with a flathead screwdriver, and voilà – There’s your filter.
Before removing the filter:
- Locate the small black hose with a cap near the filter door.
- Remove the cap and place a bucket under the hose to catch any water that drains out. This step will help minimize any mess when you open the filter.
- If no water comes out, be prepared for some cleanup when you remove the filter.
Place a container or bucket under the filter to catch any remaining water that spills when you open it. Turn the filter counterclockwise to remove it.
Examine the filter for any debris or clogs, and clean it well. Remove any lint, coins, or other objects obstructing the water flow. If the filter looks damaged or worn out, it’s time to get a new one.
Please note that this step applies to front-load washers. Top load washers typically do not have a drain pump filter. Therefore, if you have an LG top-load washer, skip this step and move on to the next one.
If you want to get any replacement part – or see how much one would cost – click to enter your model number in the search bar below. Our partners at AppliancePartsPros stock almost every part with free guides on how to install them.

#4 Run a Spin Only Cycle to Test the Drain Pump
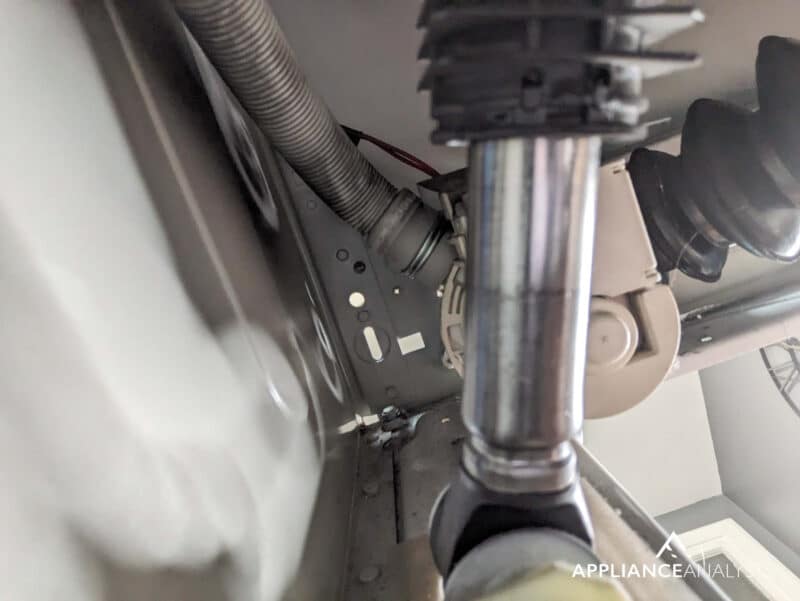
In my experience, inspecting the drain pump is also crucial when fixing an OE error in an LG washing machine.
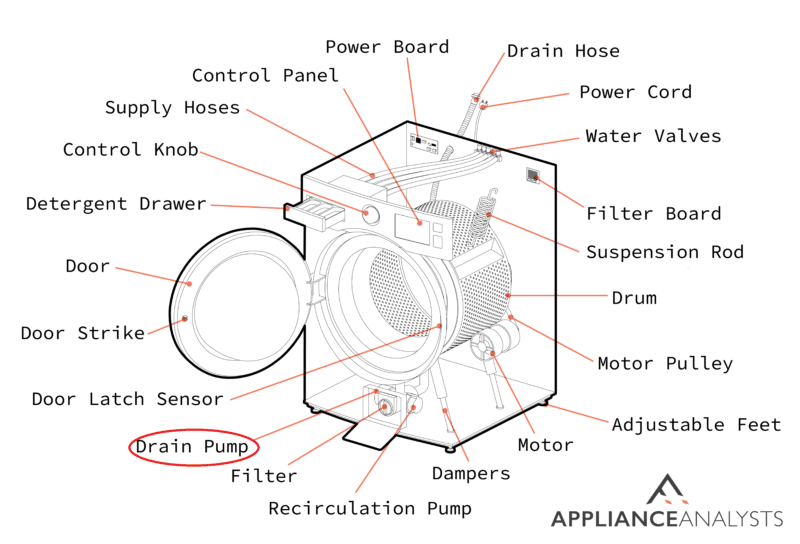
As its name suggests, the drain pump is an essential component that pumps the water out of your washer and at the bottom of the appliance.
You can easily test the drain pump by plugging your washer back in and running a “spin only” cycle. If your LG washer still doesn’t drain properly and the OE error code persists, the drain pump is likely faulty.
Follow these simple steps to access the drain pump:
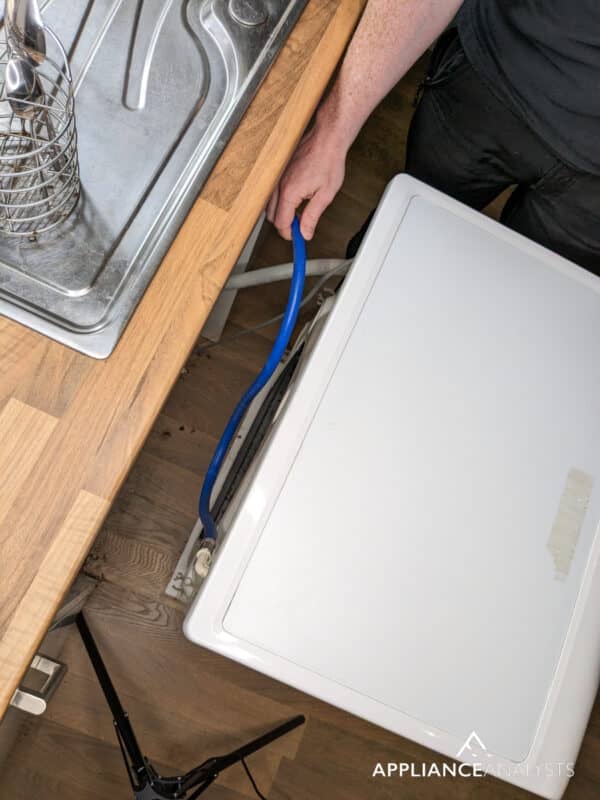
For top load washers:
- Unplug your washer.
- Lean your washer against a wall to keep the water inside the washer.
- Lay down to access the drain pump.
- Inspect the pump for any visible damage, loose connections, or debris obstructing the impeller (the little spinning wheel inside the pump).
For front load washers:
- Unplug your LG washing machine.
- Remove two screws in the back of your washer holding the top on, slide it back about 2 inches, and wiggle the top off.
- Remove the dispenser drawer, the two screws covered by the drawer, and one screw on the inside left panel. Then, try to pull the panel up.
- Remove three connectors, the door boot spring, and the two screws on the door lock.
- Remove the filter cover door housing (one or two screws) and the plastic cover (one screw covering it).
- Finally, remove 4-6 screws on top of the panel. The panel will now lean forward and come off.
Once you’ve removed the front panel, three bolts hold the drain, filter, and recirculation pump to the bottom of the washer. Loosen the bolts (don’t remove them), and you can lift the pump enough to inspect it.
If you need to remove the pump, it’s possible to get to the three Phillips head screws holding it to the filter mount, but there’s little room to work.
Inspect the pump for any visible damage, loose connections, or debris obstructing the impeller. If the pump appears damaged or not working correctly, please replace it.
#5 Inspect the Water Supply Hoses
Usually, when I fix an OE error code in an LG washing machine, I also inspect the water supply hoses.
These hoses bring water into your washer and are usually found at the back of the appliance.
There are two hoses, one for hot water and one for cold water, connected to the corresponding water valves. The hoses look like sturdy ribbed tubes made of rubber or reinforced plastic.
Turn off the water supply valves and disconnect the hoses using a pair of pliers. Be gentle, as you don’t want to damage the connections.
Inspect the hoses for any damage, kinks, or clogs. If necessary, clean the hoses or replace them if they’re damaged.
#6 Examine the Water Level Sensor
The water level sensor monitors the water level inside your washer. If it’s not working correctly, it can cause the OE error code to appear in your LG washer.
Before taking apart your washer, plug it in and try entering the service mode to test the water level sensor:
- Hold the “Soil Level” and “Spin Speed” buttons, then press “Power.” The panel will light up.
- Please ensure the door is shut, which will lock after about 10 seconds.
- Press “Start,” wait a few seconds, then press “Start” again. Repeat this until you hear the water come on, and let it fill.
- As the washer fills, the numbers on display will change. Your water level sensor works correctly if the numbers change as the water fills.
If you’ve determined that your water level sensor is functioning correctly using this method, there’s no need to take apart your washer.
However, if it doesn’t respond as expected, you must unplug your washer and replace the water level sensor. Check your manual for specific instructions.

If you want to get any replacement part – or see how much one would cost – click to enter your model number in the search bar below. Our partners at AppliancePartsPros stock almost every part with free guides on how to install them.
#7 Inspect the Wiring
The next step in troubleshooting the OE error in your LG washer is to inspect the wiring.
You see, faulty wiring between the drain pump, water level sensor, and the washer’s control board can cause the OE error code.
To examine the wiring, you’ll need to ensure the unit is unplugged and remove the top or back panels.
Examine all the wires and connectors for signs of damage, wear, or loose connections. If wires appear faulty, you need to call a professional.
#8 Clear the Pressure Hose
My usual advice for fixing an OE error in an LG washer is to clear the pressure hose.
While most newer washers don’t have a standalone pressure chamber, they still have a pressure hose that helps regulate water levels. Over time, debris can accumulate in the hose, causing the OE error code.
To check and clear the pressure hose:
- Remove the hose from the water level sensor.
- Make sure there is some water in the unit.
- Blow into the hose.
If you hear the water bubble, the hose is clear and good to go.
#9 Reassemble and Test Your LG Washer
Now, it’s time to see if the OE error code in your LG washer has been fixed.
First, ensure all components are securely in place, and reconnect any wires or hoses you disconnected during the process.
Next, plug your LG washer back in and turn on the water supply valves.
Finally, run a test cycle to see if the OE error code on your LG washer has been resolved. If your washer drains properly and the error code is gone, congratulations! You’ve successfully fixed the problem.
Click here to check out our free maintenance guide to make the most out of your LG washer and prevent the OE error code from reappearing!
Conclusion
Hopefully, now you know how to clear the OE error on your LG washer.
Remember, the OE error on an LG washer typically indicates a drainage issue. Check the drain hose and pump, and inspect the water supply hoses. Don’t forget to check the water level sensor and pressure chamber to fix your washer.
Thank you so much for reading! If you ever encounter another issue with your washer, don’t hesitate to revisit this guide or explore our other helpful articles.
Happy laundry days ahead!


Designing Modern Living Rooms from Iconic Movies

7 Tips for Heating a Room with High Ceilings (On A Budget)