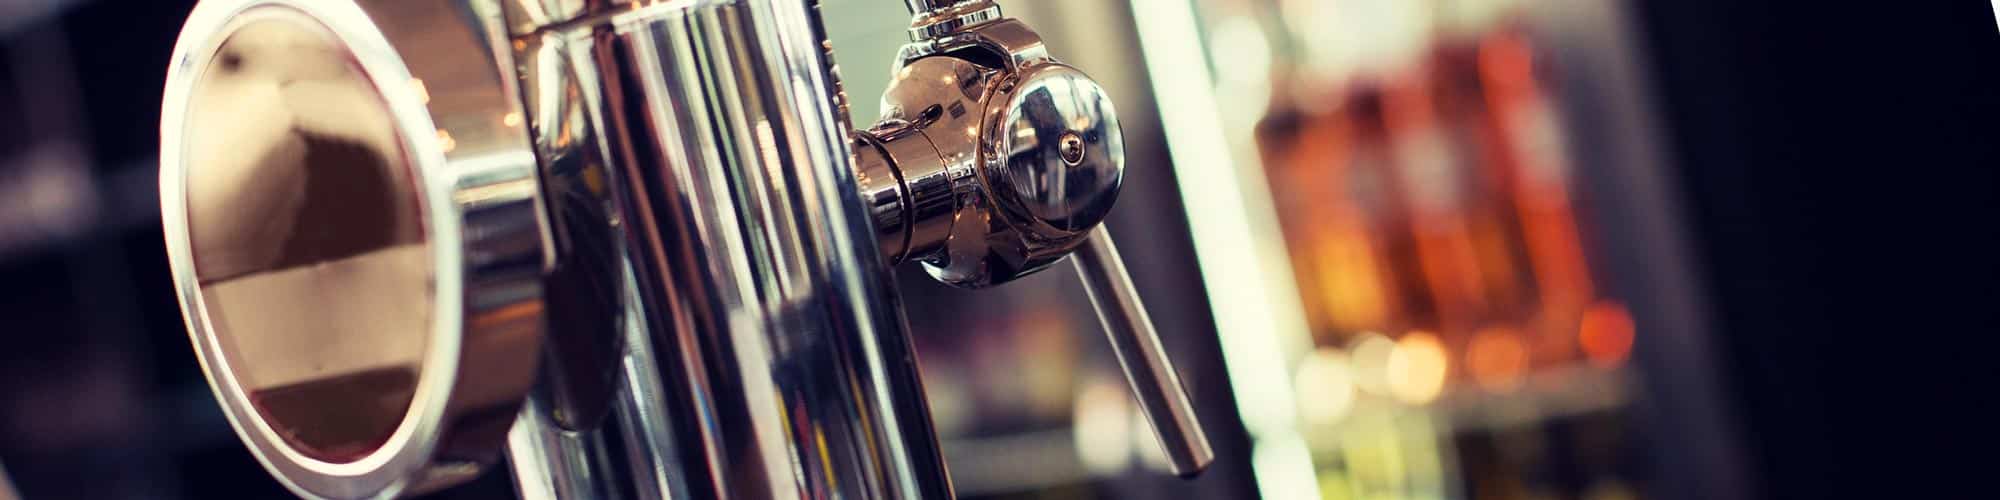
Why can’t your kegerator chill out? You want a nice frosty beer, but your tap is dispensing a lukewarm, foam-filled mess. We’ve searched high and low to find the likely reasons why your kegerator isn’t cooling. This article will walk you through the process of troubleshooting and fixing it.
First, check whether there’s ice forming inside. If there is, defrost your kegerator. Then, you can patch or replace the door gasket to keep warm air out. Add a fan to help the cold air circulate if your kegerator doesn’t have one already. Then calibrate your thermostat and check the compressor relay.
Now that you’ve got the broad strokes, we can delve into the details. Use our step-by-step instructions to bring the cold back to your kegerator.
Our 6-Step Guide to Making Your Kegerator Cool
Step 1: Check for Ice
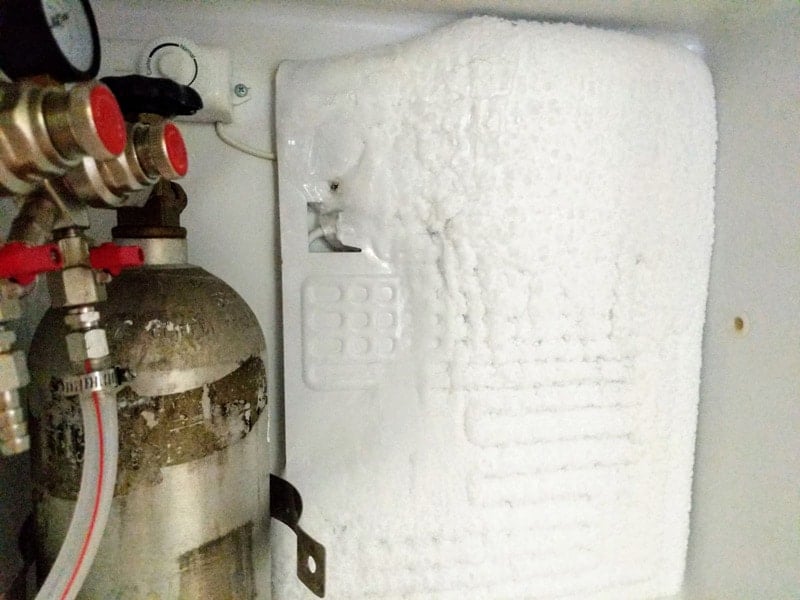
One very common reason for a kegerator to malfunction is that ice builds up on the cooling plate or coils. Any humidity that gets into the fridge can freeze onto the cold surfaces of the evaporator and cooling plate. Oddly enough, the ice makes the rest of your kegerator warmer by blocking the exchange of heat.
Pop open the door and see if any part of the interior is frosting over. The cooling system is usually in the back, so you’ll have to take out any kegs you have inside. If you spot any ice, continue to Step 2. Otherwise, you can skip to Step 3.
Step 2: Defrost Your Kegerator
The ice is a big part of your problem, so let’s get rid of it! Turn off your kegerator, unplugging it if the thermostat doesn’t have an “off” setting. You should take out the CO2 canister and regulator, as well as the beer lines. Lay down a towel inside the kegerator and set a bucket behind the machine to catch any overflow from the drip tray.
Now leave the kegerator door open for a few hours to let the ice melt. You can speed it up with a hairdryer, but don’t try to chip or scrape it. If you notice bigger pieces beginning to separate, you can break them off with your hands.
Once the ice is gone, clean and dry the interior. To be safe, you should let it sit for at least 30 more minutes afterward. You don’t want to leave moisture inside and have it freeze up all over again!
Most beer lovers recommend that you defrost once every 6 months. This should get rid of ice buildup before it gets bad enough to affect your beer.
Step 3: Make Sure the Seal is Good
A kegerator that’s in good repair shouldn’t be allowing warm, humid air inside. When the interior ices over, it often means you have a faulty seal. And even if there’s no frost, warm air sneaking in could be what’s keeping your beer from cooling down.
You can check the seal by shutting a lit flashlight inside the kegerator and turning off the lights in the room. If you see light leaking out, you’ve located an air leak.
Spread some petroleum jelly over the rubber door gasket to plug up any pinholes. Or lay down some weather stripping at the corners if there are minor gaps there. To do this, peel back the gasket from the corners. Then paste the insulating strips next to the trench where the rubber slots in. Now press the gasket back in.
If the door seal is too messed up for minor patches, go ahead and replace it. To do this, just pull the old gasket out – loosening the screws on the assembly if necessary – and push the new one into place. It’s often helpful to warm the new one up a bit first. Once it’s locked in, swab some petroleum jelly on it for good measure.
Try not to open the door more than necessary in the future. Fiddling with your keg every 10 minutes is another way to let lots of warm air inside.
Step 4: Get the Air Moving
Even if there’s no ice blocking up the works, the cold air in your kegerator might not be getting where it needs to go. Warm air rises, so over time, the air can get quite a bit colder near the top of the fridge than it is near the ground. If your beer seems to be getting warmer once you’re halfway through the keg, this might be why.
The usual fix is to add a small muffin fan inside the kegerator. This will keep the air churning so the temperature stays even throughout. Homebrew and kegerator supply companies often sell fan kits with attached hoses that you can run up into the beer tower. This helps to ensure your drafts remain cool even when they’re sitting in the lines waiting for you to pour them.
Those with a little skill at wiring and soldering can create a DIY kegerator fan. You can do this by hooking up a cheap 12-volt computer fan to an old cell phone charger. Attach some flexible tubing to blow the cool air up into the draft tower, and you should be good to go.
Step 5: Recalibrate the Thermostat
If your keg is still too warm, the problem might be with the temperature controller and not the cooling mechanism. You can sometimes fix this by recalibrating your thermostat.
Make sure the temperature controller is set as cold as it can go. (If it’s not, turn to a colder setting and see if that helps!) Then unplug your kegerator. Use a small screwdriver to remove the thermostat and its faceplate.
There should be another small screw inside. It’s usually right above the adjuster knob on the thermostat. Give it a quarter-turn with your screwdriver. Usually, you need to go clockwise to make it colder, but check your kegerator’s manual to be sure. Now screw the thermostat and faceplate back in and fire up your kegerator again.
Unfortunately, you’ll need to wait a while for it to cool down all the way, often as long as 24 hours. So you won’t know right away if this worked. You may have to repeat this process a few times to get to the right temperature setting.
If the temperature range screw reaches a point where it won’t turn further, don’t force it! This means you need to try another fix.
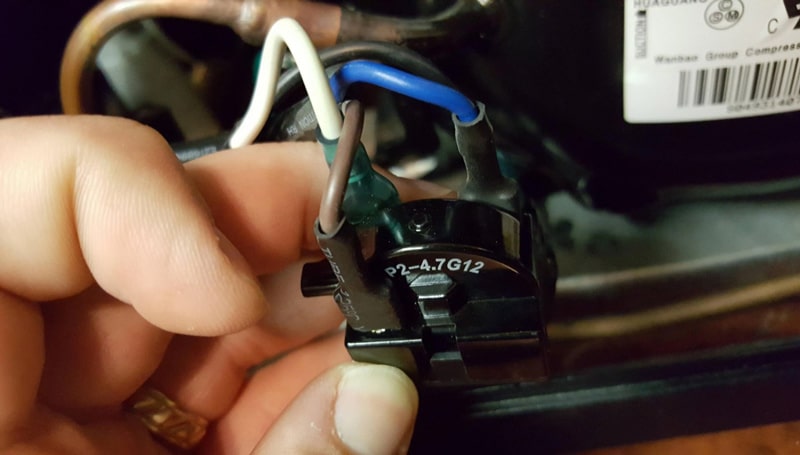
Step 6: Check the Compressor Relay
If you can’t hear the humming of your beer dispenser’s compressor, or if it’s running but seems to be blowing hot air, you could have an issue with the start relay. You can find this part on the back of your kegerator, connected to the compressor unit.
Are you comfortable working with electrical components? If not, this might be the time to call in a professional. If you do decide to test your relay, unplug the kegerator first!
Next, unplug the relay from the compressor and shake it gently. If you hear a rattling sound, this means the part is no good. Not to worry – a replacement won’t usually run you more than $20-40. Make sure it’s the same type as the one you removed. Once you’ve found a relay that fits your kegerator, plug it in where you took out the old one.
Step 7: Call the Experts
Have you tried all the previous steps, only to find that your kegerator is still too warm? Now is when we’d suggest you call in a tech. There’s a good chance you have a problem with the sealed refrigeration system. Trying to fix that yourself is more time and trouble than it’s worth.
Conclusion
We don’t care what our British beer snob friends say – warm beer is no fun. We hope the steps above let you restore your kegerator’s chill. Thanks for reading, and please visit us again if you run into other home repair questions. For a few examples, take a look at the related articles below!


Designing Modern Living Rooms from Iconic Movies

7 Tips for Heating a Room with High Ceilings (On A Budget)