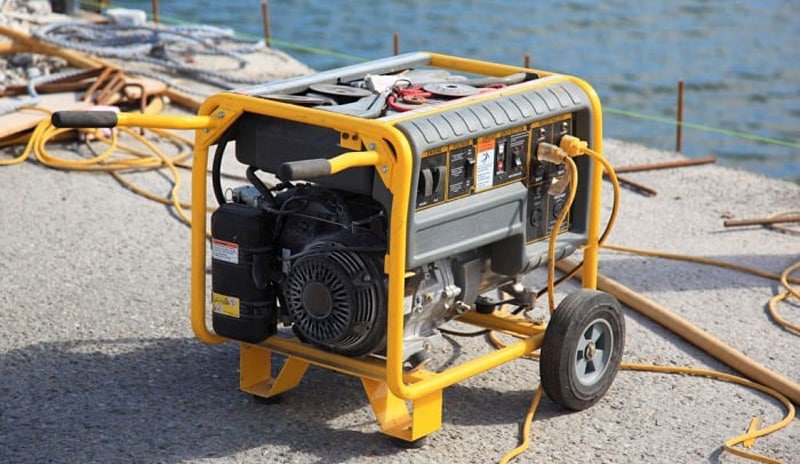
Your generator is making noise and burning fuel, but it isn’t doing much else. Even though the engine is working, your home still has no electricity. Why isn’t your generator producing power? This article will lay out a list of the 5 most likely problems and explain how you can fix them on your own.
Sometimes the problem is as simple as a circuit breaker tripping. This could be due to an overload or a damaged cable. Another strong possibility is that your generator has lost its residual magnetism. The voltage regulator or capacitor could also be faulty, or there may be too much wear and tear on the carbon brushes.
Once you know what’s getting in your generator’s way, you can often get it running again with a few quick steps. So let’s get started!
The Top 5 Reasons For a Generator That Won’t Produce Power
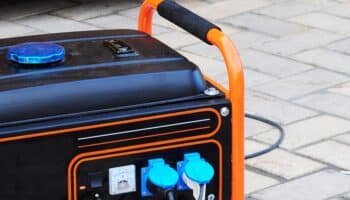
#1: Tripped Circuit Breaker
Like your house, your generator has a circuit breaker that kicks in when there’s too much current flowing. This helps you avoid electrical damage and fires when things go wrong. If the circuit breaker trips, there’s no way for power to flow from the generator.
Look for the breaker switches on your unit’s control panel. If they’re in the “off” position, you’ve tripped your circuit breaker. The simplest reason is that you’re trying to run too many devices with your generator. When the machine is in over its head, the breaker will trip to keep it from frying.
Turn off anything non-essential and fire up your generator again. Does it work this time? If so, you were overloading it.
Some generators also have Ground Fault Circuit Interrupter(GFCI) breakers. This is an extra safety measure to cut off the current if there’s a power leakage. If the “reset” button on your generator has popped up, something has tripped the GFCI breaker.
This could mean that the breaker itself is faulty. Unplug everything from the generator, turn it on, and press the “reset” button. If it cuts off and the button pops up again, you need a replacement breaker. You should also try running a few small devices, one at a time, from the GFCI outlet. If you can do this, the GFCI isn’t the problem.
One possibility is that there’s damage to the power cords you’re connecting to your generator. Make sure there’s no obvious wear and tear like stripped insulation or fraying wires. If the cords are intact, plug them one by one into the GFCI outlet and try running power through them. See if any of them trip the reset button. In that case, you’ve found the culprit.
What if none of these measures stop the breaker from tripping? This means there’s a problem with the wiring of your house or the appliances your generator was powering. The best way you can go about diagnosing the source of this issue is by isolating specific components or segments of a circuit in order to identify the source.
#2: Loss of Residual Magnetism
Your generator uses a rotating electromagnet to create the current that it runs to your lights and appliances. This coil of wire normally stays slightly magnetic when you shut down the unit. The machine counts on that little bit of magnetism to kick off its power production when you start it up again.
The most common reason for a generator to stop producing power is that it’s lost this residual magnetism.
There are three main ways this happens:
- You don’t use your generator for a while, and over time the magnetic field fades away.
- You leave something plugged in when turning off your generator. When the machine shuts down, the magnetism drains into the device it was powering.
- You leave your generator running with no load. This lets the magnetism dissipate.
It doesn’t take much to recharge the magnetism in your generator.
Here’s one simple method:
- Find a power drill and take out the bit so that the chuck is empty.
- Plug the drill into your generator’s outlet. Set it to the “forward” direction.
- Turn the generator on.
- Hold down the trigger of the drill while giving the chuck a sharp crank in the “reverse” direction. Don’t hold on too long or let your fingers get caught in the gap.
- Repeat until the drill powers on, indicating that the generator is working. This should only take 2 or 3 turns of the drill chuck.
This weird but effective trick works because your drill has magnets of its own. When you rotate it backward, you’re pushing a little of that magnetism back into the generator.
If you don’t have a drill, you can try flashing your generator with a 12-volt battery and some alligator clips.
Here’s how it works:
- Unscrew and remove the end cover over your generator’s alternator.
- Find the positive and negative wires running from the voltage regulator and note where they connect. The positive one is usually red while the negative is black or white, but check for labels to be sure.
- Detach these wires and disconnect the regulator. Use an alligator clip to connect your battery’s ground terminal to the spot where the negative wire was.
- Clamp a second alligator clip to the metal tab where the positive wire was connected. Don’t attach the other end to your battery yet. Make sure there’s no other metal touching either clip.
- Plug a light into the generator. This will let you see if there’s any power output.
- Turn on the generator.
- Connect the free end of the second alligator clip to the positive terminal of your battery. Leave it there for a few seconds. If you see your light glowing, your generator is producing power again!
#3: Worn Brushes
Okay, so flashing your generator didn’t work. Since you’ve already taken the cover off the alternator, you might as well check to see if the brushes are in good shape. The brushes are small carbon pieces that make contact with the rotor. They wear down over time, which is why more expensive generators may not use them.
Assuming your generator does have brushes, they’ll be in the brush assembly. That’s the small part with metal tabs where the wires from the voltage regulator attach. Unscrew it and examine the small carbon blocks that are sticking out. These are the brushes.
Check for:
- Cracks
- Chips
- Brushes worn down to less than half the size of a fresh one
- Burnt or melted spots
- Loose brushes
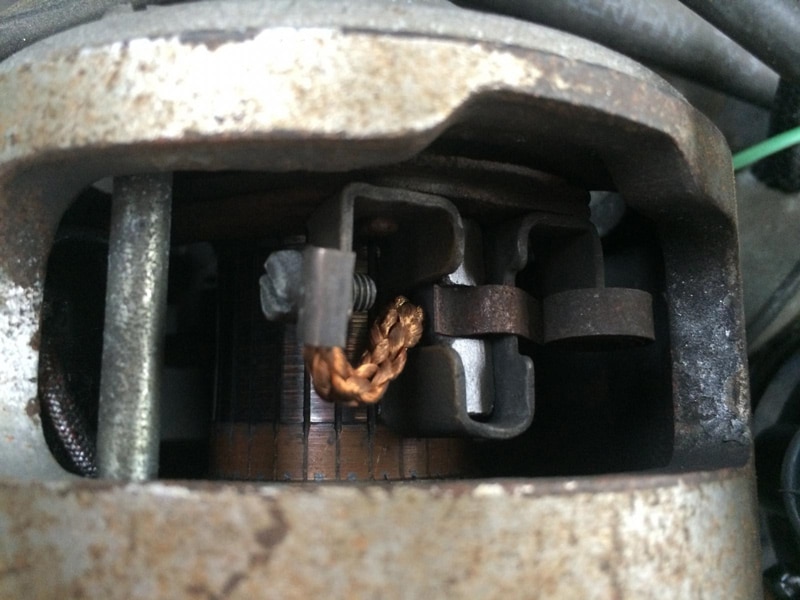
If there are signs of damage, you’ll need to replace the brushes or the whole assembly. Luckily, these are pretty inexpensive parts.
If you want to get any replacement part – or see how much one would cost – click to enter your model number in the search bar below. Our partners at AppliancePartsPros stock almost every part with free guides on how to install them.

#4: Busted AVR
Machines don’t like surprises. That’s why your generator has an automatic voltage regulator (AVR). This crucial component keeps the voltage steady to protect the alternator from things like overloads and surges. But when it breaks down, the AVR can choke off your generator’s output.
If you know the ins and outs of using a multimeter, you can use it to test your AVR. Take the leads off from the brush assembly. Then unscrew and remove the entire AVR.
Start up the generator with the end plate still off. While it’s running, you’ll need to take voltage readings:
- Across the brushes.
- Across each pair of windings. These are the four small terminals lined up on one side of the alternator.
- Across the two positive winding terminals.
If this sounds too complicated, don’t worry, there are plenty of online resources out there that you can rely on as a secondary source of information. You can also have a professional take a look at it for you.

The readings across the brushes should be somewhere between 5 and 10 volts. Across the windings, they should be more like 3-5. And there should be no voltage across the positive winding terminals. If these voltage readings are normal, the AVR is what’s messing up your generator. You’ll need a fresh one.
If you’re getting readings outside those ranges, there’s a problem with your alternator’s rotors or windings. Those are bigger fixes than we can cover here.
#5: Bad Capacitor
Lots of home generators use capacitors instead of AVRs to control their voltage. These can also cut off your machine’s output when they fail. If you have a brushless generator, you should test the capacitor to see if this is what’s blocking your power.
You’ll find it in roughly the same spot where an AVR would be (see above). Use extreme caution when working with capacitors. Don’t let your finger connect the two terminals, as this could result in a severe shock. Here’s an example of how to do this properly.
You may see obvious damage like melted metal or scorch marks. If not, leave the cover off and turn on your generator. While the engine is on, touch the probes of your multimeter to the two ends of the capacitor.
If it reads around 5 volts, your alternator is working correctly. The capacitor is what’s keeping your generator from working. Good news – these are even cheaper to replace than AVRs.
Conclusion
A generator that won’t produce power is no good to anyone. The good news is that you can often get yours running again by restoring its residual magnetism or reducing the load. Replacing minor parts like capacitors or circuit breakers may also do the trick. We wish you the best of luck in getting your lights back on!
Thanks for reading through our guide. If you found it helpful, you might also like some of the related articles below. Happy browsing!


Designing Modern Living Rooms from Iconic Movies

7 Tips for Heating a Room with High Ceilings (On A Budget)