Stuck trying to figure out why your fridge or freezer is frozen at the back?
Don’t worry, your appliance is probably not broken. This is a common issue and can happen due to numerous reasons.
But, the good news is that you’ve come to the right place for answers.
If your fridge or freezer is frozen at the back, chances are air is leaking from the door, the air vents are blocked, or there’s a problem with the defrost system. A low thermostat setting or having dirty condenser coils could also explain the issue.
Read on to learn more about these causes and learn how to solve the problem!
Why Is There Ice in the Back of Your Fridge or Freezer?
Before doing anything else, it’s important that you understand how the refrigeration cycle works.
All fridges and freezers have a compressor that draws in a liquid refrigerant and condenses it, turning it into a gas. This gas is released and pushed into the condenser coils outside the appliance, where it exchanges its heat with the incoming room air and becomes a liquid.
Then, the refrigerant flows into the internal coils and evaporates into a gas, absorbing heat and cooling your food. After lowering the internal temperature, the cycle repeats.
As you can imagine, while your fridge or freezer cools down your food, moisture will form in the back of your appliance and can transform into a small amount of ice. However, the ice or water should run from the evaporator into the drain channel.
If this is not happening, chances are there’s a problem with one of your appliance’s compartments.
What to Do if Your Fridge or Freezer Is Frozen at the Back? 7 Steps
You might find comfort in knowing that thousands of people are struggling with the same issue. But, don’t worry, fixing it is very simple.
In this guide, you’ll learn 7 different ways to get rid of the issue:
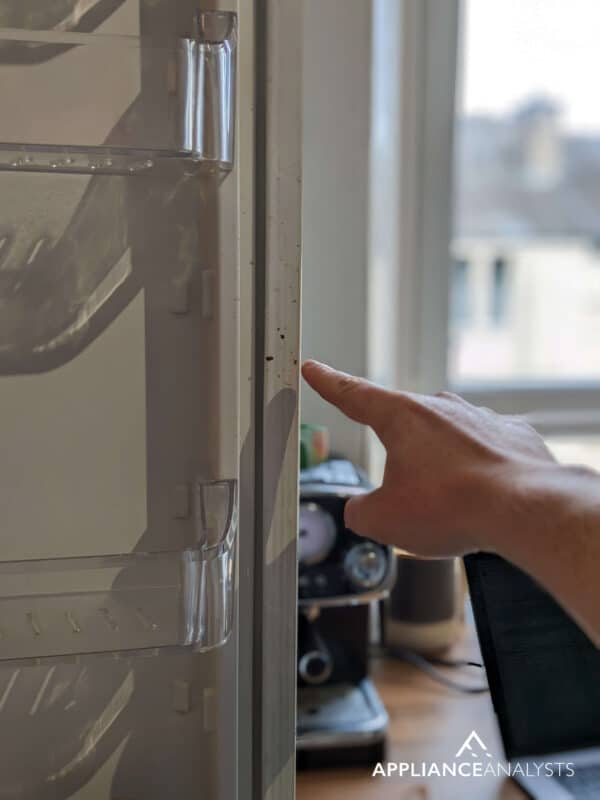
#1 Check the Door
What if I told you that you could solve the issue by simply checking the door gasket?
Yes, that’s all it might take.
You see, if the seal is broken, warm air from the outside can mix with the cold air inside your appliance. Then, this moisture can condense and transform into ice or frost.
Try inspecting the door seal. If it is broken or damaged, you’ll need to replace it with a new one.
I also recommend making sure the gasket is clean. Sometimes dirt or grime can keep your door from closing correctly and cause the issue. Moreover, if you don’t clean it regularly, it can get easily damaged, and you may need to replace it sooner.
You can easily clean the door seal using a soft sponge (or an old toothbrush) and an all-purpose cleaner or vinegar. Don’t forget to dry the gasket once you’re done cleaning it to prevent mold.
Frequent opening and closing of the doors will also allow moisture to get into the fridge or freezer.
And, it will make your appliance work harder, which can damage it and increase your energy bills.
To avoid this issue from happening, please open the door only when necessary. Think about the ingredients you need before opening the door, and take them all out at the same time.
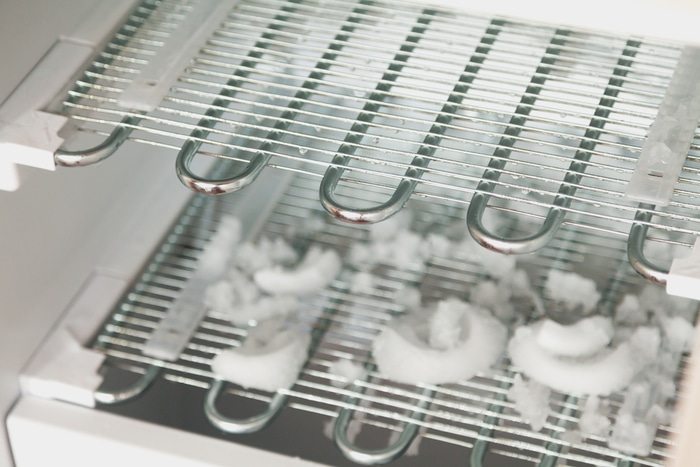
#2 Inspect the Defrost System
If the door wasn’t the issue, chances are there’s a problem with the defrost system.
You see, most modern refrigerators have an auto-defrost mode, which automatically removes frost from the evaporator coils to ensure your fridge’s or freezer’s effectiveness.
There are different types of defrost systems, however, all of them have a temperature control system that measures the temperature of the evaporator coils throughout the day. When the coils hit the optimal temperature, the machine is notified when it’s time to stop the cooling to prevent ice buildup.
Unfortunately, if the defrost timer, heater, or thermostat is damaged, frost will begin to build up in the back of your fridge or freezer.
This is why the first thing I recommend checking is the defrost thermostat. If it is faulty, it won’t send signals to the heater and the ice on the evaporator coils will not melt.
Here’s how to test the thermostat:
- Unplug the appliance from the wall outlet and locate the defrost thermostat. Bear in mind that the location may vary depending on your fridge’s model. This is why you’ll need to check the manual.
- Remove the plates covering the thermostat with a screwdriver.
- Carefully disconnect the two wiring connectors and remove the thermostat.
- Place the thermostat in a glass of iced water for a couple of minutes.
- Set your multimeter to the Rx1 setting and use the probes to touch the thermostat terminals. You should get a reading of 0, but if you receive a different reading, you’ll need to replace the thermostat.
If the thermostat wasn’t the issue, it’s time for us to check the defrost heater. If it’s not working, it will not melt the frost on the evaporator coils.
Follow this guide to check the heater:
- Unplug your appliance from the wall outlet and locate the heater. It’s usually located beneath the evaporator coils, but please check your manual, since the location may vary depending on the model you own.
- Remove the panel covering the defrost heater and carefully disconnect the wires attached to the heater.
- Set your multimeter to the Rx1 setting. Place the probes on each of the heater’s terminals. If the multimeter reads zero or infinite, you’ll need to replace the heater.
Now, please check the timer. This device turns on periodically and controls when your appliance is in cooling or defrost mode. If it’s defective, the defrost cycle may not turn on, resulting in ice buildup.
To test the timer, you’ll need to:
- Unplug your appliance from the power source and locate the defrost timer. Please check your manual.
- Carefully pull the timer out and disconnect its wires.
- Set your multimeter to Rx1 and place one of the probes on the “C” or “3” terminal and the other probe on one of the three remaining terminals, one at a time. Your first two readings should be zero or near zero, and the third reading should be infinite. If that’s not the case, you’ll need to replace the timer.
You should also check the defrost drain. If it’s clogged, you’ll have ice buildup or leaks. Try using a turkey baster and warm water to unclog it.
#3 Check the Temperature
If the issue persists, there’s a good chance the internal temperature is too cold.
You see, refrigerators should sit between 3 °C (37.4 °F) and 5 °C (41 °F) and freezers should be set to 0 °F (ca. -18 °C).
Bear in mind that this may vary depending on the model you own.
To check your fridge’s temperature, place a glass of water on the middle shelf and wait for 12 hours. Then, place a thermostat in it and check the temperature.
To measure your freezer’s temperature, place a thermometer in ice cream that has been in the freezer for at least 12 hours.
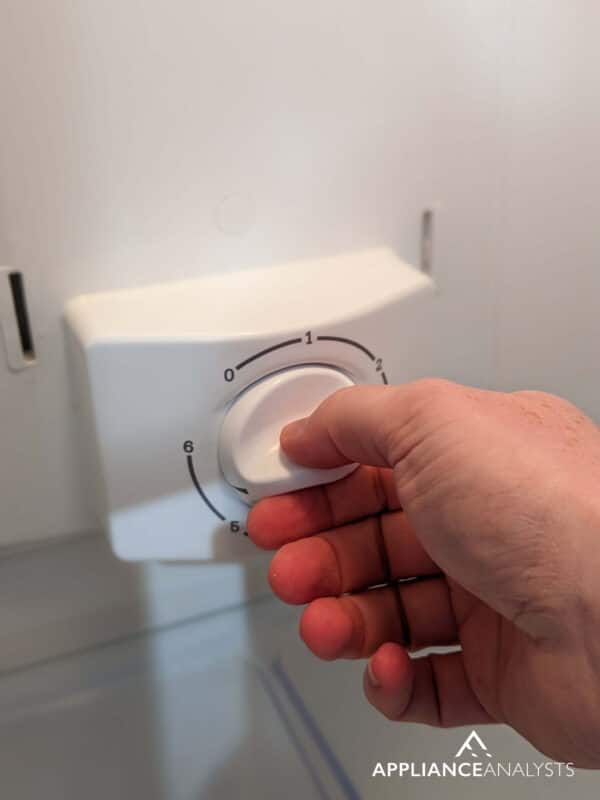
If your appliance is too cold, you’ll need to carefully raise the temperature. To do it:
- Locate the temperature control.
- Change the setting one increment at a time and wait 24 hours for the temperature change to take effect.
- Check the temperature again. Remember, you’ll need to let your appliance sit for 24 hours before making an additional temperature change (if needed).
#4 Level Your Fridge
Now, it’s time for us to make sure your refrigerator is level.
If it’s not, the refrigeration cycle may be affected because the coolant may not flow too quickly, and your fridge won’t be able to regulate its internal temperature.
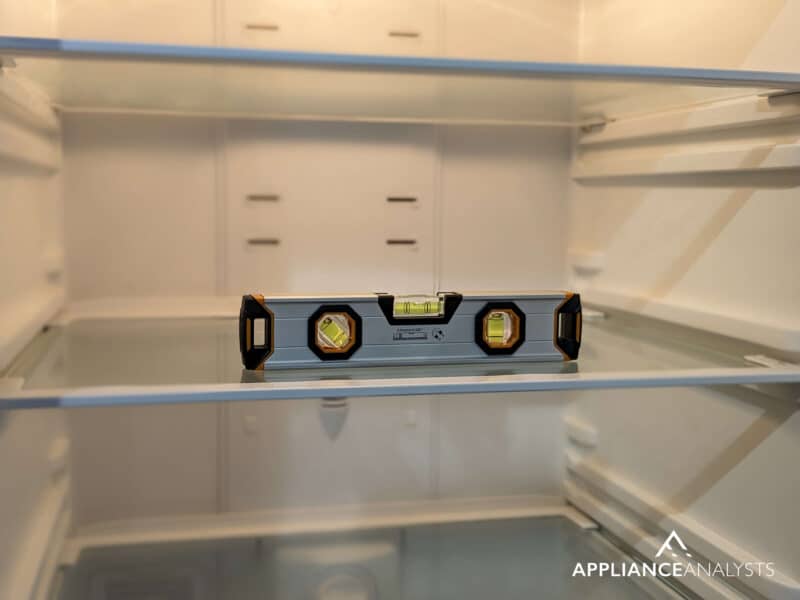
To prevent ice buildup in the back of your appliance, you’ll need to level it. Here’s how to do it:
- Place a spirit level inside your refrigerator.
- If the bubble isn’t centered, locate the leveling legs or adjustable rollers (they’re located behind the grille).
- If your fridge has leveling legs, use a wrench to level it. But, if it has adjustable rollers, use a screwdriver instead.
- To raise your fridge, turn the wrench to the left. But, if you want to lower it, turn the wrench to the right.
- Place the level inside your fridge again to check that it’s level.
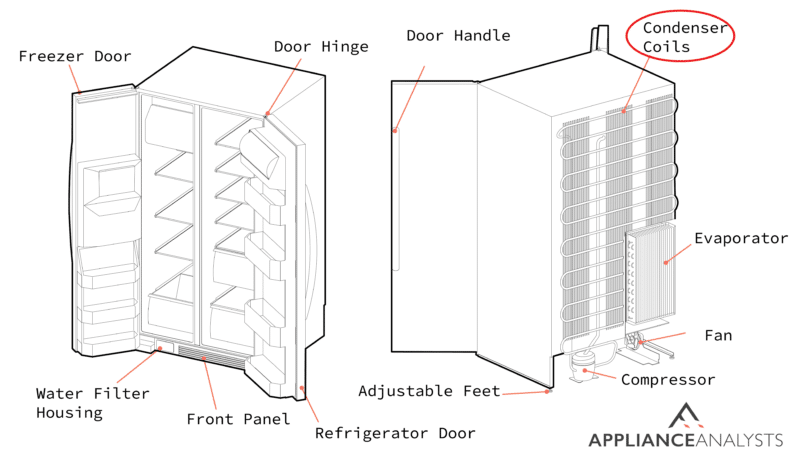
#5 Clean the Condenser Coils
Condenser coils cool the refrigerant and expel the heat continuously until the air inside your fridge reaches the right temperature.
Unfortunately, if you haven’t cleaned them in a while, your fridge will need to work harder to maintain its temperature, and in some models, this can lead to overcooling.
Follow this guide to clean the condenser coils:
- Unplug your fridge from the wall outlet and locate the condenser coils (they’re usually in the back or across the bottom of your fridge).
- Use a narrow vacuum attachment and vacuum away the dust.
- Wipe the protective front cover with a damp cloth and dry it.
- Plug the fridge back in.
Try cleaning the condenser coils at least once a year.
#6 Don’t Overfill Your Fridge
Now, please make sure your fridge is not overfilled.
You see, having too many containers in your fridge can block the vents and restrict airflow. These vents are typically located in the back of your appliance, so this can explain why that area is frozen.
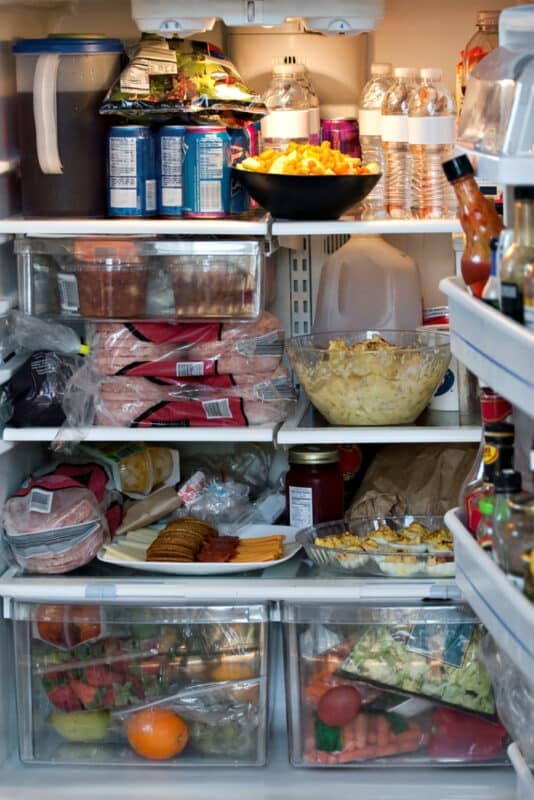
Your refrigerator should never be more than 75% full.
By making sure your fridge is not overfilled, you’ll also keep it from working harder and you’ll extend its lifespan.
#7 Let Your Food Cool Down Before Refrigerating
If you’re tempted to store warm food in the fridge or freezer, you might want to keep reading.
You see, when you store warm food in it, you raise the interior temperature and your appliance will need to work harder to cool your food down.
Moreover, the clashing temperatures can cause condensation. This could explain why the back of your fridge or freezer is frozen.
You should always let your food cool down for 1–2 hours before storing it in your refrigerator. This way, you’ll avoid excess moisture, and you’ll keep your food from spoiling.
Conclusion
Now that we’ve covered everything, hopefully, you’ll be able to solve the problem today.
Remember, if your fridge or freezer is frozen at the back, you’ll need to check the door gasket and the defrost system. Don’t forget to make sure your appliance is level, check the temperature, and don’t store warm food in it.
Thank you so much for taking the time to read this article. If you ever have a different issue with your fridge, freezer, or any other appliance, please check out the related posts below.
Good luck!


Designing Modern Living Rooms from Iconic Movies

7 Tips for Heating a Room with High Ceilings (On A Budget)