We've independently reviewed this article to make sure it's as accurate as we can make it.
To find out more about our article creation and review process, check out our editorial guidelines.
Is your fridge’s interior damaged?
I’ve been there too! Opening your refrigerator only to find a crack or other signs of damage can be quite frustrating, especially when you’re not sure how to fix it.
Don’t worry, though. I’m here to help.
If you accidentally damaged your fridge’s interior, please assess the damage and repair or replace any necessary components. To prevent further damage, it’s crucial to avoid putting hot food inside and using harsh chemicals, replace the light bulb, and regularly inspect the gasket and defrost system.
Read on to learn how to repair the inside of your fridge!
Why trust us? This article was written by Craig Anderson and Andy Fulenchek.
Craig has helped thousands of other homeowners repair their appliances since 2016.
Andy is one of our resident appliance repair experts with over a decade of experience. He currently runs his appliance repair company with a team of trusted technicians.
Repairing Your Fridge’s Interior: 7 Quick Steps
If the interior of your fridge is damaged, it’s crucial to address the issue immediately to prevent small cracks from worsening and to keep temperature irregularities and mold growth at bay.
Luckily, you’ve come to the right place.
Here’s how to repair cracks on your fridge:
- Unplug your refrigerator from its power source or turn it off at the circuit breaker to prevent electrical hazards.
- Remove any items around the damaged area and transfer them to a cooler to keep them from spoiling.
- Carefully drill tiny holes at either end of the crack to keep it from extending further.
- Clean the damaged area thoroughly using rubbing alcohol and allow it to dry completely. Then, measure the area you need to cover to prepare for cutting the liner.
- Purchase a refrigerator liner repair kit from a hardware or online store. You can also use a food-safe epoxy or sealant.
- Cut the liner to fit over the damaged area. If your kit includes an adhesive, apply a smooth, even layer over the crack and fill in the drilled holes.
- Carefully position the liner over the crack and press it firmly into place. Then, allow it to set.
Keep in mind that reading the manufacturer’s instructions included with the refrigerator liner repair kit or sealant is crucial, as specific application and curing times can vary.
While you can handle minor repairs as DIY projects, it’s important to note that if your fridge’s interior is severely damaged, it’s best to contact an appliance repair expert. Extensive damage can not only affect your refrigerator’s efficiency but also potentially compromise food safety.

How to Prevent Damaging Your Fridge’s Interior: 5 Tips
Now that you’ve learned how to repair cracks, it’s crucial to understand how to prevent potential issues with your fridge’s interior, as some damage can be irreversible.
In this section, I’ll guide you through five simple maintenance tips you can try to prevent damaging the inside of your fridge.
Are you ready? Let’s dive in!
#1 Don’t Put Hot Food In
My go-to recommendation if you’re trying to prevent damaging your fridge’s interior is to avoid storing hot food inside.
You see, placing hot items inside can damage the internal components and lining of the refrigerator. Additionally, it can cause the compressor to work harder and run longer than necessary to cool down your food.
Allow your food to cool to room temperature before placing it in the fridge. To speed up the process, you can divide your cooked food into smaller storage containers and leave them open.
Just keep in mind that, according to the USDA, you should never leave cooked food outside of the fridge for more than two hours. Otherwise, bacteria can thrive, making it much more likely for you to become ill.
When storing your food, it’s also important to avoid overloading your refrigerator. Otherwise, you can damage the shelves and drawers. Not to mention that overloading the unit can also restrict airflow, leading to frost buildup and temperature changes.
#2 Avoid Using Harsh Chemicals
In my experience, a fridge’s interior can become damaged due to the use of harsh chemicals.
You see, the interior of most refrigerators is primarily made from plastic, which can react negatively to some strong chemicals.
Therefore, it’s important to use mild detergents when cleaning your fridge and stay away from bleach or ammonia. Personally, I like mixing equal parts of warm water and vinegar to clean my refrigerator.
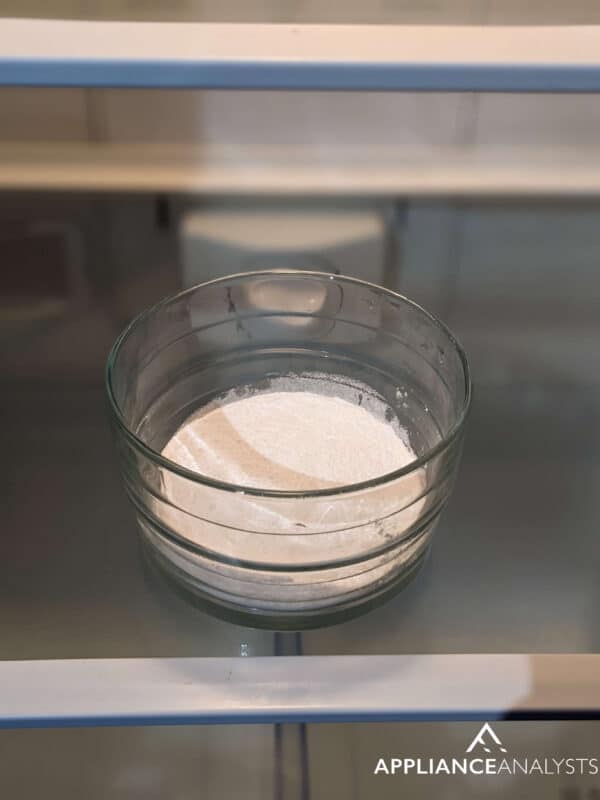
Vinegar is a great natural cleaner, as it can easily break down grime and has antibacterial properties. You can also use baking soda to neutralize unpleasant odors.
Using harsh chemicals will not only damage your fridge’s interior but also transfer to your food, changing its flavor and potentially posing health risks.
#3 Check the Light Bulb
I’ve seen that when a fridge’s light becomes too hot, it can damage the interior components.
You see, prolonged exposure to heat can cause the plastic liner to deform or melt, affecting the fridge’s insulation and causing multiple performance issues.
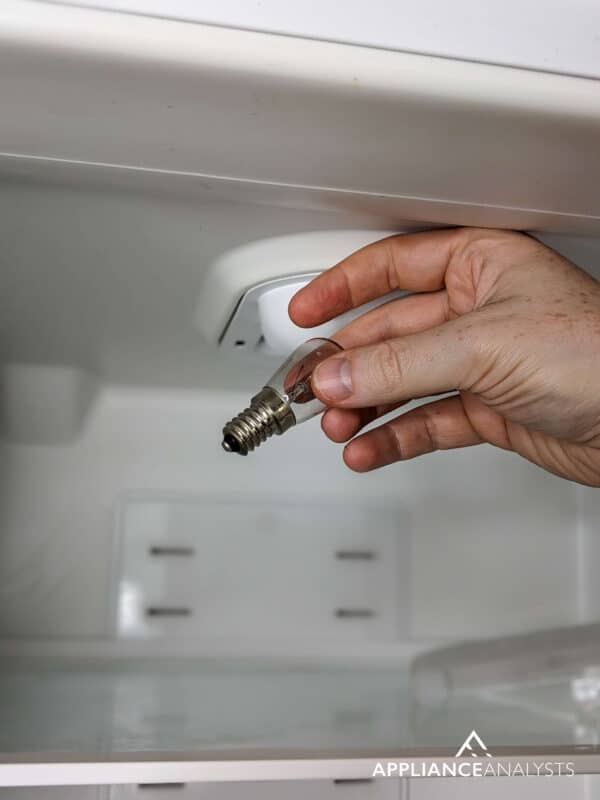
Most modern refrigerators have LED lights. However, some older models still have incandescent bulbs, which generate more heat.
So, if you have a traditional refrigerator, I recommend replacing the incandescent bulb with an LED light. To do it, you’ll simply need to unplug the unit from the power outlet or turn it off at the circuit breaker and remove the light bulb cover. Then, unscrew the bulb by turning it counterclockwise and replace it with a new one.
Your fridge’s light will only turn on when the door is open. Therefore, to keep the light bulb from overheating, it’s important to open the door only when necessary.
You should also make sure the door switch is working correctly. If it’s not, it can think the door is open even when it’s not and keep the interior light on, generating excessive heat. To test the door switch, simply press it down and see if the light turns off. If it remains on, then you’ll need to replace the door switch with a new, compatible one.
Tip: You can also see if the door switch works by recording a video and placing your phone inside the fridge. Close the door, wait for 30 seconds, and watch the video. If the interior light didn’t turn off, then the door switch is faulty.

#4 Check the Door Seal
You can also prevent damaging your fridge’s interior by regularly checking the door seal.
The seal, also known as the “gasket”, is responsible for keeping cold air inside the refrigerator and preventing warm air from getting in to maintain the desired internal temperature.
Unfortunately, if the door seal is dirty, damaged, or broken, your fridge will need to work harder to keep your food cool, leading to increased humidity, ice buildup, and potential mold growth. Over time, excess moisture can also cause metal components to corrode and plastic parts to warp.
Regular maintenance is essential to avoid damage to your fridge’s door seal. Here are three simple tips that will help you:
- Periodically check the door seal for any visible signs of damage. Please get a replacement if you notice any signs of wear and tear, such as cracks.
- Keep the door seal clean by using warm soapy water or vinegar. Removing dirt, grime, or food debris will ensure the gasket’s effectiveness. Once you’ve cleaned the seal, please let it dry completely. Remember to avoid using harsh chemicals when cleaning your fridge’s components.
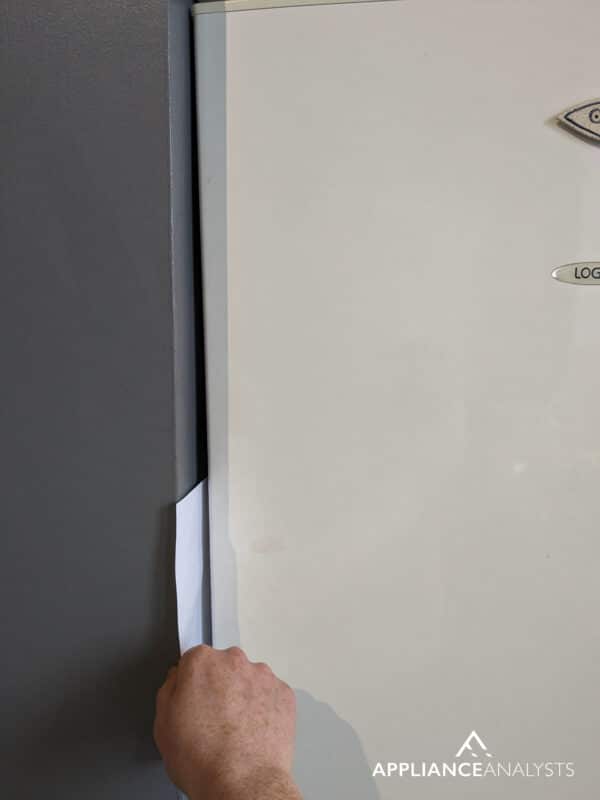
- Test for proper seal. To do so, close the door on a piece of paper or a dollar bill. Then, try to pull out the paper with the door closed. If it slides out without resistance, then the seal needs to be replaced.
If you need to purchase a new door seal, please make sure you get a compatible part. It’s also important to keep in mind that you need to take the new gasket out of the box and lay it on a flat surface for 24 hours so that it can regain its shape. You can speed up the process by using a hair dryer on low heat.
When installing the new door seal, remember to start at one corner and work your way along the strip. Don’t forget to refer to the product’s manual, as installation instructions can vary depending on the specific seal and refrigerator you own.

#5 Inspect the Defrost System
The final tip I recommend is to inspect the defrost system to prevent further damage to your fridge’s interior.
You see, modern refrigerators are equipped with a defrost system composed of different components, such as a heater, thermostat, and timer or control board. The defrost components work together to prevent ice buildup on the evaporator coils and maintain a consistent temperature.
Unfortunately, if the defrost heater stays on longer than necessary due to a malfunctioning thermostat or timer, it can generate excessive heat near the edges. As a result, your fridge’s plastic components can melt or become damaged.
If you suspect the defrost system is not working correctly because you’ve noticed temperature fluctuations and interior damage, try unplugging your refrigerator from its power source and using a multimeter to test each defrost component. If the readings don’t align with the manufacturer’s recommendations, consider getting replacements.
Remember that it’s best to call a professional if you’re uncomfortable testing or replacing the defrost system components yourself.
Repairing and Maintaining Your Fridge’s Interior
Hopefully, now you know how to repair your fridge’s interior and prevent further damage.
Remember that if there’s a crack in the interior of your refrigerator, you can use a sealant or a liner repair kit to address the issue. To prevent any further damage, avoid storing hot food inside the unit, don’t use harsh chemicals for cleaning, regularly check the door seal, and inspect the defrost system.
Don’t forget to check your fridge’s model number to ensure you get a compatible replacement if necessary.
Thank you so much for taking the time to read this guide. If you’ve found it helpful, please check out our other related posts below.
Have a wonderful day!


Designing Modern Living Rooms from Iconic Movies

7 Tips for Heating a Room with High Ceilings (On A Budget)