Freezers are a must-have, but sometimes they can work a little too well.
If you’re stuck with a freezer that’s trying it’s best to recreate Antartica, then you’re in the right place.
In this article we’ll explore all the common causes of a freezer that’s icing itself over, and how to solve them.
If that sounds good, then let’s read on and reclaim that freezer!
Quick Fixes For A Freezer That’s Too COld
A malfunctioning freezer could be the result of a faulty part. These are complicated to fix, and often are better off in the hands of a professional.
The good news is that it may also be the result of a simple issue. Which means these simple fixes could solve the issue!
Here’s a quick list of easy fixes:
- Make sure the freezer is level. The refrigerant process used by any fridge/freezer relies on moving liquids and gas around. If the appliance isn’t level, this process can’t work properly.
- Make sure the freezer has space to breathe. Similar to the above, the freezer needs room to exhaust the warm air from the refrigeration process. If possible, make sure the freezer has 1-2 inches of clear air around it’s sides and rear. Also that the floor beneath it isn’t clogged full of dust!
- Is it simply too cold? If the appliance is already in a cold area, this can mean it’s overpowered for what you need. If so, make sure to have the cooling settings down to a minimum.
- Are the settings the wrong way round? If you have an old-school analogue wheel inside the freezer, try running it at two extreme ends. On some freezers, ‘5’ may be maximum cooling, while on others, it could be 1. Or it may simply be reversed by accident.
- Have you tried resetting it? Especially with modern fridge freezers, the ‘smart’ electronics can backfire. A good reset (simple unplug, wait 5 minutes, replug) can fix some component issues.
If you don’t think it’s any of the above – it’s time to roll our sleeves up.
Below we’ve gone through each of the most common causes for a freezer going overboard – with fixes for each.
Ready? Let’s get started.
Solving A Freezer That’s Icing Over
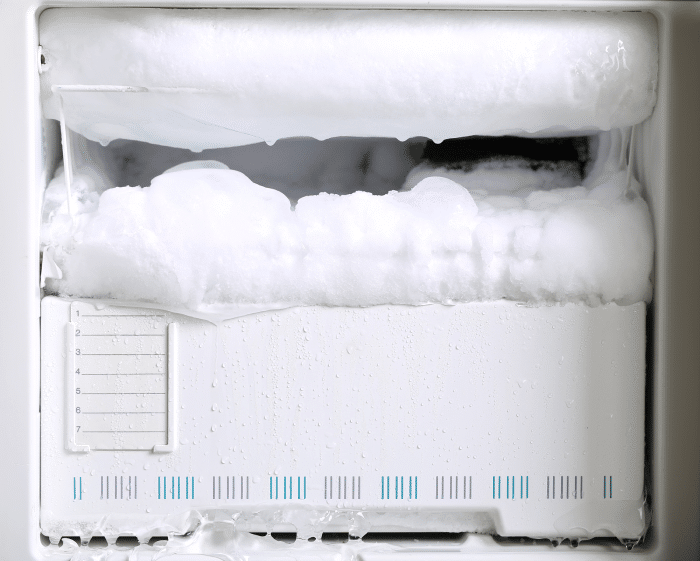
#1 – It Just Needs A Defrost
Sometimes frost in a freezer can be like a snowball rolling down a hill. It just takes a little bit of frost to get this started, but it can quickly snowball into an issue of overflowing ice.
All of this ice can end up blocking essential components (like the air vents) which can make the problem even worse.
To fix it, we need to defrost the freezer. To do this, there’s three main options:
- Initiate a defrost cycle. Some modern freezers have an automatic defrost option which can automatically allow it to reach a temperature to melt the ice, while still keeping food cool.
- Get hackin’. If you’ve got an older freezer and you see there’s a clear ice build-up, this is where you want to grab a suitable tool (ice pick, knife, chisel, etc) and work through breaking apart any ice build up.
- Full defrost. If you want to make certain everything gets defrosted – including any unseen frost buildup in the internal components – nothing works better than an oldschool defrost. You want to move all of the food into an alternative cold spot, ideally covered in ice, and turn the freezer off for a good few hours. This can be anywhere between 2 and 8 hours. You can see when it’s done just by checking to see if it’s fully defrosted or not. We recommend leaving the freezer open, but NOT attacking it with a hairdryer or anything that could cause rapid temperature changes to the system.
If you’re attempting any level of freezer defrosting, make sure to put some old towels under the freezer wherever you can Depending on the level of ice, you could end up with your own personal swimming pool!
#2: Faulty Air Damper
The air damper (AKA freezer control) decides the amount of cold air that’s sent into the freezer. If the air damper of your fridge/freezer isn’t working right, too much cold air may be staying in the freezer instead of circulating to other areas like your fridge.
This is bad for your appliance because it means that the compressor has to work harder to get extra cold air into the fridge compartments. Also, your freezer will then be too cold and iced up.
Fixing A Faulty Air Damper
Unplug the fridge and take off the damper cover first. Check that the freezer/damper control is actually running the damper. Also check for obstructions or binding on the air damper that shouldn’t be there.
If there is an automatic temperature sensing bulb attached, make sure that it’s positioned correctly to measure the temperature inside the fridge and do its job adjusting the control.
Also, check that the damper door is not stuck in the ‘open’ position – if cold air is constantly flowing unrestricted from the damper then food will over – freeze. If it is stuck open, remove any obstruction like built ice and close it back to its proper position.
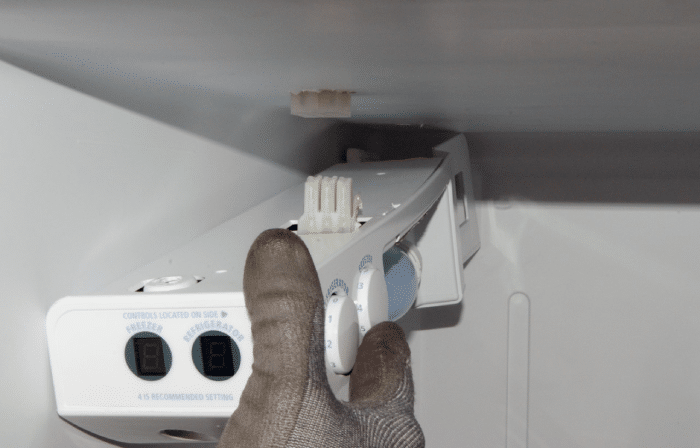
#3: Faulty Temperature Sensor/Thermistor
If your fridge/freezer has an electronic control board, its temperatures are being controlled by the temperature sensor or thermistor. The thermistor is usually found by the air inlet, and is usually a capsule enclosed in plastic with two wires attached.
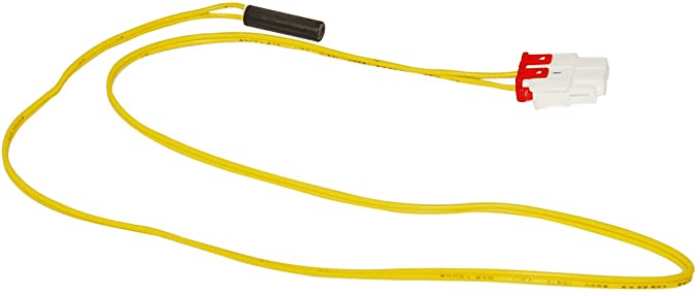
The thermistor is crucial to running the fans, compressor and damper, so if it’s faulty it’s not signaling to the control board to shut the motors off, so the freezer will get too cold and over – freeze. A picture of a thermistor is below for your reference, but check your appliance’s manual too in case your type of thermistor looks different.
Fixing A Faulty Thermistor
First of all check your manual or the manufacturer’s website to try to decode the fault code if one is being displayed.
You can also check the thermistor by using a multi meter. Check the thermistor’s resistance levels to see how it works at different temperature settings and to determine if the thermistor itself has continuity. If testing it with the multi meter doesn’t give you resistance changes or continuity, this is an indication that the thermistor needs to be replaced.
If you want to get any replacement part – or see how much one would cost – click to enter your model number in the search bar below. Our partners at AppliancePartsPros stock almost every part with free guides on how to install them.

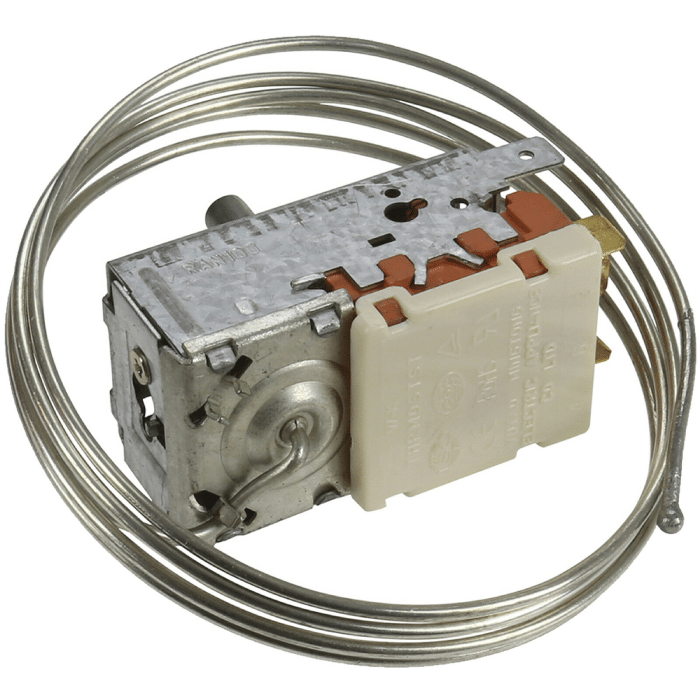
#4: Malfunctioning Thermostat Control
The thermostat control is responsible for turning the appliance on and off. It also monitors the temperature of the air in the freezer and fridge. If it’s not working properly, the compressor of your appliance will overrun, causing freezing to an unwanted level.
Checking the Thermostat Control
To check the thermostat/temperature control using a multi – meter, you’ll need to check your appliance’s wiring diagram first. This is usually found on the back of the refrigerator or in the compressor compartment. Alternatively, look online for a wiring diagram appropriate for your model appliance. Study the manufacturer’s wiring diagram so that you know where everything goes, how they connect and how to put them back in the right places afterwards!
Referring to the wiring diagram, find the wiring harness coming from the temperature control and disconnect it from the terminal board in the compressor compartment. Set the function switch on your digital multi meter (DMM) to ‘R x 1’ scale and connect the test probes to the two wires from the thermostatic switch that supplies power to the compressor’s motor.
With the temperature control in the ‘Off’ position, the DMM should display ‘O.L’ on its display screen. As you slowly turn the temperature control knob from its ‘Off’ position to its maximum cold position, the DMM should display a ‘0.000’ on its display.
If the meter shows a ‘0.000’ in the ‘Off’ position or continues to display an ‘O.L’ even in the maximum cold position, the control is faulty and needs to be replaced.
- Faulty Temperature Sensing Bulb. If the thermostat passed the electrical function test but the fridge/freezer is still running continuously, freezing everything, the problem could be a faulty temperature sensing bulb on the temperature control. The bulb is a vital part of the temperature control switch, so the whole control will need to be replaced if it is not functioning correctly.
- Temperature Control Knob incorrectly set. It seems obvious, but it could be that you’ve inadvertently set or adjusted your temperature control knob for your fridge/freezer to ‘high’. Check in your appliance’s manual because ‘high’ usually means higher power (colder temperature) as opposed to a higher temperature.
In other words, a ‘high’ setting on the temperature control knob will mean that your appliance is at its coldest – this could be causing your freezer to be too cold.
- Very cold outside/ambient temperature. If you are in an area where it is frequently very cold, this will make your fridge and freezer colder, so always check the optimal running temperature for your appliance in your appliance manual, and adjust the temperature control knob accordingly.
What Temperature is TOO Cold for a Fridge/Freezer?
Most freezers need to be kept at a constant temperature of 0 degrees Fahrenheit or – 18 degrees Celsius. Any temperature lower than 0 degrees Fahrenheit is TOO COLD and can lead to over – freezing and over – icing in the freezer compartments.
As always, also consider your ambient temperature and refer to your appliance manual or appliance manufacturer for specialist advice as needed.
Check If Your Appliance Is Under Warranty
Repairs are expensive, not to mention the cost the cost in peace of mind. If you’re lucky enough that your fridge/freezer is still under warranty, an issue like one of the above should be covered entirely.
Here’s a handy checklist for you!
- Think about typical warranty periods. If it’s giving you problems within 30 days, you can take it back to the store usually without any hassle – and most retailers offer a standard 1 year warranty on appliances.
- Phone the store and check their exchange/refund/returns policy first, get confirmation that you’re all good. THEN make the trip out to the store. No point in a wasted trip or wasted haulage fees!
- Check your receipt and user’s manual for the appliance – often all the information regarding your warranty (including the fine print) is on there. Check if you took any type of insurance with the warranty, it’ll be mentioned on the receipt or user’s manual.
- Visit the manufacturer’s website if you’ve had no luck locating your documentation. A good manufacturer’s website will give you all the information that you need about warranty periods and terms, insurance and extended coverage options.
- Remember your customer rewards memberships! If you’re part of a customer rewards program with the retailer, you may be entitled to an extended warranty or better terms when returning items, so check with your retailer to make sure that you get the benefits you’re entitled to.
- Check with your credit card company! Bought your appliance on your credit card? Often credit card users get access to extended warranty coverage PAST the traditional 1 year retailer’s warranty, as part of consumer protection. Check with your credit card homies, they may be able to save you hassle and money, even if your retailer’s warranty has since expired.


Designing Modern Living Rooms from Iconic Movies

7 Tips for Heating a Room with High Ceilings (On A Budget)