Stuck trying to stop your freezer from warming up when it shouldn’t be?
Sadly, I’ve been there too. I know how annoying it can be to have this happen. After all, freezers should make our lives easier, not the opposite.
But, don’t worry. You’ve come to the right place to get this issue fixed.
If your freezer is melting and thawing when it shouldn’t, check the power supply and door seal, clean the coils, inspect the evaporator fan, and test the defrost system. But, if that doesn’t work, please check the temperature and compressor or search for a refrigerant leak.
Read on to solve the issue!
Stop Your Freezer From Warming Up: 8 Fixes
Unfortunately, there are many reasons why your freezer may be thawing out
your food when it shouldn’t.
This is why I created a list of 8 things you should do to solve the problem. These are:
#1 Check the Power Supply
Before doing anything else, I’d like us to make sure your freezer is receiving enough power to work as intended.
Check that you’ve correctly plugged in the power cord and inspect it. If it’s broken or damaged, turn off your freezer at the circuit breaker, and replace it.
I also recommend checking the circuit breaker. If your freezer shares a circuit with the rest of your kitchen, it can trip your circuit breaker frequently and cause the issue.
#2 Check the Door Seal
Now, I’d like us to rule out the door seal as our possible culprit.
You see, the door gasket is responsible for sealing cold air in and keeping the warm air out. However, if it’s broken or worn out, your freezer will struggle to maintain its temperature.
To check the door seal, close the door on a dollar bill and pull the bill out. If it slides out with no effort, then your door seal is damaged, and you need to replace it.
I also recommend making sure the gasket is clean. If it’s not, the door may not close properly, causing warm air to enter the freezer.
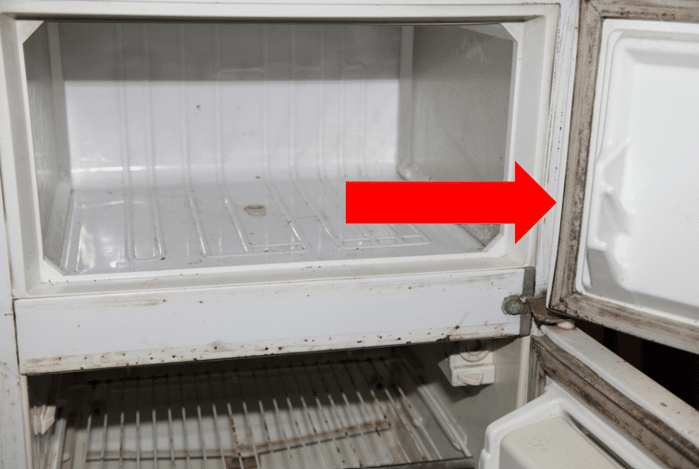
To clean the gasket, try using a natural cleaner. You can mix equal parts of vinegar and warm water and use an old toothbrush to clean the dirt and grime.
#3 Clean the Condenser Coils
During the refrigeration process, a refrigerant flows through your freezer’s components in the form of gas and liquid to absorb heat and keep your appliance cool.
When it circulates through the condenser coils, it transforms into a liquid and releases heat.
Unfortunately, if the condenser coils are covered in dust, they won’t be able to dissipate heat, affecting your freezer’s cooling capacity.
Here’s how to clean them:
- Unplug your freezer from the wall outlet and locate the condenser coils (they’re usually located on the back of your freezer or across the bottom).
- Use a narrow attachment to vacuum any dust or debris buildup.
- Plug the freezer back into the wall outlet.
#4 Inspect the Evaporator Fan
Now, it’s time for us to inspect the evaporator fan.
This component is vital for the refrigeration process, as it is responsible for circulating cold air through your appliance.
If it’s not working correctly, the temperature of your freezer will rise and your food may thaw.
Follow this quick guide to check the evaporator fan:
- Unplug the freezer from the wall outlet to avoid an electrical hazard.
- Locate the evaporator fan (typically located at the back, on top of the evaporator coil) and remove the covering panel, you may need to use a screwdriver.
- Carefully disconnect the wires attached to the fan
- Ensure that the blades can spin freely. If they can’t, the motor bearings are probably worn out and the motor needs to be replaced.
- You can also do a multimeter test. Check your manual to see the proper resistance reading, since all motors can vary. If you’re not getting the right resistance reading, replace the fan.
#5 Check the Defrost System
During the refrigeration process, the coolant circulates through your evaporator coils. This is where it transforms into a gas and absorbs heat from the interior.
When this happens, frost can form in the evaporator coils. This is why most modern freezers have an Auto Defrost or Frost Free feature that automatically removes any remaining frost to prevent buildup and its associated issues.
Unfortunately, if the defrost system is not working, your freezer can melt and thaw even when it shouldn’t.
The first part of the defrost system that we’re going to check is the timer. This component controls when your freezer is in defrost mode. If it fails, the internal temperature may raise even when it’s not supposed to.
To check the timer, you’ll need to:
- Unplug your freezer from the power source and locate the timer. It’s usually located on the back, behind the lower kick plate, or control panel.
- Pull the timer out and carefully disconnect its wires.
- Set your multimeter to Rx1 and place one of the probes on the “C” or “3” terminal and the other probe on one of the three remaining terminals, one at a time. Your first two readings should be zero or near zero, and the third reading should be infinite. If that’s not the case, you’ll need to replace the timer.
I also recommend testing the defrost heater and thermostat with a multimeter because if these fail, your freezer may activate Defrost mode when it shouldn’t.
In the case of the heater, you should get a resistance reading of 0 or infinite, and for the defrost thermostat, the reading should be 0.
#6 Check the Temperature
I know this may sound too obvious, but if your freezer is set to the wrong temperature, it can melt and thaw.
Try placing a thermostat in an ice cream that has been stored in your freezer for at least 12 hours. Then, check the temperature, it should be set to 0 °F (ca. -18 °C).
If you notice that your freezer is too warm, please adjust the temperature dial.
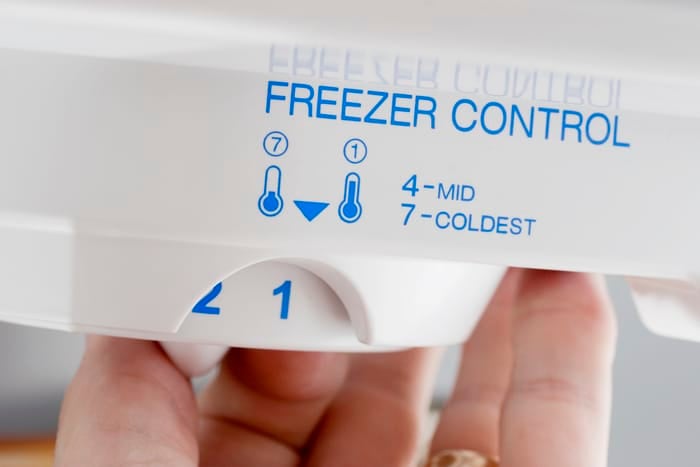
But if the temperature continues to rise after adjusting it, you’ll need to check the temperature control. If it’s faulty, the compressor may not start and the refrigerant won’t be pumped through your freezer’s compartments, failing to maintain your food frozen.
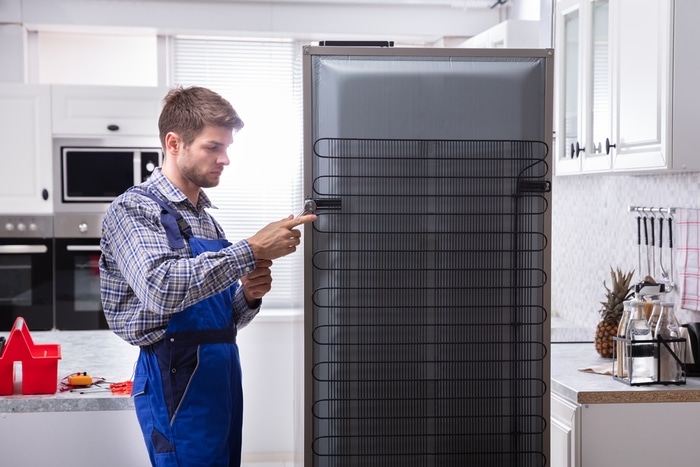
#7 Check the Compressor
You can think of the compressor as the heart of the refrigeration process. This is where the coolant is compressed and pumped through the system.
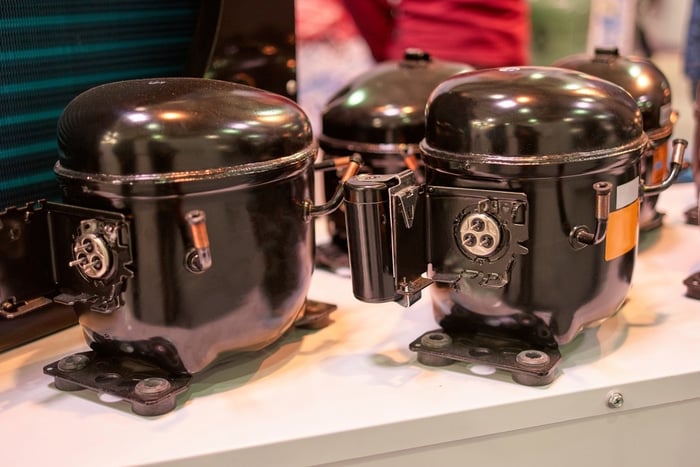
Unfortunately, if the compressor isn’t working, the refrigerant won’t flow through your freezer’s components and the temperature will rise, resulting in melted or thawed food.
Your compressor usually makes a humming noise. So, if you can’t hear it, you may need to call a professional.
Bear in mind that replacement may cost up to $650 USD, so it may be worth replacing the whole freezer. Don’t forget to check your warranty first.
#8 Search for a Refrigerant Leak
If you have a refrigerant leak, your freezer can get warm, your food may thaw and spoil, and your electricity bills can increase.
To detect the leak, you can mix a few drops of dish soap and water in a spray bottle and spray the tubing. If you see bubbles, then the refrigerant is leaking.
If that’s the case, you shouldn’t attempt to repair the leak on your own. Please call a professional, as refrigerant may be harmful to your health.
The certified technician may recommend repairing the leak or replacing your freezer, so you might want to check your warranty.
How to Know if Your Freezer Is Still Under Warranty?
As you noticed, repairing the compressor or a refrigerant leak can be very expensive. This is why you should check if your freezer is still under warranty.
You’ll find information in the documents you received when you bought the appliance. But, if you don’t have them anymore, don’t worry. Search for the warranty information on the manufacturer’s website.
You can also contact the retailer, as they tend to keep this information on their records.
Conclusion
That about covers it!
If you take anything away, remember that if your freezer is melting and thawing when it shouldn’t, you need to check the power supply, door seal, evaporator fan, and defrost system.
Don’t forget to clean the condenser coils, check the temperature and compressor, and search for a refrigerant leak.
Thank you so much for taking the time to read this guide. If you found the 8 tips above helpful, please check out our related articles below.
Good luck!


Designing Modern Living Rooms from Iconic Movies

7 Tips for Heating a Room with High Ceilings (On A Budget)