Does your Dyson vacuum power out before it’s able to get started? Then, don’t panic, you won’t have to go back to the old dustpan and broom. Take a look at the 8 fixes in this article that will get your cordless vacuum holding its charge again.
If your Dyson vacuum isn’t holding charge, check the charging cable and power outlet for damage or faults. Also check the battery casing. Try holding the power button for 20 seconds, and make sure the airflow and filter are clean and unlocked.
That’s the short answer, but each of these fixes needs covered in a bit of detail.
If your Dyson keeps running out of juice, read on and let’s fix it together.
Fix a Dyson Vacuum That Won’t Hold Its Charge [8 Ways]
You’ve had your Dyson vacuum cleaner plugged in and charging for hours. So, you unplug the charger and are full of beans ready to tackle that bit of mess in the living room. You press the power button and the vacuum works for about 3 seconds before it loses power. What could be the problem?
Cordless vacuums are brilliant. They are lightweight and are easy to use all around the house. But what should you do if your vacuum’s battery seems flat or won’t hold its charge? Coming up, you’ll see 8 ways in which you can right this problem.
Fix #1 Check the Cable For Damage
If your Dyson vacuum cleaner’s power cable is damaged, it will not be able to charge properly. This could lead to the intermittent power problem that you’re having.
To check your cable for damage, follow these steps:
- Inspect the cable up close for signs of wear and tear. This could be a bend in the cable or the exposure of the wires.
- If there is damage to the cable, stop using it immediately. You must replace the charger cable.
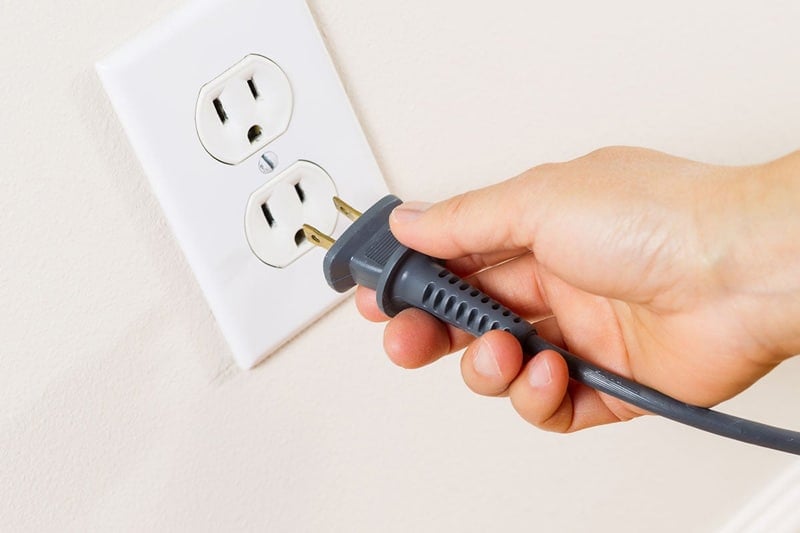
Fix #2 Ensure the Power Outlet Is Working
Before we decide to pull your vacuum cleaner to pieces, it would be good to check that your power outlet is working. If it isn’t, it will affect the battery life of your appliance.
To ensure your power outlet is working, do the following:
- Remove the vacuum cleaner from the power outlet
- Plug a high energy consumption appliance into the outlet such as a hairdryer
- Test the appliance to see if it works. If it doesn’t there may be a problem with the power outlet. In this case, you will have to contact an electrician to fix the issue. In the meantime, use another power outlet to charge your vacuum.
Fix #3 Check the Battery Casing for Damage
It is all too easy to damage the battery casing of your cordless vacuum. It could become cracked if something were to fall on it repeatedly. It could also become damaged if it were to fall on the floor. This could cause problems with intermittent charging.
To inspect your vacuum’s battery casing, do this:
- Look over the battery casing for cracks and signs of damage
- If the battery is damaged, you will need to buy a replacement
Fix #4 Put It Back to Charge for 30 Seconds
Some Dyson vacuums have a fault where they show signs of a depleted battery when they are in fact fully charged. This could make you think the battery needs recharging when all it really needs is “waking up”.
Here’s how to “wake up” your Dyson battery:
- Plug the vacuum cleaner back into a power outlet. Leave it to charge for 30 seconds.
- Unplug the vacuum cleaner and press the power button. The vacuum should now work normally.
Fix #5 Press the Power Button for 20 Seconds
I have just spoken about one way to “wake up” your Dyson vacuum cleaner. This is necessary when the appliance has a full battery but does not respond to it.
I will now show you another way of “waking up” your appliance. This method should force your cordless vacuum to start working again when it is fully charged.
Here’s how to “wake up” your cordless Dyson:
- Remove the power cord from the vacuum
- Plug the power cord back into the vacuum
- Press and hold the power button for 20 seconds
- Release the power button
- Detach the power cord. The vacuum should now operate normally.
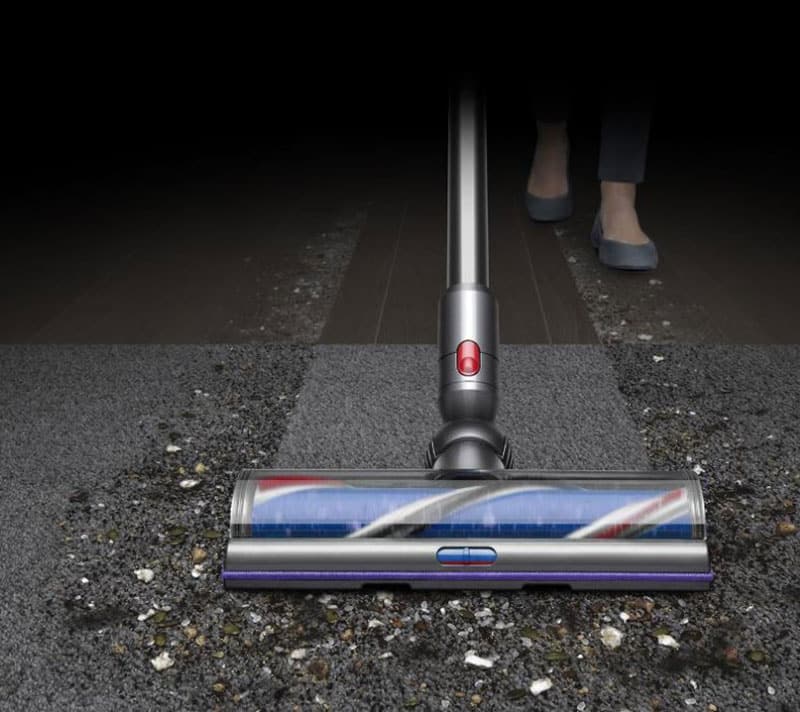
Fix #6 Unblock the Airflow
Dyson vacuums are programmed with an automatic shut-off. This feature activates when the airflow blocks. This is to prevent you from doing any damage to the motor. It also prevents you from blocking the vacuum further as large particles will not be forced into the mechanism.
Is your vacuum is fully charged but won’t work? Then there is a chance that the airflow is blocked. You will need to remove the obstruction for the vacuum to continue working again.
There are a couple of things you will need to do to unblock the airflow. This all depends on where the blockage is. To start unblocking your Dyson, follow these steps:
- Unplug the vacuum
- Leave the vacuum to cool before trying to look for blockages. Do not press the power button until you have removed the blockage.
- Remove the vacuum extensions such as the cleaner head. Inspect them for blockages.
- Empty the waste collector. Clear it completely of any dust and particle dirt.
- Return the attachments to the vacuum
- Test the vacuum by pressing the power button
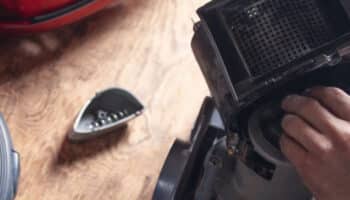
Fix #7 Unblock the Filter
Have you tried clearing the airflow in your vacuum but still suspect there is a blockage? Then it is a good idea to clean the filter. The filter inside your vacuum cleaner is also prone to blockages.
Here’s how to clean the filter in your cordless vacuum:
- Unplug the vacuum
- Leave the vacuum to cool before attempting to remove the filter. Do not press the power button until you have completed the job.
- Turn the filter anticlockwise. Pull on it to remove it from the vacuum.
- Shake any debris on the filter into the garbage
- Wash the filter in cold water. Remove all the dust from it. Do not use any detergent or hot water to clean it.
- Wash the foam element in cold water. Squeeze the foam as you rinse it to get rid of the buildup of dirt. Continue washing it until the water runs clear.
- Shake the filter to remove any excess water from it
- Leave the filter to dry for 24 hours
- Check that the filter is completely dry. If it is, return it to the vacuum.
- Test the vacuum by pressing the power button
Fix #8 Replace the Battery
So you’ve gone through all the steps in this article but are still not having any success with your vacuum. I know that this is often the last thing we want to do, but the solution may be to replace the battery.
Dyson cordless vacuums have different warranties. Some are 2 years and others are as long as 5 years. You will need to check the make and model of your vacuum to find out which warranty period yours has.
If your vacuum is still under warranty, you may be able to get a repair or a replacement free of charge.
If your vacuum isn’t under warranty, you will need to purchase a new battery. The price of the battery will depend on the make and model of your vacuum. But you should expect to pay about $100 or more for the battery.
I recommend that you purchase a genuine Dyson battery as this will come with a 12-month warranty. This way you can also ensure that you are buying something that is compatible with your vacuum.
If you want to get any replacement part – or see how much one would cost – click to enter your model number in the search bar below. Our partners at AppliancePartsPros stock almost every part with free guides on how to install them.

Conclusion
Has your Dyson vacuum stopped holding its charge? You have charged the battery for hours and it is still not working. Few things are more frustrating and time-consuming. But I’m sure the tips in this article will help you to get your vacuum working properly again. A freshly cleaned floor is just 8 steps away.
Has this article been helpful to you? Then make sure you check out some of our other articles and free guides. You could even sign up to our email list.
Have a great day!
-Craig


Designing Modern Living Rooms from Iconic Movies

7 Tips for Heating a Room with High Ceilings (On A Budget)