We've independently reviewed this article to make sure it's as accurate as we can make it.
To find out more about our article creation and review process, check out our editorial guidelines.
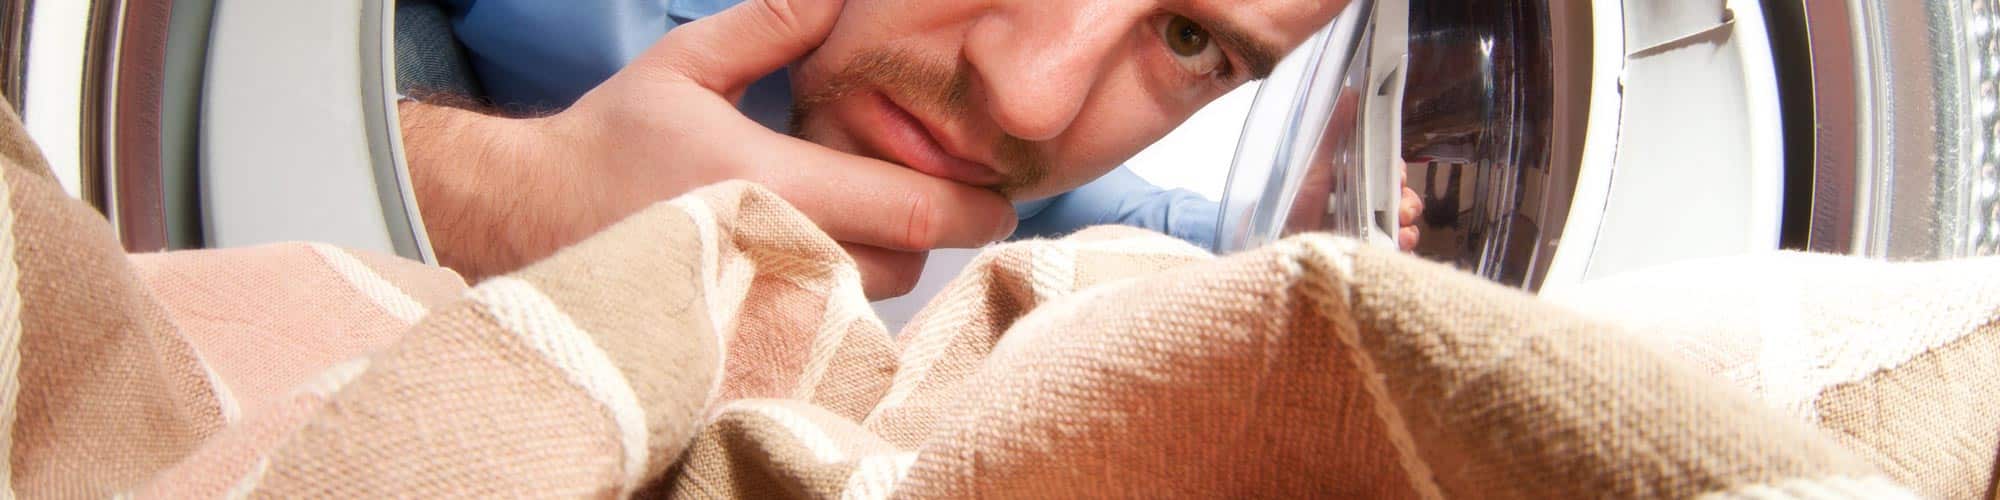
Stuck trying to figure out why there’s a puddle of water under your dryer?
Don’t worry; you’re not alone. It’s not uncommon for dryers to leak water – but thankfully, some common fixes can help solve the problem for you.
If your dryer is leaking water, there’s a good chance the ventilation hose exiting the dyer is blocked, the vents are damaged, you have a faulty vent flap, or the exhaust pipes are not insulated.
Read on to learn more about the possible causes to get rid of the problem today!
Why trust us? This article was written by Craig Anderson and Andy Fulenchek.
Craig has helped thousands of other homeowners repair their appliances since 2016.
Andy is one of our resident appliance repair experts with over a decade of experience. He currently runs his appliance repair company with a team of trusted technicians.
9 Reasons Why Your Dryer Is Leaking Water
I know how frustrating it can be to discover that your dryer is leaking water. After all, dryers should make our lives easier, not the opposite.
Unfortunately, a leaking dryer can happen due to numerous reasons. Some of the most common are:
#1 Ventilation Blockage
In my experience, ventilation blockage is a common culprit to a dryer leaking water.
Dryers use electricity to heat air using the heating elements inside the drum. The hot air is distributed evenly over the drum using fans to dry the clothes. Once the hot air passes over the clothes, it carries moisture in the form of water vapor and some trace amount of lint before exiting through the exhaust system.
If the ventilation hose exiting the dryer is blocked, the water vapor will have no escape and end up condensing inside the dryer, resulting in water leaking from the dryer.
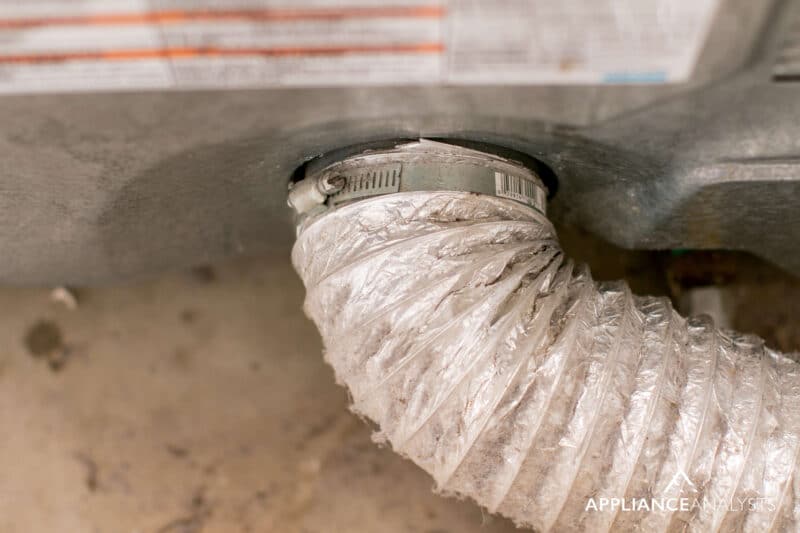
Ensure that no kinks are blocking the passage of the air through the vent. You should also check whether your dryer has a screen over the ventilation hose because it may be clogged with lint if you haven’t cleaned it in a while.
The hot air passing over the drum heats the moisture and collects it in water vapor. Some lint may also be collected, and the mixture exits through the exhaust system. However, there may be factors preventing the smooth exit of said materials, and they end up staying too long inside the vent.
The water vapor condenses and, together with the lint, forms clumps or a gooey mixture that settles inside the hose and ends up causing more blockages. You should inspect the ventilation system by placing your hand next to the vent to feel the airflow exiting the appliance.
You can also do the paper test for airflow, which is one of my favorite methods for testing ventilation blockages.
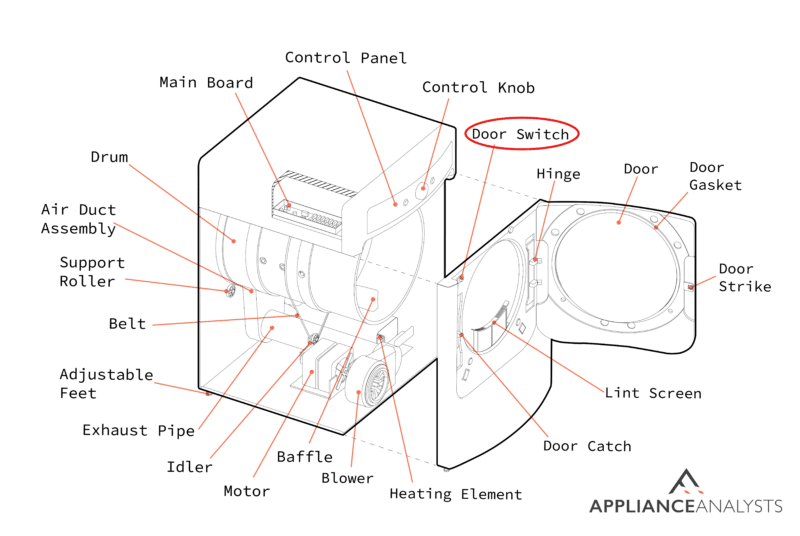
Hold down the door switch (so the dryer thinks it’s closed) and start a cycle at low temperature. Take a piece of paper and hold it under the lint trap.
If the dryer is trying to suck the piece of paper out of your hand and into the lint trap, you’re good. But if the paper is barely moving – poor airflow is likely to reason for the dryer being too hot.
You can solve the problem by cleaning the ventilation hose.
- Disconnect the dyer from the power source to avoid the danger of electrocution.
- Disconnect the vent from the dryer and clean it with a cleaning kit or a vacuum extension to remove the sticky mixture and allow free airflow. You can purchase either cleaning items from a local hardware store.
Replace the ventilation hose and ensure that it’s straight without any twists that would prevent smooth airflow.
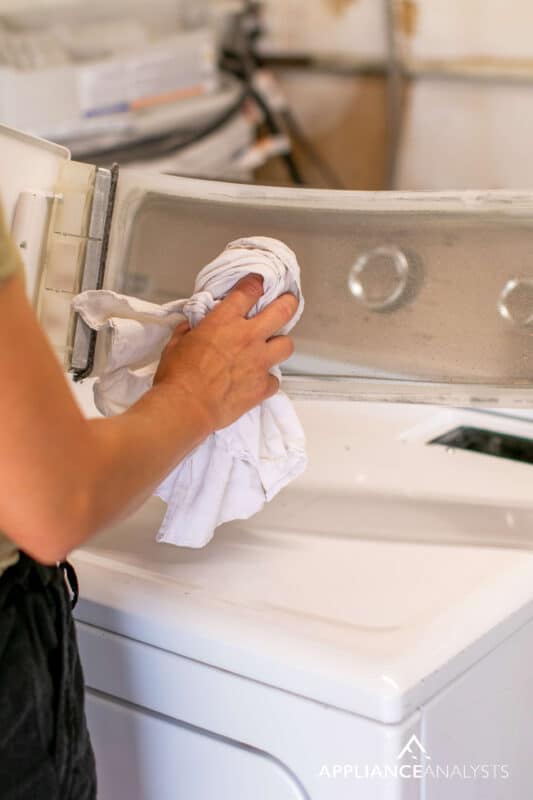
Don’t forget to clean your dryer’s lint screen after every load.
#2 Defective Vent Flap
A defective vent flap could also explain why your dryer is leaking water.
The exhaust hose in your dryer leads to the outside, letting the lint vapor mixture escape. However, foreign bodies, including bird nests, can block the outside exhaust.
A ventilation flap is usually installed to keep leaves, rodents, snow, rain, and other outside elements from entering the dryer from the outside.
From what I’ve seen, sometimes the flap can become too rigid and inflexible or stuck, preventing the vapor from exiting the exhaust hose.
In such cases, water vapor will stay for too long inside the hose, which is not as warm as the drum, and the temperature drop will cause condensation and blockage.
You should check the outside hose to ensure nothing’s blocking airflow. Inspect the flap to ensure it’s functioning correctly and order a replacement if it’s defective.
You can also remove any foreign body blocking the flap.
#3 Issues with the Condenser
Condenser issues are also a potential cause for a dryer leaking water.
Some dyers don’t have exhaust vents but rather condensers, which collect the produced water vapor in a small tank that is emptied after a cycle.
If you have such a dryer and it’s leaking water, you should check the condensation system. Typically, your dryer will produce a certain amount of lint, depending on the load. Excess lint can block airflow and make your dryer have to work harder.
To check for excess lint accumulation:
- Power off the dryer and unplug it from the power source.
- Ensure that you are not standing in a puddle of water.
- Check the filters inside the condenser if accessible as stipulated inside the user manual. If you’re unsure where the condenser filters are, check your Owner’s Manual for details.
- Check whether the condenser tank is overflowing or leaking.
- Check the condensate pump and the piping to ensure no damage.

If you find the condensation pump faulty, you can replace it with a new one. Ensure the condensation tank is upright and not tilted, or water will flow inside the dryer, causing lots of damage.
Note: If your dryer model features a condensation tank on top, disconnect the hose at the rear of the dryer and extend it so that it hangs inside the drain. For models with a condensation water tank at the bottom, ensure that the hose nozzle is not blocked and runs on the ground.
If you want to get any replacement part – or see how much one would cost – click to enter your model number in the search bar below. Our partners at AppliancePartsPros stock almost every part with free guides on how to install them.

#4 Dimensions of Ventilation Duct
Next, let’s talk about the configuration of the exhaust vent and how it could cause a dryer leaking water.
To guard against condensation, the exhaust vent should be straight and run horizontally. Too many turns and twists provide an easy surface for lint collection, which, together with the condensed water, can cause blockage.
Although different manufacturers have various specifications for their brands, a typical exhaust vent should reach 25 feet maximum length with bends included.
Any elbows installed on the pipe should be included when calculating the overall size of the duct. For example, a 45-degree turn makes 2.5 feet, while a 90-degree elbow makes 5 feet when calculating the total length of the pipe.
If the abovementioned length cannot be achieved, a vent booster fan is a good solution to increase the airflow and prevent condensation.
#5 The Material of the Ventilation Duct
Using the wrong materials could also explain why your dryer is leaking water. I recommend choosing a strong, inflexible metal, such as aluminum or galvanized steel, for the hidden part of the dryer’s exhaust vent.
Experts advise against using PVC pipes or plastic hoses for ventilation ducts because they’re highly flammable.
You can use a tinfoil-coated exhaust vent for short distances of up to 8 feet, after which you should install a rigid metal pipe. Ribbed duct piping should be avoided because it provides more surface area for trapping lint.
Tip: Ensure that there are no screw/bolts extending into the vent pipe as this will catch and collect lint attempting to exit the vent.
#6 Vent Duct Insulation
Lack of insulation in exhaust pipes can cause condensation and may also explain why your dryer is leaking water.
For a full load of laundry, your dryer will typically vent up to three gallons of water. Under normal circumstances, the amount of water poses no threat, but during the winter or in areas with cold weather, it can become an ice/condensation issue.
Pipes that pass through unheated areas, such as the basement and the attic, are also prone to condensation because the cold air affects the tube, which cools down the water vapor passing inside, causing blockage and backflow.
You can prevent ice from forming during winter by insulating the pipes. Alternatively, you can try to heat the areas where the lines are located and keep them at room temperature.
If you’re unsure how to insulate your dryer’s vents and the walls surrounding it, my usual advice is to contact a professional for help.

#7 Damaged Vents
However strong your dryer vent is, time will finally take its toll, and you’ll begin to see signs of wear and tear on the ducts. Ducts may also be damaged during installations or renovation, which can cause holes or cracks.
Sometimes, the damage is not obvious. But you must keep a close eye on the issue because if holes go undetected, they may let in cold air that condenses the hot vapor before it exits the vent.
You should regularly inspect the vent for any signs of damage and get the holes fixed to prevent the entry of cold air.
Consider purchasing an inspection camera on Amazon (there are some great options for less than $20) and attaching it to a vent snake. With the camera, you’ll be able to visually inspect the full length of the vent without needing to cut out walls.
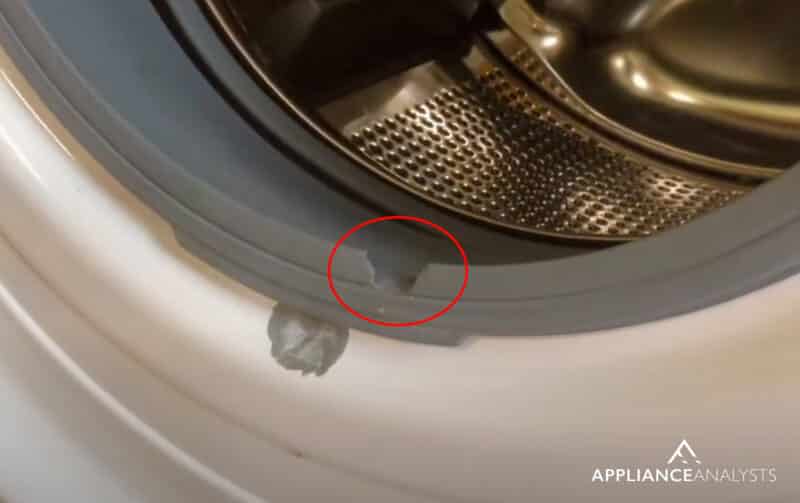
#8 Faulty Door
Small amounts of water are usually expected to accumulate inside the dryer, but you will not see it leaking.
Your dryer’s door is made so that it fits perfectly to prevent any exit of water vapor or entry of cold air. If the door seals are damaged, you’ll see water flowing through the spaces.
In such a case, you should get an HVAC expert to troubleshoot and fix the issue.
#9 Issues With the Steam Feature
Some dryers have a steam feature that helps reduce wrinkles in your clothes. The steaming feature typically uses a single water valve that is connected to the same water supply as your washing machine.
During use, the valve sprays a mist of water into the dryer drum, which can help to add moisture to the cycle.
However, if the water valve fails or becomes clogged, it can cause a water leak within the dryer.
If so, you may need to replace or repair the water valve. In my opinion, it’s best to call a qualified technician for such a repair.
Fixing a Dryer Leaking Water
A dryer doesn’t have inlet pipes like a washing machine, and if you see your dryer leaking water, you can blame the issue on the exhaust system.
Water vapor and some amount of lint leave the dryer in the form of steam, and problems with the exhaust system cause condensation, subsequent backflow, and leaking of water from the dryer.
Thank you so much for reading! If you found this article helpful, please check out our other related guides below and consider subscribing to our newsletter.
Have a wonderful week.
-Craig.


Designing Modern Living Rooms from Iconic Movies

7 Tips for Heating a Room with High Ceilings (On A Budget)