Saving You Time, Money, & Stress.
I started Appliance Analysts in 2017 with a laptop and a dream.
4 years later, as we publish our 1,000th article, I’ve found that so many people are using their appliances wrong.
They’re suffering from
- Fans that are louder,
- Bills that are higher,
- Results that are lower, and
- Appliances needing repaired WAY earlier than they should.
With just a few tips and tricks, we can change all that.
That’s why I’ve put together this ‘hub’ of appliance knowledge.
Each appliance below has a set of tips that will help you get the most out of it. They’ll show you how to get better performance, make your appliance last longer, run quieter, and cost less than it might otherwise do.
These won’t change your life, but they will change your energy bills.
Ready? Then click on a card below to get started.
Click On A Card To Learn More.

We hope these tips have given you plenty of ways to save yourself time, stress, and money by getting more out of your appliances.
This page was put together combining our years of experiences in appliances with more online research, and calls to experts to get hands-on recommendations. However, it’s still a work in progress.
If there’s an appliance you’d love some helpful advice on, drop us a line via our Contact page and we’ll make sure to add it.
Otherwise, feel free to check out our most popular articles for more original appliance content.
Thanks for reading. We hope you have a great day!
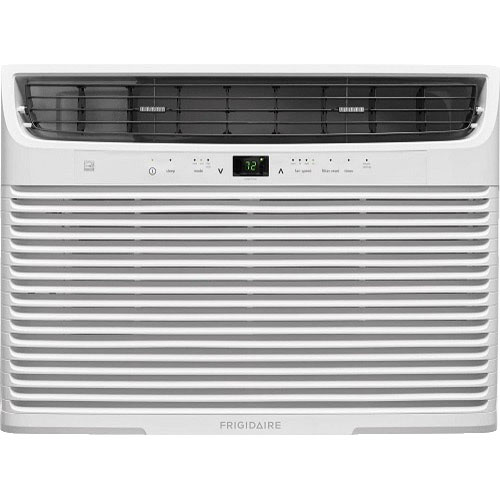
- Keep it on low. Air conditioners work hardest when they first turn on. It costs more to cool hot air than maintain cool air. If you’re heading out to return in under an hour? Leave it running on low rather than turning it off.
- Experiment with temperatures. An AC has to work harder and harder the more you ask it to cool. If you want to cool the room by 5 instead of 10 degrees, it has to work more than double as hard. Allowing a little more warmth will help save your AC (and your bills).
- Keep it out of the sun. Even with window units. Asking it to cool itself down when in direct sunlight is like to drive on the highway in second gear.
- Give it room to work. Don’t trap a window unit behind drapes, or a portable unit behind the couch. You’ll get a hot room and a very cold couch!
- Change your filters. This is super easy and should be done once a month. Clean filters mean more cooling, less wear & tear, and lower bills.
- Clean the coils. As simple as giving them a light brush downwards. Again, this helps the AC work more efficiently.
- Give it a boost. Use a fan in combination with your AC to help cool air get across a larger room.
- Help it out. You can make your home much cooler through other means. By doing so, you’ll give your air conditioner an easier job cooling down your home. Check out our related guides below.
- Humidifier doesn’t’ have a built in humidistat? Track humidity levels with a hygrometer – available at hardware stores.
- P.A recommended humidity levels are below 60% in the summer and between 25% and 40% in the winter.
- Clean humidifier air filters and tanks regularly according to manufacturer’s directions – a dirty humidifier means dirty air.
- Always use demineralized, distilled or purified water in your humidifier – never use tap water because it gives off mineral deposits that you’ll breathe in.
- Optimal humidity level for a dehumidifier is between 30% to 50% in the summer, and between 30% and 40% in the winter. Avoid higher than 50% – it breeds mold and mildew.
- Close doors and windows while the dehumidifier is on – it will work much more efficiently and remove more moisture from the air.
- Portable dehumidifiers need to be on a level, firm surface with unobstructed air vents – clear furniture and debris away from the unit to let it ‘breathe’.
- Clean your humidifier’s water reservoir regularly to avoid mold and microbe growth. Follow manufacturer’s instructions for cleaning.
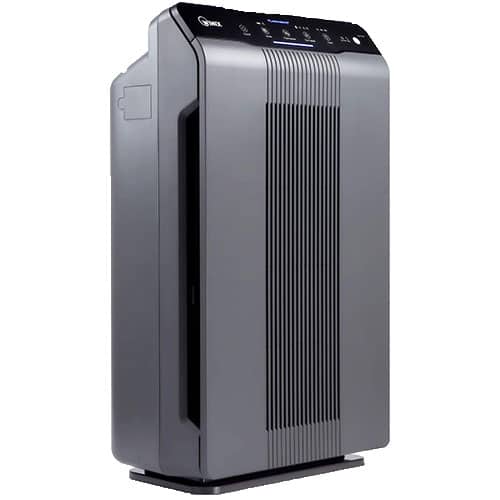
- Match pollutants in your specific atmosphere to the air purifier that you buy – different models will deal with pet dander, tobacco smoke, allergens etc.
- Consider the air purifier’s noise levels – listed in decibels in the unit’s specs. Knowing how noisy it is will help you to buy a quieter model.
- Assess the air purifier that you buy by its C.A.D.R rating – this will tell you how effective it is, and choose a purifier with an H.E.P.A rated filter, it’s the gold standard for air purity.
- Odors an issue? Buy an air purifier with an activated carbon filter.
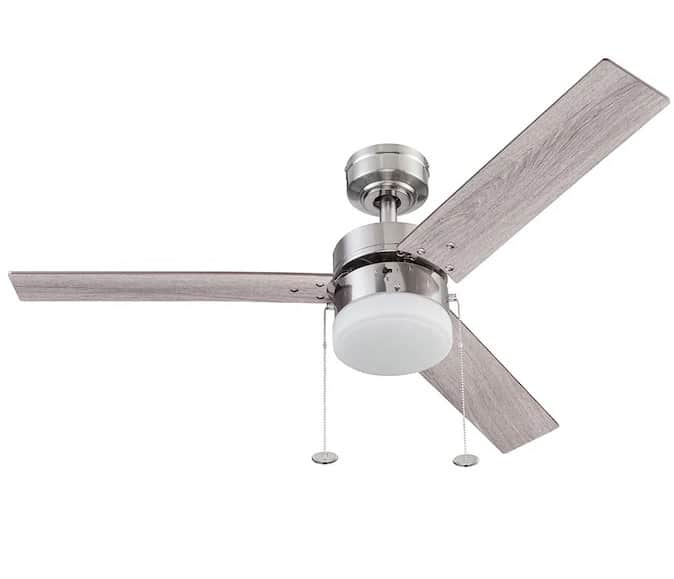
- Safety – ceiling fans should be installed at least 7 feet above the floor, and at least 24 inches away from the nearest wall or sloping ceiling.
- Low ceiling? Go for a hugger/snugger/low profile type fan with a flush mount.
- F.M numbers determine the amount of cooling, higher C.F.M = higher cooling. Aim for 6 000 – 7 000 C.F.M when you buy.
- C ceiling fan motors are the quietest AND they use less energy – up to 70% less than a standard A.C fan.
- Blades on a ceiling fan should be angled at least 12 degrees – 12 to 14 degrees is best for optimal air moving power.
- Choose a ceiling fan with adjustable modes of operation so that you can suit the warm air direction to the season and reduce your energy consumption.
- Match your ceiling fan to your ceiling fan control manufacturer – if the capacitor is meant for that specific model, you avoid buzzing noises and unnecessary repair drama.
- Remote controlled or ‘smart’ fans eliminate the need for unsightly fan pull cords and give you more control over the fan’s operation.
- High ceilings? Make sure to buy a drop rod for the ceiling fan unit if it’s not included with that specific model.
- Buy a ceiling fan with sealed bearings – your fan will run quietly and effectively for years without you having to grease the parts.
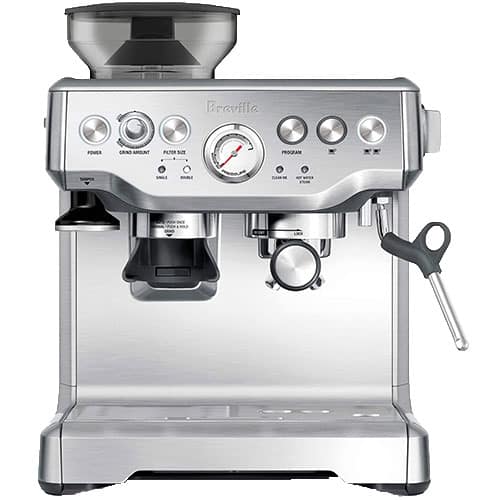
- Perfect amount for a 6 cup automatic drip coffee maker as tested by a barista? 90 grams of whole bean coffee.
- Store coffee beans/ground coffee in a dark pantry cupboard, in an opaque and airtight container to reduce flavor loss. DON’T store coffee products in the fridge or freezer.
- Espresso machines should be backwashed once a month – follow the manufacturer’s instructions in the appliance manual carefully.
- Buy espresso machine cleaning brushes for cleaning your espresso machine – they’re made to get into every nook and cranny of espresso machines easily.
- Coffee extracts best with soft, filtered water. If you live in a hard water area invest in a water filter for your coffee machine and notice the difference in your coffee quality!
- Clean your coffee apparatus thoroughly with hot soapy water and rinse thoroughly to avoid a build – up of bitter coffee oils in your machine.
- Rinse your paper filters FIRST with boiling water before using. This removes that lingering papery taste that can spoil your coffee.
- Avoid putting plastic brewing apparatus in the dishwasher, the plastic may get damaged and it absorbs the odor of the dishwashing tablets which is unpleasant tasting.
- Always preheat your coffee making apparatus before using – get everything as hot as possible so that you don’t lose heat to heating up the coffee maker.
- Digital thermometers are accurate and easy to use – get perfect temperature (205 F) for your coffee water and get a flavorful brew.
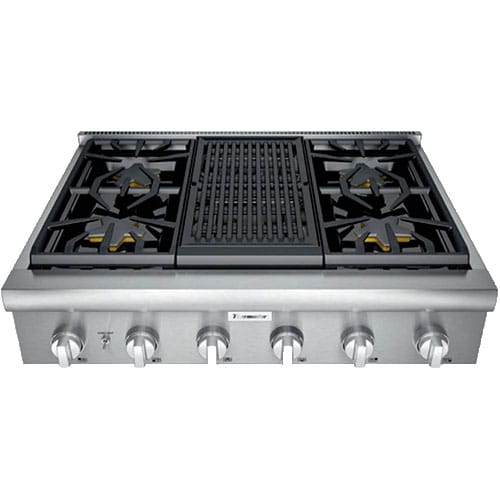
- Clean your cook top while it’s still warm – the mess and grease will come off much easier.
- Component parts of a cook top can often be removed/disassembled – soak these in hot soapy water for easier and more thorough cleaning.
- Clean promptly – messed food and stains will ‘set’ on a cook top if left over time. Try to clean as you go/after each meal.
- Burner openings on gas cook tops need to be clean and free of debris to work effectively, so check these regularly.
- Toothpicks are handy for removing food mess and grime from the gas valves if you have a gas powered cook top.
- Clean glued on mess off a glass cook top with a glass scraper held at a low angle, about 20 degrees.
- Gas offers more heat control when cooking but also requires gas supply and venting. Consider your space and budget before choosing gas.
- Induction elements are most energy efficient – saving you about 30% in energy used – remember only ferrous metal cookware like stainless steel will work on induction elements.
- Pick up pots and pans when removing them from the cook top – dragging them will scratch your cook top surface and may lead to spills.
- Protect the efficiency and look of your cook top by only using powerful but non – abrasive cleaning agents and tools.
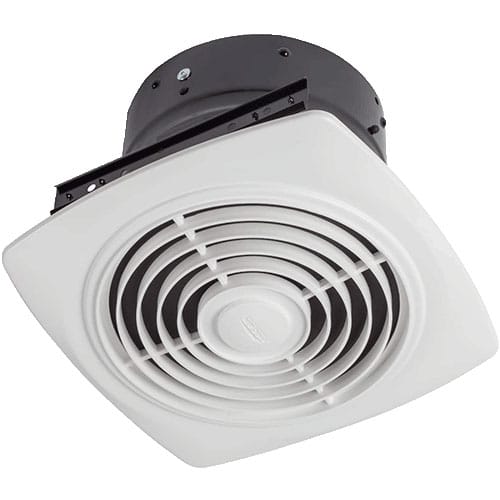
- Check how noisy the model of extractor fan is before you buy by checking its specs/manual for the decibel or sone reading.
- Consider an extractor fan with ‘heat recovery’ capability – these units expel moist air but recycle the heat, allowing for better climate control.
- Monitor the growth of mold and mildew in your ceiling/roof trusses if your extractor fan exhausts moist air into that area.
- Bathroom extractor fans should have an air flow capacity rating of 1 C.F.M (cubic feet per minute) per square foot of bathroom space.
- Extractor fans that carry an EnergyStar rating will use about 60% LESS electricity, saving you money.
- Kitchen extractor fans can often be fully dismantled for easy cleaning – use hot soapy water and tough cleaning agents, rinsing and drying off all components thoroughly when done.
- Filters need cleaning regularly. Metal mesh filters: remove and clean with hot soapy water. Paper filters: discard when very dirty and replace.
- Run your bathroom extractor fan during hot showers/baths, and for about 20 minutes afterwards to remove all steam and moisture.
- Before cleaning any type of extractor fan, ALWAYS shut if off first at the circuit board to avoid accidents.
- Exhaust fan vent pipes need to be covered by backdraft dampers – if the dampers aren’t flapping or are rusted shut, they need replacing.
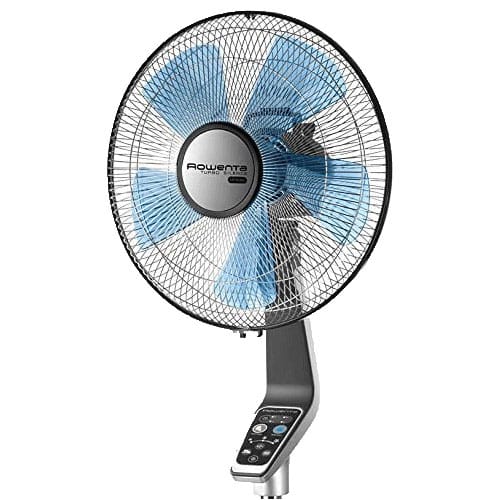
- Don’t place a plug-in fan on a counter edge or anywhere it could fall off during operation.
- Save energy and guard against accidents, never leave a fan running when you’re away from your home.
- Clean off fan blades regularly, as they can accumulate a thick layer of dust which affects your air quality.
- Place a bucket of ice in front of a fan to create a homemade air conditioner.
- Fill plastic bottles three quarters with water then freeze. Place the frozen water bottles on a tray in front of the fan to create very cold air as the fan operates.
- Fans that blow right onto you as you sleep will dry out your throat and nasal passages – rather have fans angled away from your face.
- Save on your energy bill by using a fan instead of your air conditioner – fans use a lot less electricity.
- Help your fan to keep rooms cool by closing windows, curtains/ blinds completely during the hotter months – keep sunlight and warm air out.
- Bladeless fans are a good option if you have pets or children in the home and are concerned about safety.
- Choose a tower or box fan that comes with adjustable operation and white noise settings to keep things quiet and aid sleep.
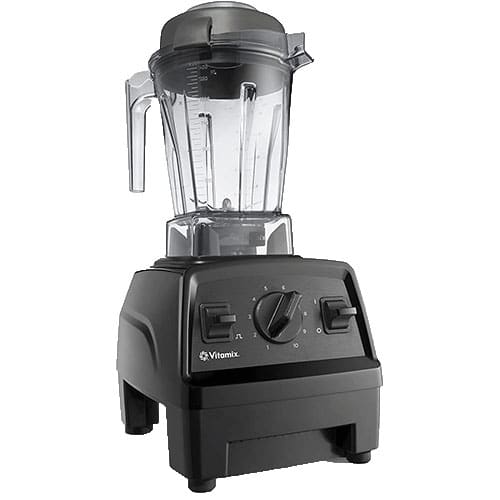
- Set the machine up with the blade sitting flush in the bowl BEFORE you add any food ingredients.
- Never fill blenders or processors more than a third full with liquid, as it will escape and leave a mess. Blend/process large amounts of liquids in batches.
- Never place hot food into a blender or processor – things like nuts straight from the oven will develop an unpleasant texture and the heat will damage plastic blades.
- Scrape down the sides of the bowl as you go, this incorporates ingredients and gives a thorough mix.
- Never insert any item or your fingers into a blender or processor while it is still plugged in to the wall socket.
- Non serrated blades on your food processor can and should be sharpened every year if you use the machine a lot. A knife sharpener can do this for you.
- Test all the attachments and ‘bits and bobs’ for your food processor or blender WITHIN the warranty period and get free replacement if something doesn’t work.
- Always be present and grasp the lid of a blender firmly whilst using – if left unattended the lid can work loose and fly off.
- Don’t immerse the base of your blender or processor in water, you can get an electrical shock and it will damage your appliance.
- Overload protection is not standard on food blenders/processors, so don’t run the motor longer than needed as it can burn out – a costly repair.
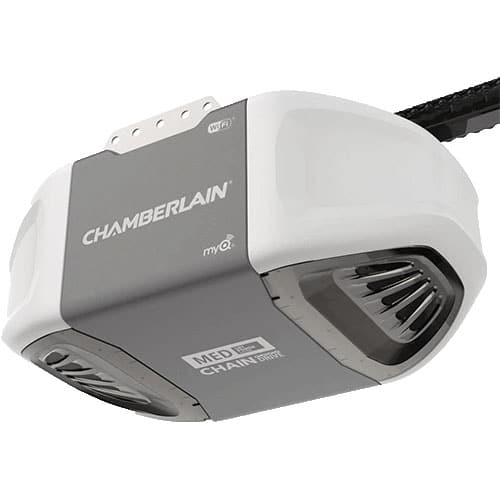
- Chain driven garage door openers are noisy – best for detached garages. Want quiet operation? Go for belt or jackshaft driven models.
- NEVER attempt to adjust or fix the springs yourself, they are under HUGE amounts of tension and can easily kill you. Springs problem? Call a professional.
- Check the ‘headroom’ of your garage before you buy a garage door opener – it needs 10 – 12 inches of overhead clearance space so measure first and take advice from installers.
- ‘Smart’ garage door openers are competitively priced and handy – open/close your door remotely, get security warnings, and control access via your phone/device even when you’re away.
- Battery back – up will save you during a power outage, ensure your opener comes with a battery back – up included in the sales price.
- Never remove or tamper with the red emergency release cord/handle. It disengages the opener if somebody gets stuck under the door and is a critical safety feature.
- Keep the roller tracks of the door clear of dirt and obstruction, move away brooms, fishing rods etc. as these can get stuck in the tracks and damage the opener and door.
- Change the batteries in your remote and clean the eye sensors near the bottom of the door if it’s not opening – you may save the cost of a technician.
- Locks getting sticky? Don’t use WD40 it’ll gum your garage locks up worse over time. Instead use graphite powder from a hardware store.
- Match garage door opener to door – the heavier the door, the more powerful the motor you’ll need. If the motor is insufficient to lift a heavy door, you’ll have constant problems.
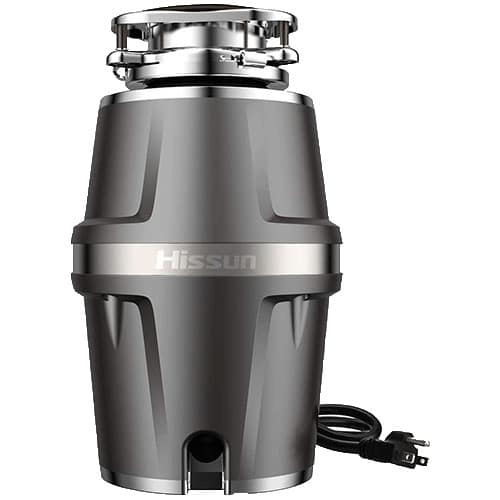
- Run your garbage disposal regularly – this prevents rust and avoids food and debris build – up.
- Grind up tougher materials like small bones and egg shells occasionally, these hard substances scour and clean the inside of the garbage disposal.
- Garbage disposals are for food/biodegradable waste ONLY – nothing else like food packaging etc. should go into your disposal.
- Large items going into your disposal need to be cut up into smaller pieces first, don’t try to force big pieces of food into the machine.
- Avoid using the disposal for large animal bones or expandable foods that absorb liquid like rice or pasta, these will clog the disposal.
- Run your taps for a couple of seconds AFTER the garbage disposal is finished grinding – this flushes the disposal out and keeps it clear of debris.
- Harsh chemicals like drain cleaners or bleach will damage disposal pipes and blades. Rather use borax or a detergent made for garbage disposals.
- Ice collects grease and scours the disposal so throw in a large handful of ice cubes and run the disposal afterwards for easy cleaning.
- Odors can be sorted by pouring a cup of baking soda into the drain and then waiting an hour or two before you use the taps or disposal again.
- Never dump any type of grease into the disposal – it will smell unpleasant and clog up your drain line. Put grease/oil into a Ziploc bag and dispose of it elsewhere.
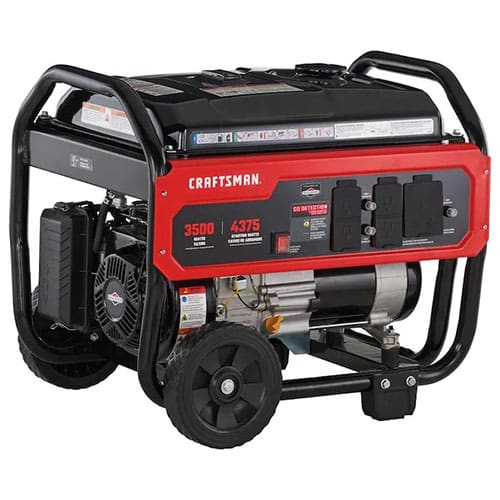
- Storing a generator? Drain the fuel first before storing OR add a fuel stabilizer to prolong its shelf life. The oil tank should also be drained.
- Extension cords for generators need to be heavy duty/’generator grade’ and rated for the amps you expect the machine to generate.
- Gasoline for your generator can only be stored for 3 – 6 months before it spoils. Propane gas can be stored for many years without spoilage.
- Generators should never be used indoors and need a well ventilated outdoor area to avoid a build – up of lethal carbon monoxide.
- Never plug a generator into the wall outlet of your home – this can overload your home circuitry and cause a fire.
- To avoid shock never touch a generator with wet hands, and don’t use a generator in rainy or wet conditions.
- Always place a generator on firm, dry ground to avoid the risk of damage to the appliance and electrical shock.
- Safety first – turn the generator on BEFORE plugging in appliances, and turn appliances/lights on one at a time to avoid overloading the unit.
- Generator components will get very hot during operation – keep children and pets clear of the machine.
- Before fueling a generator, make sure that it is turned off and cool to the touch to avoid sparking or fire.
- Keep extra spark plugs, oil filters, oil and gas on hand for extended power outages/emergency requirements.
- Heavily populated area? Chain and padlock your generator to a stationary object to prevent theft.
- CO2 detectors are recommended if you’re going to be using a generator. Battery operated detectors are inexpensive and easy to install.
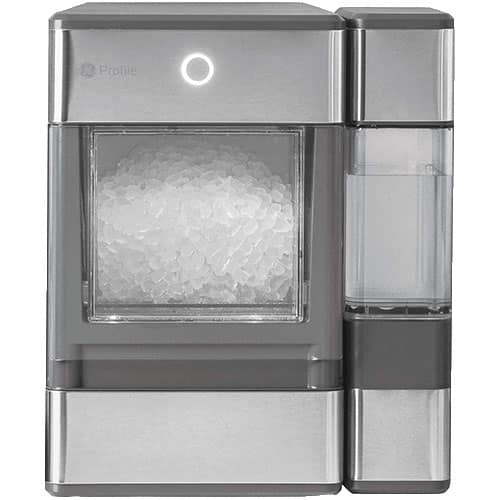
- Replace your water filter every 6 months – you’ll have a steady, clean supply of fresh ice and you’ll protect your health.
- Keep your freezer ¾ full of food – this stops the freezer from defrosting too often and forming icy blockages from melted water.
- Turn your ice maker ‘off’ and ‘on’ only as needed. This prevents an overfull ice bin and ice clumping together.
- Check your water supply line as it feeds your ice maker – it should be clear of blockages, without holes and not twisted or damaged.
- Clean/Disinfect your ice bin – use one part warm water to one part vinegar. Wash out well, rinse off, and dry thoroughly before returning to the fridge.
- Carefully break up blockages or large clumps of ice with a wooden spoon – never use metal implements to pry ice out of your fridge; you risk shock and damaging the finish of your unit.
- Before cleaning/maintaining/repairing an ice maker, place old towels or newspapers under the fridge FIRST, this prevents mess and soaks up leaks – which prevents slip n’ fall accidents.
- Shake up your ice bin now and again – this prevents ice clumping together into huge pieces that are a pain to separate and remove.
- Empty out the ice bin completely once a month, this helps prevent build – up and clumps from becoming frozen in and hard to remove.
- Thaw a frozen water supply line gently with a hairdryer on the ‘warm’ setting.
- Test all the functions on your KitchenAid mixer within the warranty period – that way if anything is wrong you get it fixed free.
- Chill your beater/whisk attachments in the freezer before using on cream – your whipped cream will rise a lot more and you’ll get a good whip quicker.
- Buy the KitchenAid Ice Cream Maker Attachment and turn your regular stand mixer into an ice cream maker – it’s easy to clean and you have 1 less appliance to store.
- Use a large shower cap or a dust cover to protect your KitchenAid mixer and its attachments from grease, grime and dust.
- Use a dishtowel to put over the bowl during heavy mixing if you’re worried about splashes and mess.
- After use and cleaning, store all the attachments for the mixer in the bowl of the mixer itself – this will prevent you misplacing them.
- Place newspaper or an old towel under your mixer during use to prevent slippage and absorb any mess.
- Shred cooked chicken, pork, or beef easily, just use the dough hook attachment on your KitchenAid mixer for about 20 seconds.
- Splurge on the KitchenAid ‘flex paddle’ attachment – no more scraping the sides of the bowl halfway through your cookie dough prep!
- Grease your KitchenAid mixer parts annually with ‘food grade’ oil or grease – this’ll keep it working smoothly. Remove old grease or drips easily with a P.V.C spatula.
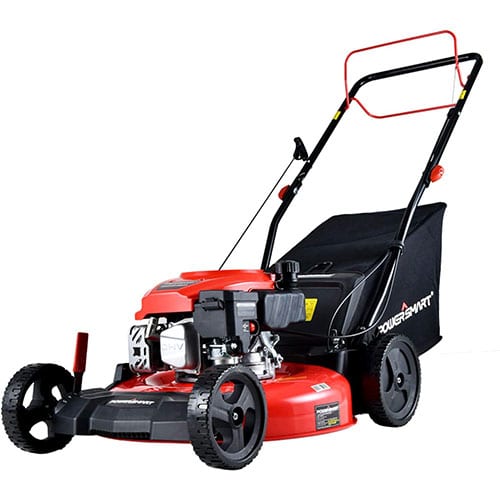
- One third rule – for a healthy lawn, never cut your lawn more than one third of a grass blade down at one time.
- Gas powered lawn mowers need more maintenance than other types – so consider your technical skill/free time when buying.
- Sharpen your lawn mower blades once or twice a year – dull blades tear and damage the grass instead of cutting it cleanly.
- Spark plugs should be changed annually to keep your lawn mower in tip top shape.
- Remove gas from your lawn mower when mowing season is over. Gas goes bad and damages the mower if it’s left to sit in the machine.
- Inflatable tires on lawn mowers need to be checked for full inflation – full tires make the mower easier to handle and give a better mow.
- Battery powered mowers – remove the battery during the winter, and charge up the battery a couple of times during winter to keep it charged.
- Air filters need to be checked and replaced if necessary once a year. The filter should be free of debris and clumped matter.
- Wear long, sturdy pants while mowing – most lawn mowers cast up debris, stones etc. that may injure you otherwise.
- Never use a lawn mower on wet grass – if it’s electric you risk shock, and you can easily slip and hurt yourself on wet grass.
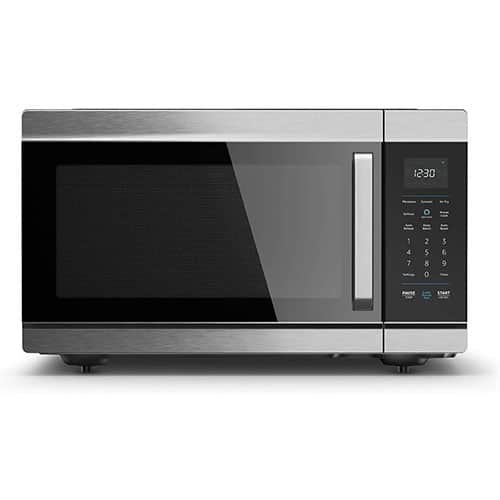
- Never run your microwave empty – this damages the magnetron. Use your microwave as a timer only if it has a separate timer that works without running the machine.
- Use the preset cooking modes on your microwave – they’re designed to minimize energy use and heat your food effectively.
- Don’t open the microwave door while it’s running – this could cause a blown safety fuse which is dangerous and means an unwanted repair.
- Power surges are especially damaging to microwaves. Install a surge protector or unplug your microwave between uses.
- Capacitors in microwaves store a large charge even after being unplugged – to avoid shock and injury contact an electrician for electrical problems.
- Charcoal filters in your microwave are easy to replace. If the filter is greasy/microwave smells bad, replace the filter and solve these problems inexpensively.
- Avoid fire or explosions and NEVER put metal into a microwave – this includes cutlery, aluminum foil or dishes with gold or silver accents.
- Microwave splatter covers are inexpensive, easy to use, and save a lot of cleaning time and effort.
- Microwave steam covers/dishes are inexpensive, easy to use, and give you healthy, nutrient rich food cooked quickly with less fat.
- Easy Cleaning: 1 cup vinegar + 1 cup hot water in a large bowl, microwave on high for 2 minutes, then remove and clean the inside of the microwave as usual.
- Wipe up spills in the microwave immediately, use warm soapy water and gentle cleaners on your microwave – avoiding abrasive cleaners will protect the finish of your appliance.
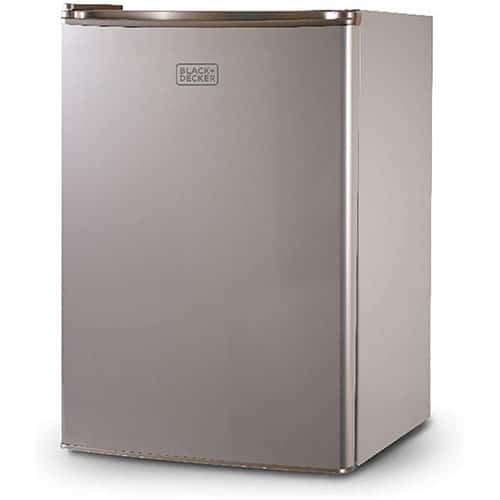
- Egg carton door liner – line your fridge door with the bottom tray of an egg carton (remove the lid part) – store condiment bottles upside down with no drips/toppling over.
- Bottles – if they’re too tall to stand in your mini fridge, stack them in a pyramid shape on their sides.
- Energy bill economy – Think twice before purchasing! Regular sized energy efficient fridge/freezers often use the same amount of power as a mini fridge.
- Placement – never place a mini fridge on its back or tilt it more than 45 degrees to save space, it damages the compressor.
- Save space by looking at ‘under the counter’ models of mini fridges and rethinking your living area.
- College students often have mini fridges going cheap end semester/end of year. Keep an eye on local ads during ‘end of study year’ periods.
- Limited space in a mini fridge? – Pack effectively, label with expiration dates, avoid bulky takeaways, buy small amounts of fresh food regularly.
- Check your fridge seal – close the fridge door on a piece of paper. When you pull on/remove the paper there should be resistance and gripping, if not your door seal needs repair/replacement.
- Condenser coils at the back of the fridge must be wiped down/vacuumed regularly – this ensures good cooling power.
- Transported/stored a mini fridge on its side? You need to stand it upright for 24 hours BEFORE plugging it in. This avoids compressor problems.
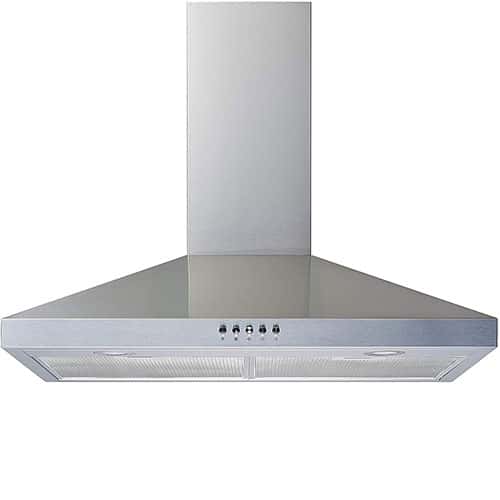
- Size – for wall mounted hoods the hood should be the same size as your stove or even better, slightly bigger.
- Island mounted hoods should overlap the stove on each side by at least 3 to 6 inches to trap heat, grease and odors effectively.
- Clean range hood filters regularly to keep them working well and save money on repairs to the whole unit.
- Mesh type filters trap more grease than baffle type filters and are usually cheaper over the long run.
- Professional level range hoods are expensive and only necessary if you cook professionally or in very large quantities. For most householders a regular range hood does the job beautifully.
- Check your city ordinances before deciding the blower power of your range hood, there may be restrictions on the noise levels allowed in built up areas.
- Range hoods should be placed with a distance of 24 inches to 30 inches between the hood and the ceiling for safety and optimal operation.
- Cleaning a kitchen with a range hood is much quicker and easier as the hood eliminates a lot of grease and bad odor.
- Check the C.F.M rating with the retailer to ensure that it’s high enough for your kitchen’s needs – a C.F.M rating of above 900 C.F.M is considered best.
- Ducted hoods are more powerful so choose this option over ductless if you have space for ducting. For apartments, go ductless with a good C.F.M rating.
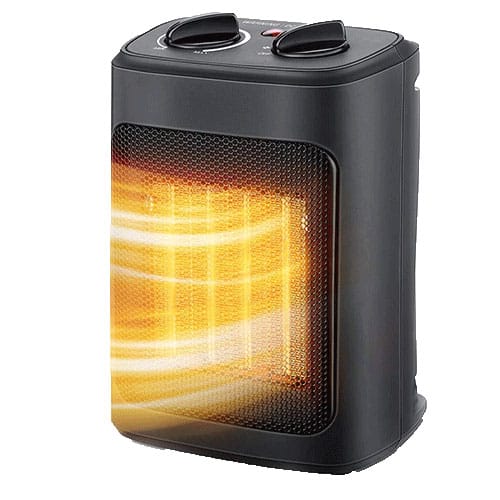
- Avoid ceramic heaters. While the most popular option, ceramic heaters are also the most expensive to run. Infrared and oil-filled heaters are much more efficient – giving you similar heat for lower costs.
- Focus on heating a smaller space. A space heater should add heat to a room, not a whole house. Close doors and curtains, and do anything else you can to isolate the area that’s to be heated.
- Aim to use a wall socket. This is more efficient than plugging the heater into a long extension cord.
- Give the heater room to breathe. Placing it next to objects – especially clothes or similar material – is a fire hazard, and at the least could simply end up heating that object.
- Use a heater with a thermostat. You’ll use only the power needed to be comfortable, rather than running it on hot until you’re sweating.
- Combine with your furnace. Having your home furnace on low and a space heater in your favorite area will be much cheaper than running your whole central heating on high.
Protect children and pets. Look for heaters which are ‘cool-touch’ or with a safety guard on the heating element. Make sure they also have tip-over and overheating safety shut-offs.
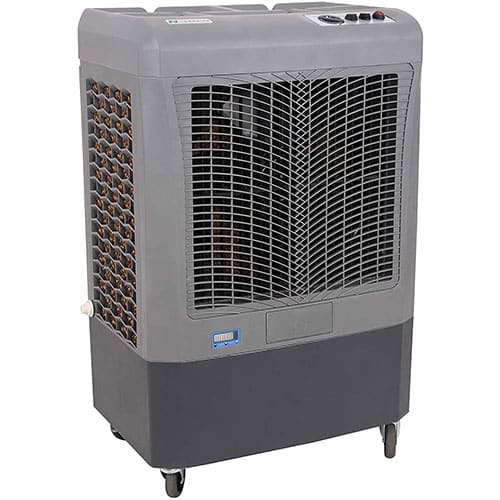
- Buy a swamp cooler only if you live in an area with low humidity – those are the conditions they’re designed for.
- Leave a window slightly open in a room where a swamp cooler is operating to assist in the flow of air/make cooling most effective.
- Ground mounted horizontal coolers are easier to maintain and avoid roof leaks that may occur from roof mounted cooler units.
- Buy a swamp cooler with a ‘vent only’ function – you can use it as a whole house fan during mild weather.
- Add optional air filters to your cooler unit if you suffer from allergies and breathing problems. Filters also reduce the unit pulling water and can be fitted during/after installation.
- Drain and clean your swamp cooler regularly as part of routine maintenance and this will keep it working well and keep it energy efficient.
- Disconnect the swamp cooler entirely from the power outlet before attempting any cleaning or maintenance to guard against electrical shock.
- Wait 15 minutes for the cooling pads to absorb the water in the reservoir BEFORE you switch the fan on. This saves you wasting electricity on blowing hot air around.
- Tests show that cold tap temperature water works most efficiently in a swamp cooler for optimal cooling.
- Don’t store your swamp cooler without cleaning it and draining the water first. Allow it to dry out thoroughly before packing away.
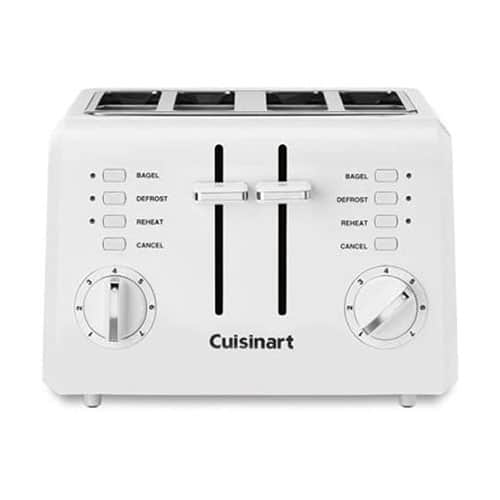
- Unplug a toaster and wait for it to cool down BEFORE attempting to clean it. Shock/burns are no joke!
- Use an old toothbrush or a soft scrubbing brush to gently remove grime and stuck on crumbs from your toaster and crumb tray.
- Clean the outside of a stainless steel toaster with vinegar and a soft cloth to make it shiny clean and preserve the finish.
- Choose a toaster with a wider or adjustable slot size to allow for thicker bread items like bagels or waffles – this gives variety to your meal choices.
- Never be tempted to ‘hack’ buttered bread in a toaster – the butter will melt, scorch, and you could start a fire. It’ll also make a mess.
- Keep your bread in the freezer, it lasts so much longer – just pop the frozen slices straight into the toaster and enjoy, no thawing needed.
- Never put metal implements like forks into a toaster that is plugged in, you will get an electrical shock.
- Never be tempted to use a toaster resting on its side – it will not transform into a mini pizza oven, it will make a drippy mess and may start a fire.
- Use and adjust your factory given toaster settings – they’re there to make sure you get perfectly done toast every time.
- Remove your toaster plug gently from the wall socket by its base, never jerk or pull on the toaster cord as this leads to wear and damage.
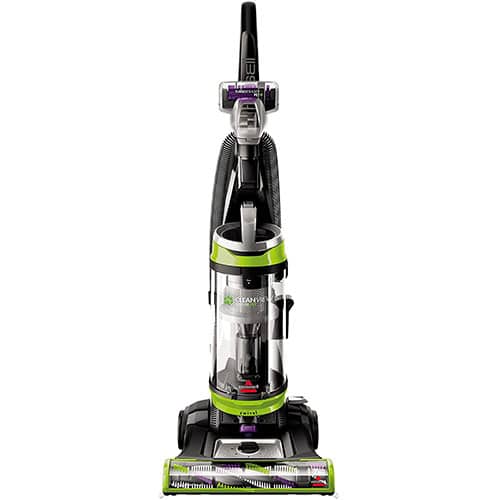
- Scented tumble dryer sheets are good deodorizers – just put one into your vacuum cleaner dust bag/canister.
- Replace your vacuum cleaner bags regularly – it will prolong the life of your machine and make your air smell fresher.
- Remove clutter and small objects from the floor before you vacuum, small items sucked up by your machine can damage it internally.
- Allergy/Asthma sufferers are recommended H.E.P.A rated vacuum cleaners – these help control allergens and dust mites.
- Brush rolls should be removed entirely (consult your manual) and cleaned off thoroughly, use scissors to cut through stuck on gunk.
- Hoses need to be kept unclogged and free of holes or worn areas. If your hose is clogged remove obstructions with a bent wire hanger.
- Change or empty vacuum cleaner bags outdoors to prevent dust spreading. Or, use a large garbage bag to empty into indoors.
- Avoid damp and wet on the inner cyclone, shroud and cone of your vacuum cleaner. These must stay dry to avoid attracting dust.
- Motor belts can wear, but are easily and cheaply replaced. Change your motor belt if your vacuum isn’t cleaning as effectively as it used to.
- Store your vacuum cleaner in a temperate and dry place – changes in temperature will crack or damage your machine or its belt.
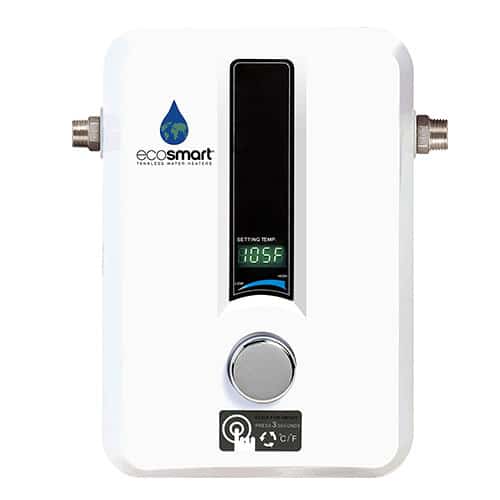
- Save money – drain your water heater annually and clean it out. Sediment stops the water heater from working well and raises your power bill.
- Replace the anode rod in your water heater every 5 years to stop rust/corrosion destroying the inside of your water tank.
- Insulate your water tank pipes and avoid water freezing and causing expensive to replace and messy burst piping.
- Lower your energy bill by insulating your water tank – your water heater will have to work less, saving on energy consumption.
- Lower the temperature of your water heater to 120 degrees – ample heat for all your needs, lowers your energy bill, and avoids scalding and burns.
- Gas water heaters need their gas burners cleaned of carbon residue and dirt build up to work effectively – clean the burners every couple of months.
- Reduce fire risk by keeping the area around the water heater free from debris, other appliances, and built up dust and dirt.
- Heat traps can be installed on water heaters – they save on your electricity bill so speak to a technician for advice.
- Plumbing leaks either on the tank itself or inside the home waste water and energy – get these repaired promptly and save.
- Install a timer on your water heater to both lengthen the lifespan of the appliance and save big on your energy consumption.
- Factor in the cost of installing a gas line if you’re going with a gas water heater – it will affect your project cost significantly.
- Dropping from 50 gallon to 40 gallon water tanks has saved many users money without affecting their hot water supply – 40 gallons may be all you need.
- Avoid replacing the whole unit and check your elements first if you have water heater problems – it may be a cheap and easy fix.
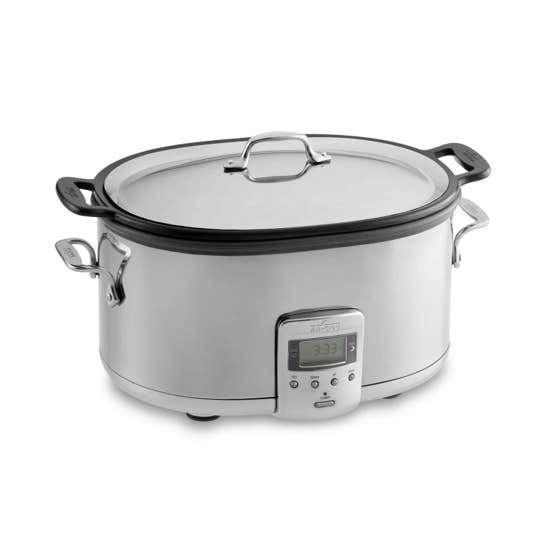
- Buy a slow cooker with a removable inner pot, you’ll save time and effort on cleaning and most inner pots are dishwasher safe too.
- Save time by prepping all your ingredients the night before, store in the fridge and then just add to the slow cooker in the morning.
- Best meats for a slow cooker are thick cuts, or sinewy, tough cuts with high muscle content like shanks. Fattier cuts like breast will tend to overcook and lose texture from slow cooking.
- Don’t overfill your slow cooker, you’ll end up with mess and burnt on food on the sides and base of your slow cooker.
- Clean tough stains off with a ball of aluminum foil and detergent or a paste made from water and baking soda. Leave the paste on for 20 minutes before cleaning.
- Use slow cooker liners if you hate cleaning – they’re relatively cheap and save you a job.
- Put hot water and detergent into a dirty slow cooker for 30 minutes on high, then discard water and clean as usual. The caked on food will come off easier.
- Vinegar in a slow cooker for 20 minutes on high will remove burnt and caked on food effectively. When done discard the vinegar and clean as usual.
- Never wash stoneware from your cooker in cold water while it is still hot, this will crack and damage your appliance.
- Don’t fiddle with or open your slow cooker while it cooks, you’re releasing heat and slowing cooking time. Only check on progress once near the end of the cooking time.
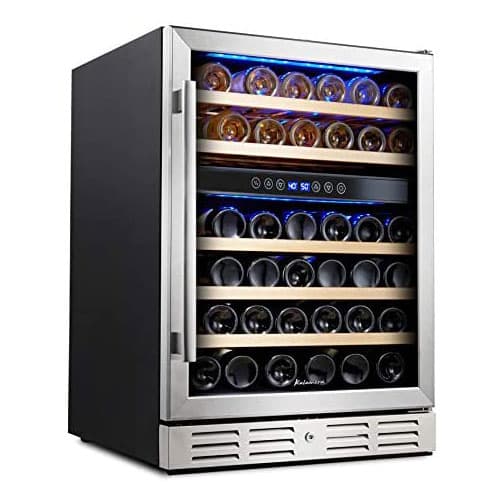
- Temperature – store red wine between 50 degrees F and 65 degrees F, white wine between 45 degrees F and 50 degrees F, sparkling wines at 40 degrees F.
- Light destroys wine – keep your wine cooler in a dark area and away from sun to protect your wine from U.V.A ray damage.
- Store unopened bottles on their sides both to save space and to keep the cork moist.
- Vibration and movement can stir up sediment in your wine – don’t move bottles around and store the wine cooler on a flat, level and firm surface away from music equipment etc.
- Steady temperatures are essential for wine as it expands and contracts with heat changes. Check the cooler temperature regularly and avoid fluctuations to preserve your wine.
- LED lighting inside your cooler will save energy and preserve your wine from U.V.A damage.
- Buy a cooler with the capacity to chill and store enough wine for your consumption AND for your wine collection as it grows.
- Check the drip tray for overflow and dry out if needed – excess moisture will lead to odor and leakage from the cooler.
- Remove smudges on your cooler’s glass doors by rubbing down with vinegar soaked newspaper – quick cleaning and no streaks!
- Wine coolers are incredibly versatile – use for storing cheese, charcuterie, medications, soft drinks, cosmetics or snacks. Easy D.I.Y repurposing info is available online.