We've independently reviewed this article to make sure it's as accurate as we can make it.
To find out more about our article creation and review process, check out our editorial guidelines.
Is your swamp cooler leaking water?
Unfortunately, I’ve been there too. I know how frustrating it can be to have this happen. After all, swamp coolers should make our lives easier, not the opposite.
The good news is that you’ve come to the right place to get this issue fixed.
If your swamp cooler is leaking water, you’ll need to check the water supply, reservoir, and drain plug. Don’t forget to inspect the water pump, float switch, and distributor lines.
Keep reading to stop your swamp cooler from leaking water!
How to Fix a Swamp Cooler That Is Leaking Water: 5 Steps
As a swamp cooler owner, you well know part of the magic of the swamp cooler is the evaporative process involved. Yes, that hot air evaporating cold water and blowing out cool air as final product.

It truly is a remarkably simple process. As long as it works. However, with appliances comes the possibility of wear and tear, equipment damage, and, when water’s involved, leaks.
So, let’s take a look at where swamp coolers are likely to leak and how to fix them.
#1 Check the Water Supply
If your swamp cooler is leaking, the first thing to check is the water supply. If your swamp cooler is a portable type that’s filled with water by hand, clearly your hand isn’t the issue.
However, if you have a swamp cooler that has a hose connection or has a supply line that’s hard-piped to the cooler, it’s time to inspect that connection.
If it’s a hose, inspect the hose for damage and cuts. You can repair a hose but it may be just as cost-effective (and time-saving) to simply replace it.
This is especially true if the hose is constantly exposed to weather and the sun. The damage inflicted, if due to deterioration, probably will only get worse.
Also, this doesn’t have to be a garden hose. Some units have a water hook-up similar to the tubing you’d find on a refrigerator for an ice maker or water dispenser. The principle remains the same, though, in that it’s usually easier to replace than repair.
If the connection is hard-piped, you might be dealing with something like a pinhole leak. These types of leaks are easily repaired. However, if you don’t know how to repair a leak on copper or PVC piping (depending on what your unit has) a plumber can usually do it in no time at all.
Lastly, also check any valves in the supply line. Valves form junctions, so it’s not uncommon to find leaks at such junctions.
#2 Inspect Your Reservoir
If a swamp cooler’s leaking, a good chance is it’s leaking somewhere in the reservoir. This is a big reason for leaks on exterior coolers that are exposed to the weather on a regular basis.
Why?
Besides the normal wear from weather, you’re also dealing with things like exterior heat and interior cool water, causing normal expansion and contraction. In my experience, seems in the reservoir can fatigue and crack, leading to leaks over time.
If leaks are allowed to go on for a while, small cracks become bigger cracks and small leaks become bigger leaks.
Leaks in the reservoir that are bad can often require replacing the reservoir if that’s possible. If the leaks are due to corrosion and the corrosion has spread thoroughly throughout the unit, the entire unit may need to be replaced.
However, let’s deal with small cracks. If you discover any, they can be fixed with a product such as a cooler coating sealant. These products are designed to not only seal the reservoirs of coolers but also inhibit corrosion, resist moisture, and protect your equipment.
Because the sealant is long-lasting, you shouldn’t have to apply it on a regular basis. However, it’s a good idea to do an application any time you discover an issue. Also, inspect old sealant before the start of your hot season to make sure it’s still serviceable.
Now, if you have a portable swamp cooler, you may be dealing with a removable plastic reservoir. If you find a leak with it due to cracks, you’ll probably have to replace it based on the manufacturer’s recommendations and availability of replacement parts.
#3 Check Your Drain Plug
This is a quick check and possibly the quick fix you’re looking for. Like other areas of your cooler, corrosion and build up can cause a drain plug not to seal properly.
If the drain plug is damaged, you may only need to replace it and move on.
If, however, the area around the plug is corroded and impacted the functionality of the plug, like dealing with crack, you’ll have to clean the area around the plug and put sealant down before replacing the plug.
#4 Check the Float Switch
If your swamp cooler is still leaking water, it’s also important to check the float switch.
This component is responsible for monitoring the water level in the reservoir and telling the pump when water is present or not.
Unfortunately, if the float switch is faulty or stuck, it may shut off the pump, resulting in leaking water.
Please clean the float switch or replace it with a new one if it’s damaged.
#5 Inspect the Water Pump and Distributor Lines
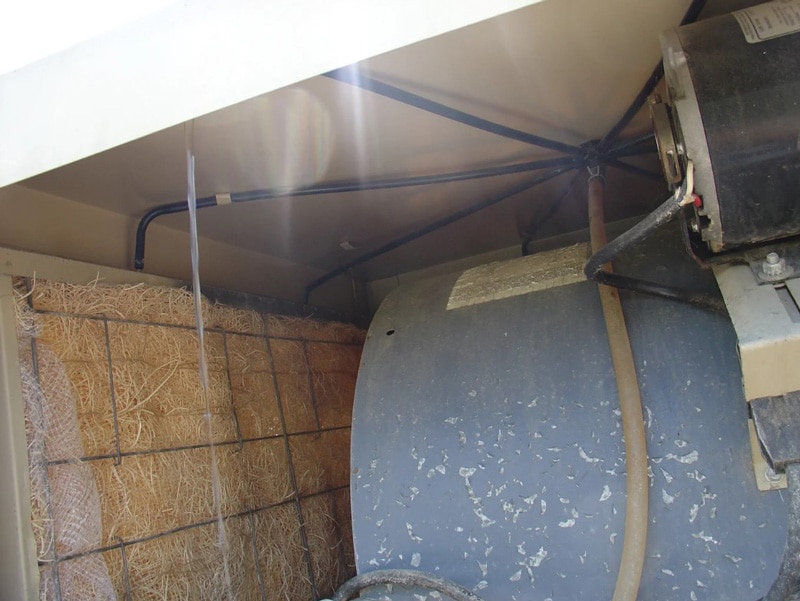
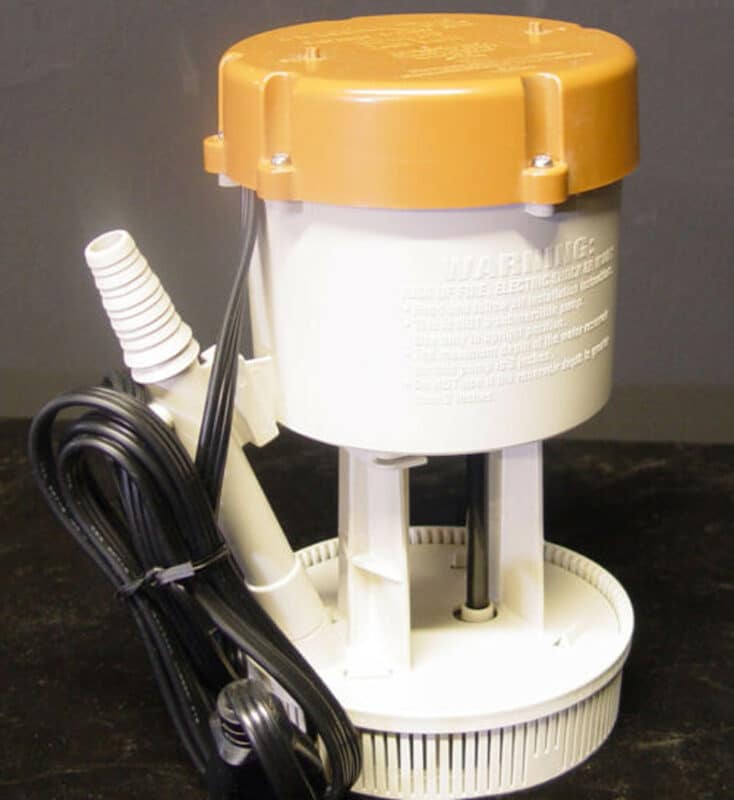
If you’ve got internal leaks around the water pump or with the water distributor lines, this is a good time to repair or replace the source of those leaks as well.
No, those leaks probably won’t lead to leaks outside the cooler right away. However, if you’re getting your swamp cooler in the best shape possible and inspect all aspects of the water side of it, you should fix these types of leaks as well.
Also, if these types of leaks are due to corrosion, you definitely want to clean and fix them so that corrosion doesn’t spread to other parts of the cooler.

Lastly, it’s just good practice to find problems and fix them when you can. It’s good for the equipment and great for your return on investment.
How to Prevent Leaks in the Future
The best way to fix a leak is to prevent one from ever happening.
Sounds great, right? As if you can tell exactly where a leak will occur and get out in front of it like some kind of swamp cooler mystic.
No, you can’t see the future of your swamp cooler. However, that doesn’t mean there aren’t steps you can take to ensure your swamp cooler avoids unnecessary issues that lead to leaks.
The good news is that almost all the things you can do should be part of your preventative maintenance routine already.
What are they?
- Inspect your swamp cooler on a regular basis. This is a big one, especially before you start using it on a regular basis (i.e., taking it out of a winter storage set-up). Besides inspecting the electrical side, you should also be checking the water side, including tubing, hoses, connections, etc. Look for damage and deterioration that can lead to a leak or already is a leak you never noticed before.
- Replace water components ahead of time. Besides changing your water pads on a routine basis, you should also repair or replace other components ahead of time if any issues are detected early. Parts go bad and if they involve water, leaks will usually occur. Leaks let you know something’s wrong. If you find something wrong, take care of it.
- Don’t let water sit in your swamp cooler if it’s not in use. Stagnate water can lead to build-up and corrosion. Both can lead to poor equipment performance, leaks, damage, and eventually an equipment casualty that result in costly repairs or total unit replacement.
- Clean, clean, clean. It’s one thing to replace your water pads and clean your reservoir from time to time. It’s another to routinely clean out your water tubing, impeller screen, and chase down corrosion and mineral deposits. However, performing the latter will help prevent leaks if you stay on top of it.
Conclusion
Leaks on appliances are always a cause for concern. With a swamp cooler, however, it could be the difference between a simple fix and having to replace your entire unit.
Therefore, finding leaks and fixing them is the best policy if you want to keep your swamp cooler operational and working for you during the hottest times of the year.
That being said, not all leaks can be fixed on your own. You’ll definitely have to weigh your ability to fix it versus calling for help from a technician. Always use your best judgment considering how bad the leak is and where on the cooler it’s located.
Lastly, don’t forget your warranty if you have one. You may not have to pay for any repairs out of pocket and if the unit is too far gone, a replacement option may be in the cards for you.
Thank you so much for reading, if you found this article helpful, please check out our other related posts below!


