Is your range hood leaking grease?
That sucks! I understand how annoying it can be when your range hood starts leaking grease, especially right after you’ve just finished cleaning the kitchen.
The good news is that you’ve come to the right place to fix the issue.
If there’s grease raining from your range hood, you’ll need to clean the filters and cup or tray. If the issue persists, it’s important to adjust the settings, inspect the duct, and examine the fan to ensure proper airflow and ventilation.
Keep reading to learn how to keep your range hood from leaking grease!
Addressing Grease Leaks in Your Range Hood: 5 Steps
Unfortunately, grease leakage is a common issue, especially when range hoods aren’t cleaned regularly or when there’s a problem with the ventilation system.
But don’t worry. In this section, I’ll walk you through the five steps you must follow to prevent grease from leaking out of your range hood.
Keep in mind that fixing the problem will require accessing certain internal components, such as the filters and fan. So, having the owner’s manual handy is essential.

Are you ready? Let’s get started!
#1 Clean the Filter
I’ve found that when a range hood leaks grease, it’s typically due to a dirty filter.
As cooking vapors are drawn in, your range hood’s filter captures grease particles to prevent them from accumulating in your kitchen or clogging up the ductwork.
Unfortunately, if you haven’t cleaned the filter in a while, it won’t effectively trap grease anymore. As a result, grease will accumulate and eventually start dripping, affecting the range hood’s efficiency.
To solve the grease leakage problem, you’ll need to clean your range hood’s filter. Here’s how:
- Unplug your range hood from its power source or turn it off at the circuit breaker. Make sure to let it cool down before removing the filter.
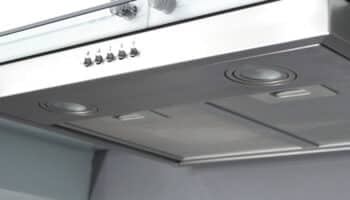
- Locate the filter, which is typically directly underneath the hood. Then, remove the filter by gently sliding it out or pressing the latch.
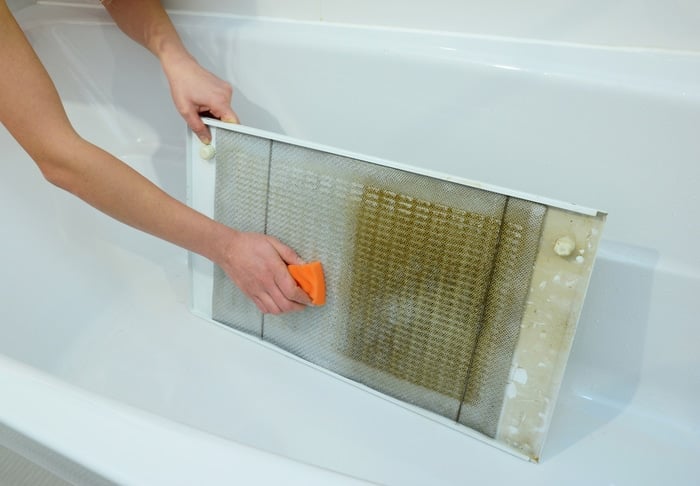
- Fill the kitchen sink with hot (but not boiling) water and add a generous amount of dish soap and 1/2 cup baking soda. Use a fork or spoon to stir the water until it becomes soapy.
- Soak the filter in the soapy water for a couple of hours. If you’ve never cleaned the filter before, it’s best to let it sit overnight.
- Use an old toothbrush to gently scrub the filter and remove any grease buildup. If necessary, use a kitchen degreaser.
- Rinse the filter with warm water and let it air dry to prevent mold growth.
- Once the filter is dry, reinsert it into the range hood.
To ensure your range hood’s efficiency and keep your kitchen clean, I recommend cleaning the filter every month.
While cleaning the filter, it’s also important to visually inspect it. If you find any signs of damage, such as holes, you’ll need to replace it with a new one.

Note: Keep in mind that some range hood filters are dishwasher-safe. To check if yours is, simply refer to the manufacturer’s manual or look for a “dishwasher safe” label or symbol.
#2 Clean the Grease Cup or Tray
If your range hood has a grease cup or tray, it’s important to clean it regularly to prevent leaks.
A grease cup or tray is a component found in certain range hoods, especially in commercial, high-end, and ductless models. It is responsible for collecting excess grease that wasn’t trapped by the filter.
If you haven’t cleaned the grease cup or tray in a while, it can overflow and cause your range hood to leak.
Note: To determine whether your range hood has a grease cup or tray, please refer to the manufacturer’s manual.
Follow these simple instructions to clean your range hood’s grease cup or tray:
- Turn off your range hood at the circuit breaker.
- Remove the grease filter and locate the grease cup or tray, which is typically near the fan or blower assembly. The exact location will vary depending on your range hood’s model, so please read the owner’s manual for detailed instructions.
- Carefully remove the grease cup/tray.
- Empty the grease cup. Pour the grease into a disposable container and let it solidify before disposing of it. Do not pour grease down the sink.
- Fill your kitchen sink with warm water and a good amount of dish soap. Let the grease cup or tray sit for a few hours or overnight.
- Use an old toothbrush to scrub the cup or tray gently. For stubborn residues, consider using a commercial kitchen degreaser.
- Rinse the grease cup or tray with warm water and let it dry to prevent mold. You can use a microfiber cloth to speed up the drying process.
- Place the grease cup or tray back into its original position.
If you cook regularly or prepare dishes that generate a lot of grease, consider cleaning the grease tray or cup every two weeks or once a month.
#3 Adjust the Fan Settings
In my experience, using the wrong fan settings can also cause your range hood to leak grease.
You see, the fan settings play a crucial role in how efficiently your range hood draws in cooking vapors and captures grease.
If the fan speed is too low, especially when you’re deep-frying food, it won’t effectively capture all the grease. As a result, grease can accumulate on the hood’s surface, filter, and even your kitchen counters.
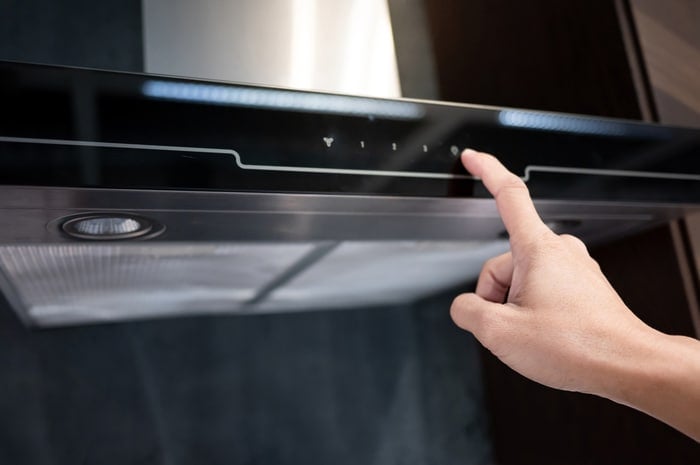
To prevent grease leaks, try adjusting the fan settings according to your cooking habits. For cooking methods that produce a lot of grease or smoke, use the highest fan setting.
After you’ve finished cooking, I recommend leaving the fan running for a few minutes on the lowest setting to clear any remaining cooking vapors.
Tip: If you struggle with grease buildup, consider using lids when frying food, as they can reduce the amount of grease that splatters.
#4 Inspect the Duct
From what I’ve seen, issues with the ductwork can also lead to grease leaks in a range hood.
The exhaust ducts are responsible for removing excess moisture, smoke, and grease particles from your kitchen.
Although range hoods have filters to capture grease, some grease particles can stick to the interior walls of the ductwork. This buildup, when mixed with condensation, can result in grease leaks.
Here’s how to clean your range hood’s duct:
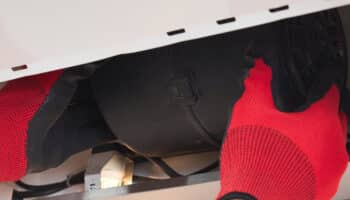
- Turn off your range hood at the circuit breaker to prevent electrical hazards.
- Remove the vent cover and necessary panels to access the duct. Keep in mind that you’ll probably need to use a screwdriver.
- Use a putty knife to scrape off built-up grease from the interior walls of the duct. Please be careful to prevent damaging the duct.
- Use a long, flexible brush to remove any stubborn spots. If necessary, use a commercial kitchen degreaser.
- Once the duct is clean, reassemble the range hood and turn it back on.
While you’re at it, use a flashlight to examine the range hood’s duct for any cracks or holes. If you notice any signs of damage or feel uncomfortable cleaning the duct, it’s best to call a professional. They have the necessary tools and expertise to address the issue.

#5 Examine the Fan
If you’ve tried all the fixes mentioned above, but your range hood is still leaking grease, then there’s probably an issue with the fan motor or blades.
The fan is one of the most important components in your range hood, as it pulls smoke, odors, and grease out of the kitchen and directs them into the ventilation duct. Then, the air is expelled outdoors.
Unfortunately, if the fan malfunctions, it won’t effectively capture cooking vapors and grease. As a result, the excess grease can accumulate on the interior surfaces of the range hood, which can eventually lead to leaks.
To determine whether your fan is the issue, remove the grease filters and necessary covers to access the fan. Then, inspect the blades and motor for debris or any visible signs of damage. If needed, clean the blades using a cloth dampened with soapy water.
You can also turn on the range hood fan and listen for any grinding or squealing sounds. If the fan makes unusual noises or doesn’t rotate smoothly, you’ll likely need to replace the fan motor or switch.
Remember that if you’re not an experienced DIYer or you feel uncomfortable fixing the fan yourself, it’s best to contact an appliance repair expert.
Wrapping Up: Fixing a Greasy Range Hood
That about covers it! Hopefully, now you know how to keep your range hood from leaking grease.
Remember that if there’s grease raining from your range hood, you’ll need to clean the filter and cup or tray with warm soapy water or a kitchen degreaser. Don’t forget that it’s also important to adjust the fan settings according to your cooking habits and inspect the duct.
Thank you so much for taking the time to read this article. If you’ve found it helpful, please check out our other related posts below.
Have a wonderful rest of the day!


Designing Modern Living Rooms from Iconic Movies

7 Tips for Heating a Room with High Ceilings (On A Budget)