Is your range hood wobbling like it’s made of Jell-O, and it has you concerned?
Sorry to hear that! Range hoods are wonderful at helping us keep our kitchens free from smokey and lingering smells, but when they’re unstable, thousands of things can happen.
I understand why you’re worried that your range hood is unstable and that you’re desperately trying to find out why this is happening and what you can do about it. Luckily, you’ve come to the right place for answers. Below, you’ll find a list including 7 tips to help you stabilize your range hood and get everything back to normal.
When your range hood is looking unstable, try looking for loose screws/bolts, adjusting the mounting brackets, checking for misaligned parts, and inspecting wall anchors. You can also examine the internal mounting system, check for structural damage, or reinstall the range hood as a last resort.
Keep reading to make your range hood stable as a rock!
Why Your Range Hood Is Looking Unstable
Range hoods are not supposed to move during the entirety of their lifespan; however, sometimes, due to the constant movement of the fan inside them and several other factors, they can start to come loose and look unstable.
Over the years, I’ve found that although there are many possible causes for an unstable range hood, some are much more common than others. Here are some tips you can try to stabilize your range hood again and get everything back to normal.
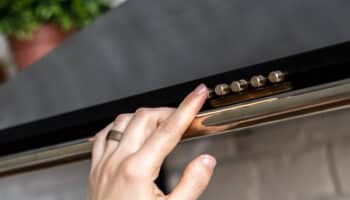
#1 Tighten Loose Screws/Bolts
First, when your range hood is looking unstable, you must try to spot any screws or bolts that are loose or are making vibrating noises. Your range hood’s fan is constantly spinning to promote airflow and pull in smoke, smells, and humidity from your kitchen’s air. The process is made possible thanks to a fan that spins very fast inside the range hood.
Along with air currents, the spinning of the fan can cause any loose panels, bolts, or screws to make a vibrating noise, which should be the first telltale sign that you must go in with a screwdriver and a keen sense of observation.
Solution: Patience is key. Before working on the range hood, please ensure you’ve cut off power to your kitchen from your circuit breakers to eliminate the risk of electrocution. Then:
- Look around the range hood for anything that seems to be loose and tighten it.
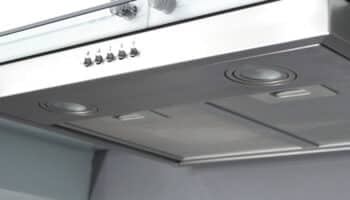
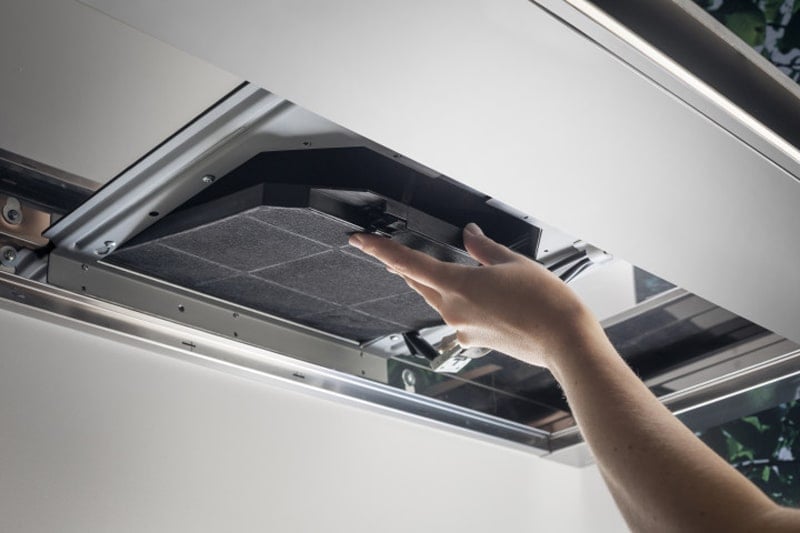
- Remove the grease filters to gain comfortable access to the internal part of the range hood and repeat the previous step.
- Check the ducting system for loose panels and gaps.
After a thorough inspection, restore power to your kitchen via your circuit breakers, turn the range hood on, and see if it’s still looking unstable.
#2 Adjust the Mounting Bracket
If nothing seems to be loose, adjusting the mounting bracket can also help when your range hood is looking unstable. While not true for all range hoods, some models have a mounting bracket that can be adjusted for different positions and distances between the appliance and the wall/cabinetry they’re installed into.
If your range hood has an adjustable mounting bracket, there’s a good chance there’s either something loose or the position you have selected is not the right one. It’s also possible that the appliance has accidentally moved out of place and needs to be repositioned to fit where it’s supposed to snuggly.
Solution: In my experience, range hood adjustable mounting brackets are similar to TV wall mounting brackets in that the further they are extended, the less stable they are. My usual advice is to keep your range hood as close to the wall or cabinetry as possible, as that will not only ensure the best possible airflow but can also reduce the strain on the mounting bracket.
It’s like carrying a heavy book with your arms extended versus carrying it with your hands close to your chest. It will always be much harder to support the weight with your arms extended!
#3 Check for Misaligned Parts
Misaligned parts can also cause your range hood to look unstable. Similar to most other modern appliances, range hoods require a high degree of symmetry to work normally. And considering that range hoods also need an airtight ducting layout to keep external air currents out and exhaust air properly, any misalignments can be disastrous.
If your range hood is not aligned properly with the wall, its ducts, or even the fan inside it, it can look unsteady and even move as it runs.
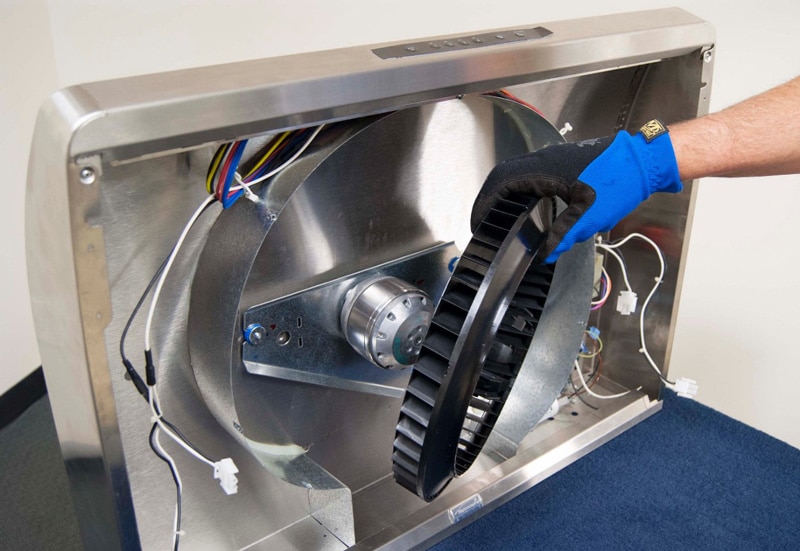
Solution: In my experience, the best way to check for misalignments is by observing every nook and cranny of the appliance closely. If you don’t spot anything out of the ordinary on the outside, you can also remove the grease filter and check inside – specifically where the fan is.
Sometimes, if the fan is not properly aligned and balanced, it can make the entire range hood unstable and even scrap against the surrounding walls as it spins. A good sign that the fan is misaligned is a grinding sound when the range hood runs.
The process for accessing your appliance’s fan will vary depending on the brand and model you own. Typically, you can find the right instructions and locations of any parts you need to access on your User Manual. If you no longer have it, please refer to our free resource below.

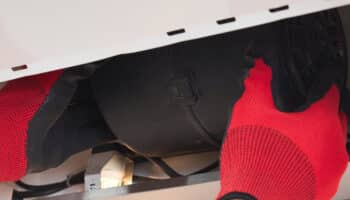
#4 Inspect the Wall Anchors
Another possible reason why your range hood is looking unstable is that the wall anchors it’s installed into have come loose or are damaged in some way.
When your range hood is first installed in your kitchen, there’s a lot to do. Professionals have to secure the appliance to the wall using wall anchors and then work out all the ducting layout to ensure proper airflow and exhaust of the air the range hood pulls in as it runs.
To keep the range hood and everything else tightly in place, wall anchors are used to secure the appliance to the wall. Different contractors have different methods of installing wall anchors, but they all should result in a firm range hood.
However, when something goes wrong, or the range hood is not anchored properly, it’s normal to have it look a bit unstable.
Solution: Unfortunately, there’s no way to tell whether the wall anchors are improperly placed without removing the range hood from the wall, which is, in and of itself, quite a chore.
Not to mention that you’ll need to disconnect the appliance’s internal wiring, deal with the ductwork, and ensure that you don’t break anything as you remove the range hood from the wall. If you’re unsure about the process or don’t feel like taking on the task yourself, you can always contact a professional.
A certified technician doesn’t only have the right tools and skill set for the job but might even be able to tell whether the wall anchors are to blame for the problem without having to remove the range hood.

#5 Examine the Internal Mounting System
Having talked about the wall anchors and their importance when it comes to keeping your range hood stable, let’s now move on to the appliance’s internal mounting system.
When a range hood is installed in a kitchen, an internal mounting system is secured to the wall anchors to help keep the appliance steady over time. Not all range hood models have an additional inner mounting system frame, but those that do can become unstable if they’re not secured properly.
Solution: My usual advice is to check your User Manual to determine whether your range hood has an additional support frame to keep it steady. If so, please locate it and check it for damage or any loose screws and tighten anything necessary.
#6 Check for Structural Damage
Sometimes, when your range hood is looking unstable, the internal mounting system and the wall anchors will be okay, but structural damage to your wall can be to blame instead.
Structural damage on your walls can happen for many possible reasons, including earthquakes, normal wear and tear, excess humidity behind your walls, and even anchoring your range hood to wall material that isn’t fit to support the appliance’s weight.
Whatever the cause may be, it’s important that you pay close attention to how unstable your range hood is, as, in some cases, the structural damage can be severe, indicating a much larger issue.
It’s also possible that your wall is okay, but the range hood itself presents structural damage. Look for any bends or dents on the appliance’s wall that could be throwing it off balance as it works.
Solution: In my experience, homeowners can correct small bends and dents on the range hood without too much trouble; however, when it comes to larger structural damage on either the appliance or the wall it’s mounted to, that’s a different story.
Please don’t try to address wall structural damage unless you have experience working in construction; otherwise, you can put yourself at risk.
#7 Reinstall the Range Hood
The last possible solution when your range hood is looking unstable is that it needs to be reinstalled, as it wasn’t installed properly the first time.
Reinstalling your range hood should be a last resort, as it involves complex processes and ductwork that require special knowledge and the right tools. If you’re not sure about doing the reinstallation yourself, please do not hesitate to call a technician for help.
I understand how it can be undesirable to have to pay extra for a technician’s rate, but you can’t put a price on safety! Not to mention that a job not done properly will have to be redone sooner than later.
Stabilizing Your Range Hood
That about sums it up!
When your range hood is looking unstable, it’s natural to worry about the appliance falling and destroying your kitchen wall.
Luckily, as I hope this piece has helped you better understand, addressing the most common causes behind a range hood that’s looking unstable can be easy, quick, and cheap. More often than not, something as simple as tightening any loose screws/bolts and ensuring there’s nothing misaligned will do the trick.
Thanks for reading! If this article was useful and answered your most burning questions, please check out our other resources and free guides below and consider subscribing to our newsletter.
Have a wonderful day!
-Craig.


Designing Modern Living Rooms from Iconic Movies

7 Tips for Heating a Room with High Ceilings (On A Budget)