We've independently reviewed this article to make sure it's as accurate as we can make it.
To find out more about our article creation and review process, check out our editorial guidelines.
If you have lots of yard waste you need to dispose of, you’ve probably thought about burning it before. A burn barrel is a perfect way to get rid of all your unwanted organic material safely and easily.
However, buying one yourself can be expensive. Instead, with a bit of DIY magic, it’s possible to create your own smokeless burn barrel.
In our full guide we’ll cover:
- How Burn Barrels Work
- How to Make A Burn Barrel (& How Much It Costs)
- How to Reduce Smoke From A Burn Barrel
- How Long Do Burn Barrels Last?
- Best Practices for Using A Burn Barrel
- And Some Notes on their Legality
Ready? Then let’s dive in.
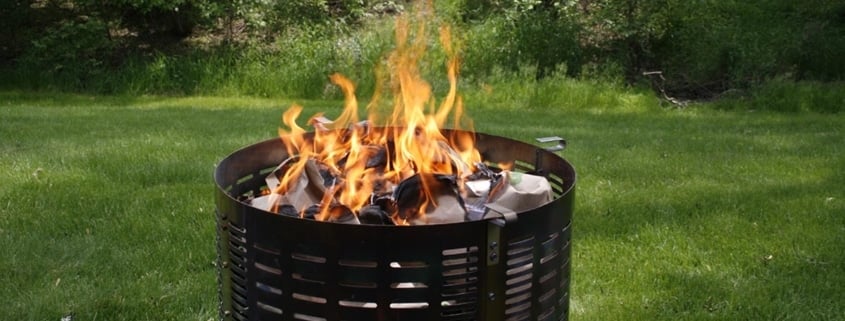
How Burn Barrels Work
The goal of a burn barrel is to burn safe refuse cleanly and without a lot of smoke. In some places, it’s hard to get to a legal dump site. That’s where burn barrels come in. They’re a simple way to get rid of yard waste, sensitive documents, and burnable, non-toxic household trash.
A good burn barrel has a couple of functions:
- First, the body and interior of the barrel should be fireproof and able to stand up to high temperatures. Hot fires produce less smoke than low-temperature fires, so metal is typically the best material for a burn barrel.
- Second, the barrel has some holes in the bottom and the sides. The holes in the bottom allow rainwater to drain out of the barrel if it gets wet. Meanwhile, the holes in the sides and bottom let oxygen into the barrel. The more oxygen your fire gets, the hotter and more efficient it will be. That means that there will be less smoke, smell, and pollution from the fire.
- Third, the high walls of the barrel are there for your protection. Sometimes things make it into a burn barrel that doesn’t react well to high temperatures. If something explodes, strong, high-walled burn barrels contain the debris and keep anyone from getting hurt.
- More advanced burn barrels can have additional parts. Some will have ash-catchers in the bottom for easy cleanup. Others have grates and flanges to keep burning material collected in one place for a hotter burn. Most have grates on top to contain sparks, as well as lids to keep out the weather when the barrel isn’t in use.
Once a fire starts it gets really hot, really quickly. All the air coming in through the ventilation holes feeds the flames. Since the fire is sucking in air for fuel, flames and burning material stay safely inside the barrel. The grated lid helps the pillar of heat from shooting sparks into the sky.
The bottom line to remember: hotter fires lead to less smoke.
Making A Burn Barrel – Step by Step
If you don’t want to buy one, you can make a burn barrel with some materials that are regularly found in garages or barns.
What You Need:
- A metal drum – 55 gallons is the most common size (examples on Amazon)
- A metal punch and hammer, or a drill
- Wire
- Metal snips
- Hardware cloth, a metal grate, or metal fencing
- A solid piece of sheet metal or an old trashcan lid
- Concrete blocks
- A patch of bare dirt or concrete, away from houses, trees, or flammable objects
What to Do:
Create Holes
To make a burn barrel, you first add holes to a metal barrel. A drill or a metal punch and hammer are the easiest ways to create exhaust holes.
With your preferred tool, make five to ten holes in the bottom of the barrel. The bigger the hole you can make, the fewer holes you can get away with. Fewer holes are better because they reduce the number of places that rust can attack the barrel in the long run.
Make holes in the sides of the barrel, too. Place these holes at different heights around the circumference of the barrel. Good circulation will help pull in oxygen and raise the fire’s temperature. Around 10 to 20 holes should be fine.
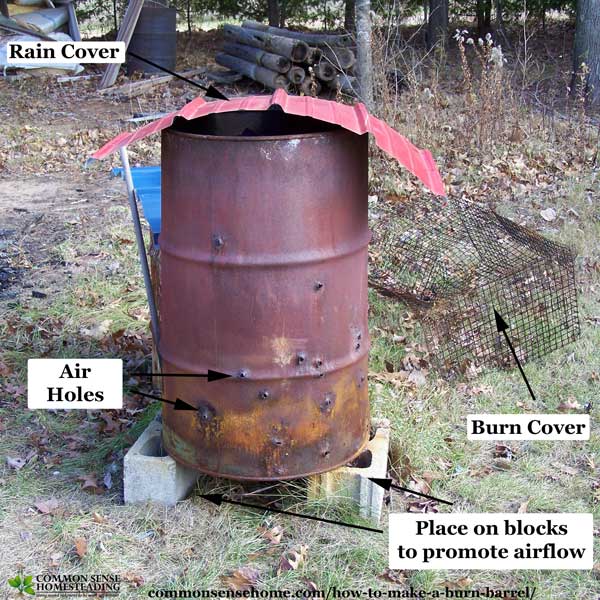
Source: CommonSenseHome.com
Set Up Mesh
Take some of your preferred metal mesh or hardware cloth and make a cone the width of the barrel. Use some wire to help the cone keep its shape and secure it. You can use the snips to trim the extra material if you want. Place the cone at the bottom of the barrel. The cone helps keep the burning material centered, so the fire burns hotter and faster.
Take some more of the metal mesh and trim it into a circle roughly the diameter of the burn barrel. This will be the lid when the barrel is actively burning. Use some additional wire to make a handle – the mesh lid will get very hot when it’s in use. The handle will help you take off the lid without putting your hands directly on or over the burn barrel.
Prepare a Lid
You also need a solid lid for when you’re not using the burn barrel. The lid keeps water out of the barrel and helps prevent rust. Whether you’re using sheet metal or an old trashcan lid, make sure the material completely covers the top of the burn barrel. Bonus points if it has a lip around the edge, which helps prevent the barrel from getting blown away on windy days.
Get Ready to Go
Finally, find a clear patch of dirt or concrete and put the concrete blocks there. Put the barrel on top of these blocks, so air can get underneath it. As long as you’re away from anything flammable, your burn barrel is ready to go.
Where To Buy
While a DIY barrel can work well, they can be a ton of work – and often don’t look great!
Purchasing a professional burn barrel does cost a fair amount, but they are way more efficient, smokeless, and look really nice. We’re partnered with Burn Right Products, which offers the best burn barrels and accessories available (seriously).
How to Reduce Smoke From A Barrel
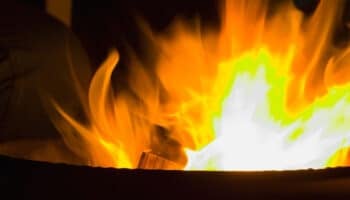
The trick for reducing smoke is to get the temperature of the fire up. If temperatures get high enough, the smoke itself gets burnt in the flames, too. That’s because of some interesting chemical reactions in how fire works.
Smoke is made up of a whole cocktail of different chemicals. If you’re burning wood and plant products, a lot of smoke is just water vapor, hydrogen, and carbon dioxide. These are all invisible though, so you don’t see them. The visible compounds are a lot nastier. They are known as volatile compounds, and most of them are hydrocarbons.
Hydrocarbons include oils, plastics, alcohols, formaldehyde, ammonia, and other things that are toxic. None of these are good for you, your neighbors, or the environment. They also smell nasty, make you cough, and send a visible signal that you’re burning things to the surrounding area. On the upside, hydrocarbons are also incredibly flammable.
The trick is getting temperatures up to the point where these chemicals spontaneously ignite. The hotter the fire, the more of these chemicals break down into carbon dioxide and water. The result is less ash, less smoke, and less nastiness in general.
By making sure you have plenty of holes for air to fuel the fire, and using the mesh cone to concentrate the heat, your burn barrel will generate enough heat to stay smokeless.
How Long Do Burn Barrels Last?
The materials in a burn barrel last quite a long time. Purpose-made burn barrels are usually made with materials that don’t even rust.
A good burn barrel can be a life-long investment.
On the other hand, homemade burn barrels do have expiration dates.
The standard 55-gallon steel drum is vulnerable to rust. The holes that help the burn barrel drain and oxygenate the fire are also its weak points. A homemade burn barrel can rust away entirely in just a few years if you aren’t taking care of it.
You can help, though. If you watch out for rust and store the barrel somewhere dry when it’s not in use, it can last almost as long as something professionally made as long as you observe proper maintenance.
What Can You Burn?
Once you have a burn barrel, it’s time to get the fire started. There are plenty of things you can safely dispose of with a burn barrel. However, there are also some substances that should not be burned. Knowing which is which will help you take care of your health and the environment at the same time.
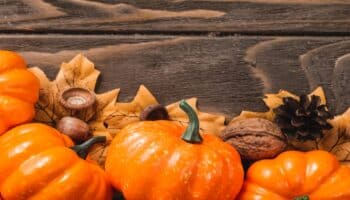
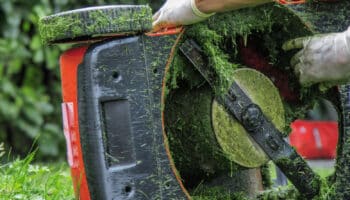
Most organic materials are perfectly safe to burn. Things like yard waste, grass clippings, old newspapers, and fallen branches are the perfect materials to send through a burn barrel. They are harmless to burn and they’re found in campfires around the world. You can also burn things like cardboard, old candles, and natural fabrics like burlap and cotton.
You should not burn the following:
- Plastics, styrofoam, and rubbers. Plastics are dangerous to burn at home. They produce noxious smoke that can be dangerous to inhale. Melted plastic can be very dangerous to touch, and burning plastic is harmful to the environment. Save up your plastic and rubber waste and take it to an official recycling center.
- Electronics contain many heavy metals in trace amounts. When the device is in one piece, it’s perfectly safe. Once the device is on fire, though, all those heavy metals are vaporized into smoke. That can lead to problems like heavy metal poisoning if you are in the area.
- Aerosol containers. Aerosol containers are already under pressure. Heating them up can stress the metal to its breaking point. That will lead to explosions. Never burn an aerosol container.
- Old paint. Paint should be disposed of at a specific waste center. Burning it leads to incredibly unpleasant smoke that may even cause lead poisoning, depending on the age of the paint.
- Old gas, oil, or alcohol. Outside of environmental effects, burning gas, oil, or alcohol is incredibly dangerous. These are all incredibly flammable and even explosive. Burning them instead of disposing them safely can kill you.
- Pesticides or garden chemicals. Pesticides and many other garden chemicals are poisonous when burnt. Trying to get rid of them with fire can throw cancer-causing chemicals into the air. Dispose of them properly, not in the burn barrel.
- Sparklers or fireworks. Sparklers and fireworks explode. Setting them on fire in a burn barrel will cause them to explode. Do not burn them in a burn barrel.
- Full glass containers. Glass shatters when it quickly changes temperature. High temperatures can also vaporize liquid inside a glass bottle. This combination can create glass shard shrapnel. Glass is safe in a fire on its own, but full containers are not.
You should also keep an eye on treated wood or painted objects. They can contain chemicals that are unsafe to inhale. In general, if it can’t rot, then it’s not usually a good idea to burn it.
Best Safety Practices to Follow
Using a burn barrel involves very hot fire and metal, along with smoke. To use a burn barrel safely, there are a few guidelines you should follow. You should also have a permit if your area requires one.
- First, you should only have a fire on days when it’s safe. Sometimes the weather conditions make things ripe for a wildfire. If it’s particularly windy or dry, a single spark can start a fire that spreads out of control. Always check your county’s fire conditions website before having a burn. They will tell you whether the local conditions put you at risk of an unintentional fire. If the risk is high, wait to burn things another day.
- You should also make sure there’s nothing near the burn barrel that can catch fire. The best place for a burn barrel is in the middle of a large dirt or paved area, away from any structures. Get rid of any dead grass or other plant matter within a five-foot radius of the barrel. You should also put the burn barrel up on concrete blocks or otherwise lift it off the ground. These all help keep the barrel from igniting things on its own.
- Watering down the area helps as well. Even dust can ignite in the right conditions. Hosing down your surroundings helps keep the dust down. Moisture helps keep sparks from escaping. Keep your hose nearby for the burn, in case something goes wrong.
- Before you light the burn barrel, empty it out. There are likely ashes from the last burn still in the barrel. These can clog up the barrel and keep it from heating correctly. Ashes can also harbor moisture and mold if they’re left in the barrel, which can make for dangerous smoke. Dump the ashes and the fire will go more smoothly.
- Never use gasoline, oil, or kerosene to start your fire. These and other accelerants can lead to explosions. The vapor they produce is even more flammable than the liquid; trying to light a fire with gasoline is a good way to lose your eyebrows in a best-case scenario. Use products sold as a fire-starter or start with newspaper and kindling.
- While the burn is going, be very cautious. You can add more material to the burn, but do it safely. You can use fire tongs or a fire-proof glove to lift the burn barrel’s lid. Don’t overload the barrel. It’s best to load it no more than halfway full at a time. Keeping an optimal load helps everything burn evenly and prevents the flames from getting too tall.
- Never touch the barrel or the lid with bare skin or through plastic or polyester. You might experience severe burns. Plastic and polyester fabrics can easily melt. Use natural fibers, or preferably use things designed for fires and heat. Otherwise, don’t touch.
- Once the fire is out, triple-check! Stir ashes to check for sparks, and then drown the fire with water. Stir the burned material and water it again. Keep doing this until there are no sparks left. The fire should be out cold before you leave.
How to Empty a Burn Barrel
Once your burn is over and the ashes are cool, you need to empty the burn barrel. Leaving the ashes in the barrel will eventually lead to your barrel overflowing. Not emptying can also lead to a buildup of mold and other gunk that shouldn’t be burned. Disposing of burned waste regularly can help keep things neat and prevent pests from finding a home on your land.
Emptying a burn barrel is relatively simple. If you’re planning on disposing of the ashes, wait until the entire barrel is cool. Then you can gently tip the barrel sideways onto a tarp. If the ashes are compacted, you might need to grab a rake or a hoe to start loosening them up. Otherwise, you should be able to tip the barrel completely upside down. The ashes will fall out onto the tarp. You can give them a little help by prodding a stick through the drain holes on the bottom if you need to.
Turn the burn barrel right-side-up and put it back on its stand. If there’s a collection of ash on the side that you want to get rid of, you can hose the burn barrel down. The remaining ashes will wash out through the drain holes.
The ashes on the tarp can be put to many uses. Even if you just want to throw them away, it’s easy to use the tarp to funnel the ashes into a trash bag. Otherwise, the tarp is the perfect way to move the ashes where they need to go.
If you don’t have specific plans for your burn barrel ashes, you can create a dump pile. Get the barrel on a dolly and wheel it to a corner out of the way. Dump the ashes in your compost or refuse heap and you’re good to go. Just make sure the ashes are cold before you leave.
Handling The Ashes
There are plenty of uses for the ashes from a burn barrel. As long as you’re burning safe materials, ashes are actually great for many plants. When you’re burning wood, plant debris, and natural materials, you’re creating a perfect plant food. It’s full of lime, potassium, and other trace minerals for your garden.
Sprinkling clean ash lightly over your yard and garden can help plants that prefer neutral or basic soil. Keep it away from blueberries and azaleas, but other plants are okay with the material. The rest of the ash can be composted just like other organic material. Compost can become acidic over time and ashes are the perfect way to neutralize that problem.
If you’re not looking to improve other plants, ashes have other uses. In cold climates, ashes are a great free way to add traction to slippery sidewalks and driveways. They also stand out against snow, so it’s easy to see where it’s safe to walk. Ashes can also help melt ice and snow, so it’s a one-two punch in the winter.
You can throw wood ashes into ponds to get rid of algae. A handful is enough to kill off most algae without hurting aquatic plants and animals. Similarly, ash is great for repelling slugs, snails, ants, and creeping pests. Scatter it around vulnerable areas and you’ll notice fewer problems with pests.
Keeping some ash on hand is a great way to clean up oil spills. The ash absorbs the oil and clumps up. In return, you can just scoop up the clumps for disposal. Ash can also help get rid of stains if you make a paste with water, or remove smells if you scatter it around. It’s a helpful substance that doesn’t get enough appreciation.
Are Burn Barrels Legal?
Whether burn barrels are legal depends on your local laws. Every town and municipality has its own rules on fires and burn barrels. If you’re not sure whether burn barrels are legal, check out your town’s website. There should be a page about fire safety and rules. You may need to get a burn permit, you might not be allowed to burn things at all, or you might be allowed to burn whatever you want whenever you want. It really depends on where you live.
How Much Does It Cost to Build a Burn Barrel?
Building a burn barrel can be super simple, or it can involve quite a few purchases. It depends on what you have on hand.
Most people make burn barrels out of 55-gallon steel drums. If you have one around, then it’s free! Otherwise, you need to get your hands on one.
New or used, these barrels tend to be at least $100.00, minimum.
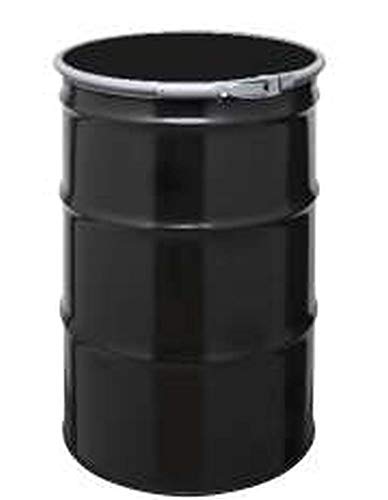
- constructed of first quality cold rolled steel with rust inhibitor interior.
- supplied with lever lock cover
- The 55-gallon drum is constructed of first quality cold rolled steel with rust inhibitor interior. This open head steel drum is supplied with Lever locking ring closure, and gasket cover.
You’ll also need some material for the lid. Chicken wire, metal fencing, or another wide metal mesh can be used. Cold rolled steel mesh is a great option – depending on how much you buy, it’s typically about $10 for two square feet.

- Carbon steel expanded sheet provides strength, hardness, weldability, and wear resistance
- Unpolished (mill) surface has no finish
- Flat surface is smooth and level
If you don’t have the right drill bit or a steel punch, you can get a good one for about $10 as well.

- ONE-HANDED SPRING IMPACT: Automatic center punch has one-handed impact operation, no hammer needed.
- DRILL PUNCH TOOL: This Automatic Center Hole Punch is the perfect centering punch device to help start screw and drilling holes. Align the tip of this metal hole punch on a variety of hard surfaces to...
- MARKS HOLE LOCATIONS: Accurate center punch prevents drill bit from traveling, starts drill, nail or screw holes.
So, assuming that you have a place to put the barrel, but nothing else, it costs at least $120 to build a burn barrel. If you have tools and materials on hand, that cost goes down. Just remember, you’re putting holes in a hundred-dollar barrel.
Buying vs. Making a Burn Barrel
If you’re sure you want a burn barrel, you can buy or make your barrel. The difference between the two can be dramatic.
First, it’s important to consider the quality difference. If you have some serious experience working with metal, then you’re probably able to safely cut and grind the barrel in a way that looks professional. On the other hand, if you’re less experienced, then the end result will probably show it.
A professionally made burn barrel will not only look well-made, it will also work more effectively. Professional, patented options like Burn Right’s Home Incinerator Cage can guarantee you a safe, smokeless, and efficient burn every time.

When you make a burn barrel, you’re typically using a standard steel barrel. These are relatively easy to find, but they’re also prone to rust and other problems. That means you’ll have to replace the barrel as it degrades. A stainless steel professional burn barrel will stay in perfect condition for years. It will burn more efficiently that whole time, and it will look nicer, too.
The end result is that making a burn barrel yourself will cost roughly $120 if you don’t have materials. Depending on the size you want, a professional burn barrel can cost anywhere from $150 to $550. If you’re looking for a shorter-term option, a homemade burn barrel is definitely cheaper upfront.
On the other hand, a professional burn barrel can better stand up to the test of heat and time. Which one is best for you depends on what you need out of a burn barrel.


Designing Modern Living Rooms from Iconic Movies

7 Tips for Heating a Room with High Ceilings (On A Budget)