How can you stop a leaking humidifier? You can start by making sure your floor is level. Here are 6 simple fixes you can try.
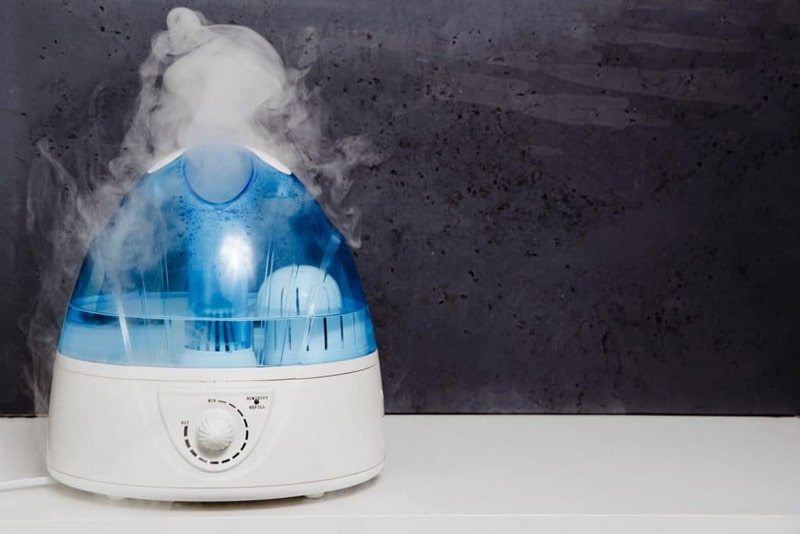
Whether you live in an extremely dry area, or just love the benefits that your humidifier has to offer, you’ll agree with me when I say that this appliance has changed your life.
There’s a lot to love, and very little to complain about.
That being said, a fail proof model is yet to be invented, which means that, from time to time, your unit could give you some trouble, and start leaking. If this is your case, I can only imagine your frustration. Right now, all you probably want, is to know why this is happening.
And while there’s no single answer to that question, there’s a wide range of potential factors that could be to blame. So many, in fact, that it can be easy to feel lost.
That is, unless you’ve done some research. And lucky for you, I have.
Below, you will find a list with the most common causes behind this occurrence, and the simplest steps you can take to address each one of them. I’m certain that, if you follow them to a tee, your humidifier will stop leaking immediately.
Sounds good? Let’s go!
Fixing a Leaky Humidifier
#1 Double-Check the Seal
Your gasket might be broken
This is one of those things that might seem too obvious, but that people tend to miss more often. And it makes sense. Why would you pay any attention to your appliance’s sealing conditions?
Well, because it’s actually very important.
As you can imagine, the sealing mechanism in your humidifier is what keeps the water from leaking out. It varies from model to model, but, in most cases, this is accomplished with the help of a rubber gasket.
When this part works normally and is unscathed, no water should leak out. However, as time passes, your gasket can wear out or altogether break, allowing for some liquid inside the unit to seep through.
If you’ve owned your appliance for a very long time, and you’ve never replaced the gasket, this might be your cue to do so.
Solution: As stated above, the process for replacing the gasket can vary from model to model, but the broad strokes should be similar for all of them.
All you have to do is remove the upper part of the appliance as if you were about to pour more water into it. You should find a rubber ring going around the area where both ends meet.
Once you have located it, remove it carefully, look for any signs of damage, and replace it if necessary.
#2 Check the Floor Level
Uneven floors could compromise your appliance’s functioning
Humidifiers are temperamental appliances. You’d be surprised at how many conditions must be met for them to operate properly.
For example, I’m sure you never thought that adequate floor leveling was crucial to the humidification process. And who can blame you? It’s not the most obvious thing in the world.
When the surface you place your humidifier in is not completely level, the unit could have some trouble functioning correctly, as this affects its internal water pressure, as well as the efficiency of the draining system.
Assuming that your gasket is not the problem, this is the next thing you want to consider.
Solution: There are many ways to tell whether your floor is level, but the most efficient and cheap one, is by using one of those popular meters with a bubble inside them.
You should be able to get one from any hardware store near you for a very low price.
#3 Place the Drain Hose Properly
You’ll never win against gravity
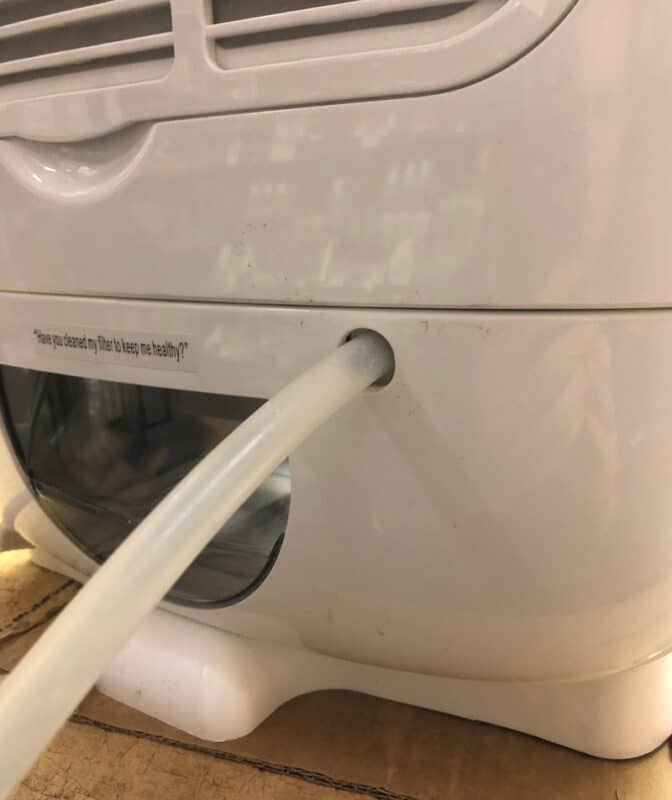
Adequate draining is vital to ensuring that your humidifier is working as it should. If you own a model that has pumps and a drain hose, you might want to check how gravity could be impacting the appliance.
Let me explain.
As you know, your humidifier prevents overflowing by using the drain hose to remove any excess water from its reservoir. Normally, one end of the hose is connected to the machine, while the other is secured to a wall connection with an exhaust to the sewer.
If your humidifier is leaking, you might want to check the positioning of the wall connection, as it could be placed too high, thus compromising your unit’s draining capabilities.
Solution: Ideally, you want to make sure that the drain hose runs in a straight line, as close to the floor as possible. It should remain untangled, and without any kind of hills or sharp turns along the way.
Provided that you determine that your current wall connection is not the best for the draining process, you’ll have to relocate the unit.
#4 Unclog the Drain Hose
Sediment might be blocking your drain hose
Okay, let’s say your wall connection is perfectly fine, and gravity is not working against you.
What now? Well, your drain hose might be blocked by sediment.
Now, before you throw your humidifier in the bin, let me assure you that this substance is not dangerous per se. In fact, it is present in the water that we shower, and do our dishes in, as well as in the water we drink (only if you drink tap water, of course).
The rate at which sediment will clog your drain hose will depend greatly on the quality of the water where you live, but sooner or later, it will happen. That being said, proper maintenance and frequent cleaning cycles can help prevent this in most cases.
If your humidifier is leaking, there’s a very good chance that you have to descale it, and give it a much-needed cleaning session.
Solution: Empty your reservoir and prepare a mixture made up of equal parts of water and white vinegar.
Pour it into the reservoir and let the appliance run normally until the container is nearly empty again. Doing this at least once a month should prevent most of the sediment clogging, and keep your humidifier disinfected.
#5 Clear the Solenoid Valve
Your valve might need urgent cleaning or replacing
Assuming that none of the solutions above worked for you, it’s time to consider the possibility of a dirty or obstructed solenoid valve.
What does this component do, you ask? Let me briefly explain.
This valve is responsible for controlling the flow of water inside your humidifier. When more water is needed, it opens, and when the reservoir is about to overfill, it closes. You can think of it as some sort of dam.
When it’s working normally, you should never experience leaking or overflowing. However, over time, sediment or dirt can build in and around it, compromising its water controlling abilities.
If your humidifier is leaking like there’s no tomorrow, you might want to make sure that the valve is not obstructed or broken.
Solution: Please follow these steps to replace your solenoid valve:
- Carefully cut off all electricity and water supply to your humidifier
- Locate your solenoid at the side of the unit
- Remove the compressor nut, holding the part in place
- Clip the wires connecting it to the appliance
- Use a container to drain any remaining water inside it
- Repeat the process in reverse to connect and set up the replacement
These are only the broad strokes. If you’re a visual person like me, and like detailed walkthroughs, there are tons of online videos you can check out, and follow along step by step.
#6 Reduce Your Water Pressure
Call a certified technician to adjust your water pressure
Lastly, let’s take a look at your water pressure.
This might not be true for all models, but most manufacturers recommend that you operate your humidifier at around 125 psi, as the parts inside it are designed to tolerate it.
Having higher water pressures when using your unit could break some of its internal components, and cause the leaking you’re experiencing right now.
Moreover, this could eventually cause a general malfunction and damage your appliance permanently. Please, if you suspect this to be the problem, do not wait too long to address it.
Solution: Unless you know your humidifier’s internal components like the palm of your hand, I’d advise contacting an expert, or a certified technician. They already know their way around these machines, and can easily adjust the pressure for you, so that it runs at or under the aforementioned limit.
Remember, it’s great to try and do your own repairs, but, there’s also no shame in asking for help when you feel doubtful.
What Are the Benefits of Owning a Humidifier?
This article would probably run a lot longer if I mentioned all the benefits of owning these appliances. That being said, I see no harm in mentioning a couple of them, such as:
- Reduced allergies
- Fewer nosebleeds
- Moisturized skin
- Reduced eye irritation
- Hydrated lips
There are plenty of reasons to keep your humidifier working perfectly, and giving it proper maintenance, so it lasts a long time. Sometimes, the initial price tag can be a little scary, but when you think about all the things your machine can do for you, owning one makes sense.
Conclusion
Having a leaky humidifier can be inconvenient, and extremely frustrating. Not only are you stuck with a malfunctioning appliance, but also in the unfortunate position of having to figure out what the problem is, and how you can solve it.
Luckily, as I hope you’ve learned in this piece, addressing most of the causes behind this issue is simple and should not take up a lot of your time. More often than not, making sure your floor is level, and using gravity to your advantage, is all you need to do to restore your humidifier to its former glory.
Trust in yourself and in your DIY skills. I’m sure there’s nothing you can’t accomplish if you set your mind to it.
Thank you for sticking with me all the way to the end. If you found this article helpful, why not become an expert in the subject through our other incredible resources below?
No more puddles!


Designing Modern Living Rooms from Iconic Movies

7 Tips for Heating a Room with High Ceilings (On A Budget)