Is your dehumidifier leaking like there’s no tomorrow? You might want to make sure your internal components are not obstructed. Here’s how you can fix this in 8 easy steps.
There’s no denying that dehumidifiers are wonderful appliances. Not only are they easy to use and relatively inexpensive, but also solve one of our home’s most important problems. Excessive moisture.
Now, as great as they are, perfection is a feature they lack, which means that, from time to time, your unit can give you trouble, and start leaking all over the place.
If you’re here, this is already happening to you, and trust me, I understand your frustration.
I’ve had this issue myself, so I know how inconvenient it can be, and how desperate you are to get the machine back to normal as soon as possible.
This is why I’ve prepared the list below, where you’ll find the most common causes to this occurrence, and the simplest steps you can take to address each one of them. Rest assured that, if you follow them religiously, your dehumidifier will be back to normal in the blink of an eye.
Are you ready? Let’s get to work!
Fixing a Leaky Dehumidifier
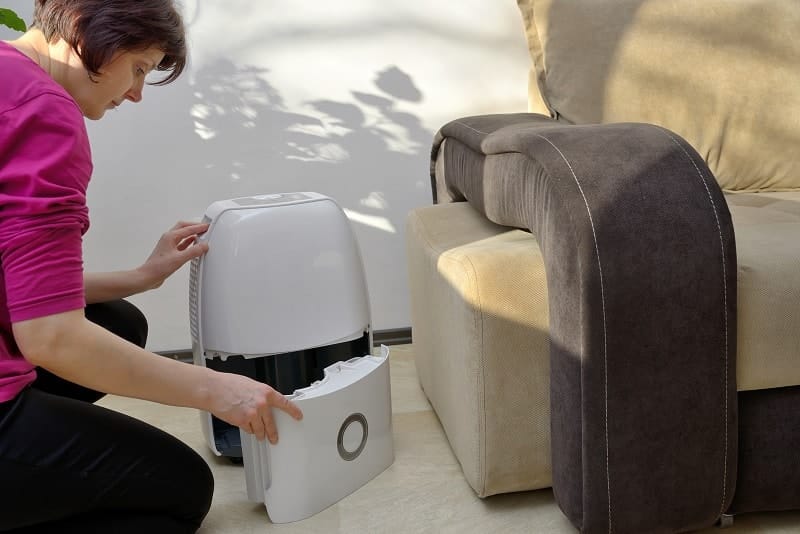
#1 Reposition the Reservoir
Make sure the reservoir is properly placed
This might seem a little obvious, but we want to leave no stone unturned, right?
If you just bought your dehumidifier or cleaned it recently, the possibility of the reservoir not sitting properly, is not too crazy. A lot of people immediately start thinking there must be some kind of technical fault to blame when their appliances leak, but they’re usually wrong.
Don’t become a part of that statistic.
Before trying anything else to address this issue, I’d like you to take a look inside your machine, and see that everything is in the right place.
Solution: Unless you’re the proud owner of a brand-new model, you’ve already emptied your reservoir or cleaned it a couple of times. Please repeat the process, and make sure to put everything back together properly.
Should this stop the leaking, mystery solved!
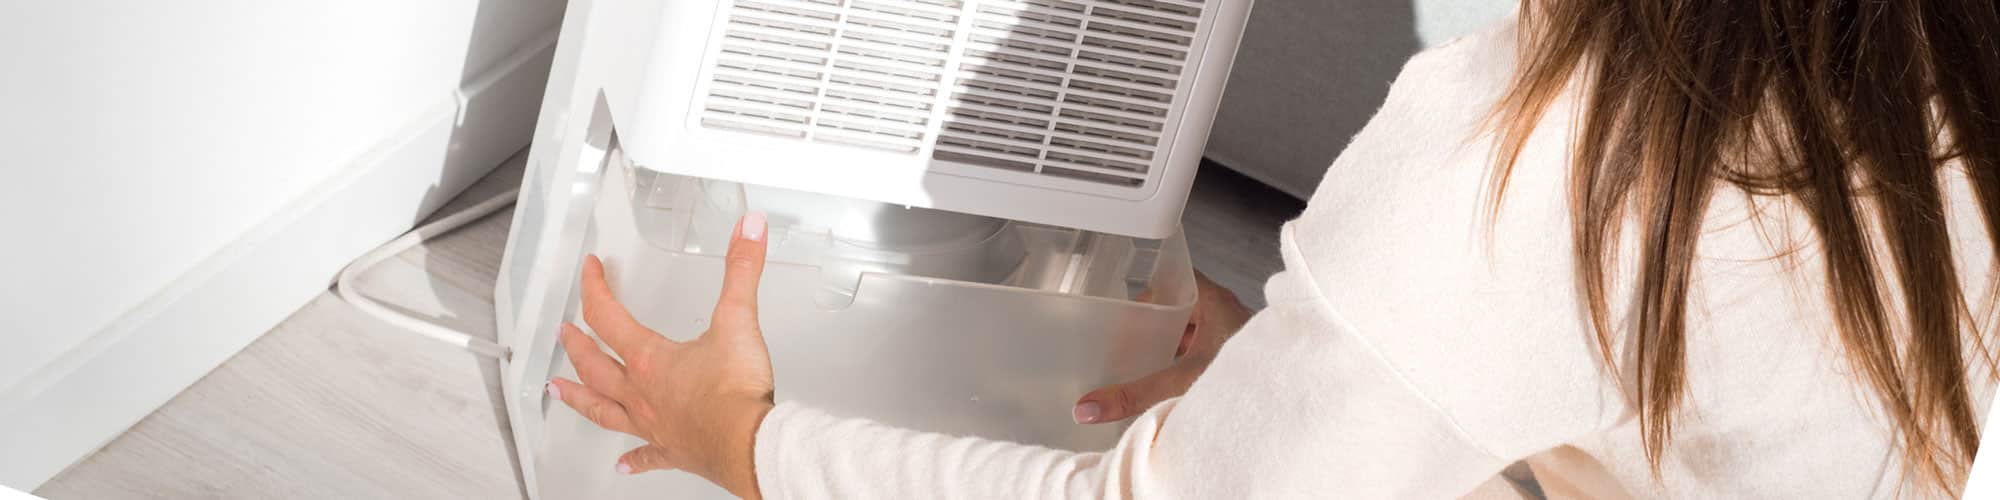
#2 Check the Reservoir for Damage
Assuming that your reservoir was, in fact, properly placed, we must consider the possibility of it being broken.
Ideally, your dehumidifier shouldn’t move too much; however, with changing needs, and relocation necessities, keeping the appliance static in a single room throughout its entire lifespan, can be a little difficult.
If you’ve ever accidentally dropped or bumped your dehumidifier against an object while moving it, there’s a very good chance that the reservoir might have sustained some damage.
Now, I’m not talking about penny-sized holes on this side of the container, I’m talking about the smallest, thinnest hairline fractures, nearly invisible to the naked eye. They may not seem like much, but they can easily fill your home with puddles.
Solution: Carefully remove your reservoir and inspect it for any kind of damage. Sometimes, you’ll be able to see a little bubbling where a hairline fracture is, as air is entering the container.
Provided that you find any cracks on your reservoir, there are a couple of things you can do about it.
If you don’t want to spend a lot of money right now on a new reservoir, you can always try using waterproof adhesives to patch up the breaches; however, I’d advise against it for two main reasons.
Firstly, there’s no way to guarantee that these adhesives will work and stop the leaking, so you might just end up wasting more time. Secondly, even if they work, they’re not a long-term solution, so you’ll eventually have to buy another reservoir.
If you want to get any replacement part – or see how much one would cost – click to enter your model number in the search bar below. Our partners at AppliancePartsPros stock almost every part with free guides on how to install them.

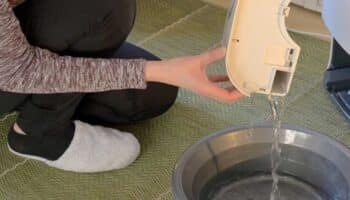
#3 Secure the Drain Hose
Double-check that the hose is properly attached to prevent leaking
There’s no denying that dehumidifiers with pumps make our lives a lot easier and save us large amounts of time; however, even with all their virtues, they can still cause some problems when the drain hose is not properly attached.
This can happen for a lot of reasons. Maybe you relocated your appliance and forgot to tightly secure it on either end, or maybe the locking mechanism has worn out. A lot can go wrong when it comes to these hoses.
A very easy way to tell whether this is the source of the leaking, is by looking at the position of the puddles. If the water is not located directly underneath your unit, but at the back exhaust or the wall connection, there’s a very good chance that the hose is not tightened all the way.
Solution: Take a closer look at the connections on either end. Provided that you find that the locking mechanisms have worn out, you’ll need to find a replacement.
If the problem lies with the wall connection, you should be able to get a spare part from your nearest hardware store. However, if the failing mechanism is the one on the unit’s connection, you’ll likely have to call your manufacturer.
Replacements like that are usually custom-made or specific to your model, so it can be difficult to locate them through other vendors.
#4 Check the Drain Hose for Damage
Even the smallest fracture could cause a flood
Okay, so both ends of your drain hose are perfectly tightened.
Why is it still leaking? Simple, it might be damaged.
Just like it would happen with any other component in your household appliance’s, your dehumidifier’s drain hose will wear out as time passes.
The rate at which this happens will depend greatly on how often you relocate the unit, and the frequency of maintenance you give it, but it will eventually occur, no matter what.
Moreover, the damage doesn’t have to be very big. In fact, just as it happens with your reservoir, even the smallest cracks or fractures are more than enough to make a mess. It’s always a good idea to keep a spare hose in your home in case this occurs.
Solution: Carefully unplug your appliance, and detach the drain hose from both your dehumidifier, and your wall exhaust.
Once you have done that, place it over the sink for testing, and look for any leaks across its length. Assuming that you spot any, you will have to get a replacement.
You can try patching up the damage with waterproof adhesive, but again, I do not recommend it, as it’s not a long-term solution. In the long run, fixing something like this temporarily can do more harm than good.
#5 Check Your Room Temperature
Make sure to stay above your manufacturer’s room temperature recommendations
It might not seem like it, but your dehumidifier needs several conditions to be met in order to operate properly.
One of them being room temperature.
This is one of those things that can be hard to figure out unless you read your user manual. It turns out that most manufacturers recommend that you do not use your appliance in a room that is below 60 degrees Fahrenheit.
Why?
The answer lies with the machine’s internal processes, and its cold coil. I won’t bore you with the technical details, but your unit is equipped with two coils. One that runs hot, and one that runs cold.
The latter condenses the moisture from the air that has been pulled in by the fan, while the former warms it up to release a drier current into the room.
When you use your dehumidifier in an area that is below 60 degrees Fahrenheit, ice might form around the cold coil. This likely won’t be a problem immediately, but, after a while, the ice will melt and form a puddle under your machine.
If you want to stop your leaky dehumidifier, you might want to consider raising your room temperature a little.
Solution: I hate to be the bearer of bad news, but unless your room has thermostat controls, there’s a very good chance that you won’t be able to use your unit inside it.
Sure, you can always turn on the wall hater, if you have one, but bear in mind that your electricity bill will skyrocket.
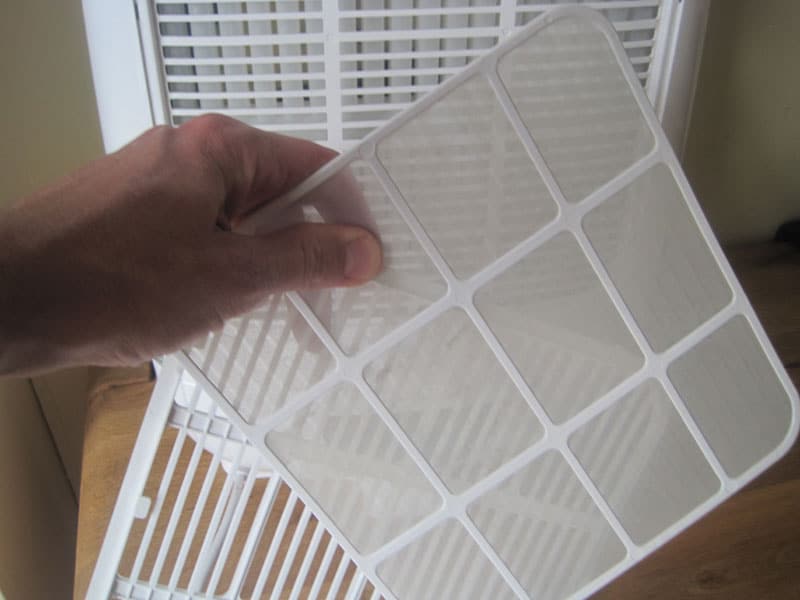
#6 Replace Your Air Filter
Make sure to clean your filters regularly
Your air filter is essential to your dehumidifier’s functionality.
A lot of people ask me, “why do I need an air filter for an appliance that is designed to collect water?”. And I always tell them the same thing.
How else will you stop harmful particles and pollutants from reaching your machine’s internal components?
Your air filter is the only thing standing between the outside world and your dehumidifier’s guts. When clean and functional, not only does it allow for proper airflow, but also helps your unit work as best it can.
Most manufacturers recommend that you clean your filter at least once a month and replace it every three to six months. Moreover, if you suffer from any respiratory conditions, such as asthma or allergies, the recommended replacement time dramatically drops to between one and two months.
Letting your air filter become excessively dirty or obstructed can result in very serious conditions, such as overheating, short-circuiting, and, you guessed it… leaking.
You see, when airflow is compromised, your fan will not pull in as much air as it’s supposed to, but the cold coil will still work normally. This can cause it to freeze up, and eventually thaw out, causing the leaking.
Quite similarly to how it would happen when the room temperature is too low.
Solution: Carefully unplug your appliance from the wall outlet and let it cool down for a couple of minutes. Once you have done that, remove the frontal plastic panel and the filter.
Clean the part with dish soap under running water, and let it dry completely. Vacuum off any remaining debris and place it back into your unit.
Now, this will only work for filters that are newer than six months. If yours is older than that, no amount of cleaning will make it work normally again. In that case, you’ll have to buy a new one.
#7 Clear the Pumps
Sediment can build up in your pumps and wreak havoc
If you’re in the habit of waiting too long between cleaning cycles, your pumps might be obstructed by sediment.
Now, before you throw your appliance in the bin, let me assure you that this substance is not dangerous per se. In fact, it is present in the water that we shower and do our dishes in, as well as in the water that we drink (only if you drink tap water, of course).
The rate at which sediment can form in your appliance’s internal components and start causing you trouble, will depend greatly on the water quality in your area.
If your pumps are being blocked by this substance, your machine will not be able to drain itself properly, resulting in overflowing, and leaking. It is of the utmost importance that you do not put this off for too long, as overheating can also occur, and cause permanent damage to your appliance.
Solution: Prepare a mixture made up of equal parts of water and white vinegar. Once you have done that, pour it into your empty reservoir until it’s nearly full, and set the dehumidifier to pump as usual.
Wait until the water in the container has been nearly depleted, and refill one more time.
This is known as descaling. Doing it once a month will prevent sediment buildup, and keep your internal components unobstructed.
#8 Replace the Microswitch
A faulty microswitch could be the source of your headaches
Lastly, let’s check your microswitch.
In case you’re not familiar with what this part does, let me briefly explain. Your microswitch is responsible for sensing when your reservoir is nearly full, and prompting the pumps to activate or work harder to empty it.
When working normally, your dehumidifier should never overflow or leak. However, any malfunction can render the switch incapable of doing its job, resulting in an overflowing reservoir.
It’s very easy to confuse this problem with broken pumps, as these might fail to activate and drain the water. Before tampering with them, make sure to test your microswitch for viability.
Solution: Carefully remove the frontal plastic panel, the filter, and any protective screws in order to expose your dehumidifier’s internal components.
Your microswitch should be located right next to the reservoir, but this can vary from model to model. Once you locate the part, use a multimeter (if you have one), and test it for continuity.
Should you get null readings on the meter, the component is dead, and needs to be replaced.
If you’re a visual person like me, there are tons of online videos you can check out, and follow along step by step.
If you want to get any replacement part – or see how much one would cost – click to enter your model number in the search bar below. Our partners at AppliancePartsPros stock almost every part with free guides on how to install them.
What Are the Benefits of Owning a Dehumidifier?
There are many great health and home benefits that come with owning one of these appliances. Some of them are:
- The prevention of mold in your walls, and furniture
- The elimination of unwanted humidity smells
- Lower air conditioning power consumption
The first two are self-explanatory, but a lot of people always ask me about the last one.
You see, your air conditioning unit has to remove moisture from the air in order to cool it down. Owning a dehumidifier will make the AC’s job simpler, and keep it from working as hard, resulting in lower power consumption.
What is there not to love about your appliance?!
Best Practices
I know this was a long list, so I’ll try to recap all the best practices we reviewed. This way, you’ll always have in mind the dos, and don’ts, allowing you to extend your machine’s lifespan significantly.
- Make sure your reservoir and drain hose are tightly secured
- Check your drain hose for damage
- Clean your filters regularly
- Only use your dehumidifier above 60 °F
- Descale your pumps often
Following these indications will keep your dehumidifier working perfectly for the years to come. And while this won’t guarantee that you’ll never encounter any malfunctions, the risk of experiencing them will be greatly reduced.
When Should You Consider a Replacement?
The answer to this question will depend greatly on the status of your warranty, and whether the solutions above worked for you.
If you’re still under coverage and don’t mind waiting a couple of days or weeks for your manufacturer to send a technician to your home, by all means, give them a call.
Unless specified otherwise, they should take care of the repairs for free.
Provided that your warranty has expired, you’ll have to weigh the cost of repairs vs the cost of buying a new model. As a general rule, paying repairs that are equal to 50% or more of the price of a new model with similar features, is a bad investment.
Conclusion
A leaky dehumidifier can be very inconvenient. A modern day nightmare, if I’ve ever seen one.
Not only are you stuck with a malfunctioning appliance, but also in the unfortunate position of having to figure out what the problem is, and finding a way to solve it.
Fortunately, as I hope you’ve learned in this piece, addressing most of the causes behind this issue is fairly simple, and quick. More often than not, giving your dehumidifier proper maintenance is all it takes to keep it fully functional.
Thank you for reading. If you found this article helpful, why not keep the learning going through our other incredible resources below?
No more puddles!


Designing Modern Living Rooms from Iconic Movies

7 Tips for Heating a Room with High Ceilings (On A Budget)