The bulb in your bathroom light fixture blows.
What should be a quick switchover soon turns into a nightmare when you realize that the fixture can’t be unscrewed.
Don’t worry!
This article will talk you through the steps you need to change a bathroom light fixture with no screws.
To remove a no-screw bathroom light fixture, follow the instruction that matches your light type below:
- Notch or Groove Mechanism: Twist and pull down.
- Spring-Loaded Mechanism: Pry by pulling and nudging.
- Slotted Connectors: Turn and pull down.
- Flush Mount: Turn and lower.
Fancy looking at those instructions in a little more detail? Then check out the following step-by-step guide:
How to Remove a No-Screw Bathroom Light Fixture
We all love a flush light fixture in the bathroom—
—Well…we do until the bulb blows in our fancy fixture on a dark winter evening. That makes us go right off it. And as for the instruction manual that explains how to dismantle the fixture…we’re well aware that by now that manual has either transformed into the kids’ 3rd-grade paper mache project or has rotted into a pulp at the city dump.
It’s only at times like these that we wish we’d gone for the dead easy screw-in light fixture at the homeware store that was half the price.
But don’t despair. What’s coming up is a list of steps that will help you to dismantle any light fixture with no screws.

To get started, take a look at your light fixture and decide which category it falls into:
- Notch or Groove Mechanism
- Spring-Loaded Mechanism
- Slotted Connectors
- Flush Mount
Once you have a better idea of who your opponent is, it’ll be a whole lot easier for you to tackle them. Take a look at the section in this article that corresponds to the light fixture in your bathroom.
Notch or Groove Mechanism
This type of fixture will have the dome secured onto the base using a notch or groove mechanism.
A bulb with a notch or groove mechanism is best removed by two people. Once you’ve buddied up, you can get started.
Here’s how:
- Person A should put pressure on the base pushing it towards the ceiling/wall.
- Person B should twist the dome so that it detaches itself from the base.
- Once detached, the fixture should dismantle with ease.
If you don’t get it the first time, try again as the notch in the dome may be twisted away from the groove. So keep pushing the base up and twisting the dome until you find the groove. Once the dome has detached itself from the groove it will fall away from the base.
Dead easy right? The good news is that putting it back together is just as simple.
Here’s how:
- Person A should push the base against the ceiling/wall.
- Person B should twist the dome into the base until it slots into the groove.
- Once slotted in, both parties can lift their hands away from the fixture.
Spring-Loaded Mechanism
This type of fixture will have the base and the dome pressed firmly together using tight springs.
Here’s how to remove this kind of light fixture:
- Tease a flathead screwdriver or a knife between the base of the light fixture and the wall/ceiling.
- Move the tool up and down until there is a big enough gap for you to get your fingers between the base and the wall/ceiling.
- Pull the fixture off of the springs with your hands.
Here’s something handy about light fixtures with spring-loaded mechanisms. They’ve been designed to pull away from the wall and hold themselves in place as you change the bulb. (They’re like the light fixture version of hands-free driving.)
Then to put the fixture back together you simply push it up towards the base. With a little maneuvering, the dome should click back into place.
Now, what If you’re worried about not being able to get the fixture back together again? Even if you only remove the dome from one side, you will still have ample working room around the bulb. Removing the dome on one side only makes it easier to snap everything back into place when you’re done.
Some spring-loaded fixtures are built with a pressure mechanism, whereas the fixture will separate the base from the dome when pressure is put on the base. The pressure will move the springs to contract and the dome will ease away.
If your fixture has a pressure mechanism, push the springs in on themselves to fit the dome into the base again.
Slotted Connectors
This type of light fixture will have raised bumps that lock the base to the dome.
Here’s how to remove a bathroom light with slotted connectors:
- Twist the dome to take it out of line with the bumps.
- Gently pull down and the fixture should come away in your hands.
Here’s how to put it back together:
- Locate the raised bumps and line them up with the groves in the dome.
- Tease the dome by twisting it against the base so the slotted connectors fall into place. Once secured, you can let go of the fixture.
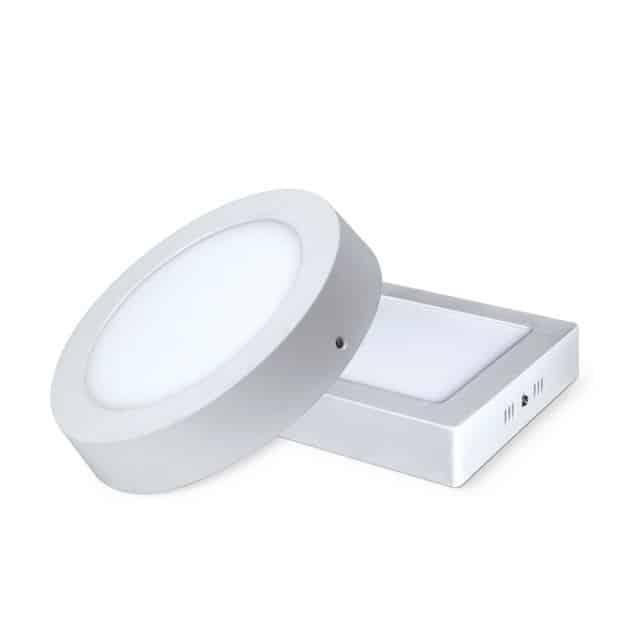
Flush Mount
This type of light fixture has its base set flush against the ceiling or wall.
Here’s how to remove this kind of light fixture:
- Locate the finial (the fancy decorative bit in the middle of the dome).
- Turn the finial anticlockwise to loosen it. Keep one hand on the dome. As you turn the finial, the dome should start to come away from the base.
- Completely unscrew the finial and the dome should come away in your hand.

Taking a flush mount light apart is quite a doddle, but you’ll need a steady hand to put it back together.
Here’s how to do it:
- Use your hands to screw the finial into the base of the dome.
- With the finial and the base of the dome attached, screw the finial to the finial port at the base of the fixture. Keep screwing the finial around with your hands until the dome is firmly in place. (You may want to use pliers here if you’re struggling.)
How to Remove a Stuck Light Fitting
What should you do if you’re struggling to remove a bulb from a light fixture? The last thing you want is for the bulb to shatter while you’re removing it. Not only is the broken glass dangerous, but you’ve also not long swept and cleaned the bathroom floor and don’t fancy having to do it again.
I’m about to let you in on a super simple trick. This trick will help you remove a stuck lightbulb without breaking it.
Here’s what you should do:
- Unplug the lamp or turn off the electrics if you are changing a wall or ceiling bulb.
- Cut a 25 inch (63 cm) strip of duct tape.
- Stick one end of the tape to the other making a loop.
- Stick the middle of the loop to the lightbulb on both sides. Stick both sides of the tape together to form two duct tape handles.
- Turn the duct tape handles with both hands in an anticlockwise motion. This will help you tease the bulb until it frees without putting too much pressure on it.
The great thing about this method is that it keeps your hands far away from the bulb while removing it. This will stop you from hurting yourself while removing a stuck bulb if it breaks. Also, should the bulb shatter, most of the shards will stick to the duct tape. Cleanup will then be minimal and less dangerous.
Conclusion
Changing a regular lightbulb is child’s play. But, removing a screwless light fixture can seem like a puzzling task. But once you know which kind of bathroom fixture you have, you should be able to dismantle it in next to no time. Following the steps mentioned above makes putting your no-screw bathroom light back together just as easy.
If this article has helped you, why not consider supporting us by checking out our related articles?
Thanks for reading, and have a great day!
-Craig


Designing Modern Living Rooms from Iconic Movies

7 Tips for Heating a Room with High Ceilings (On A Budget)