Recently, I had a battle with my vacuum. If you’re reading this article, you’re likely in the middle of a similar struggle. Maybe, like me, you’ve vacuumed the same spot over and over, and yet nothing is being sucked up.
This situation is frustrating but resist tossing out your vacuum. If you’re lacking any suction, you could be dealing with a split vacuum hose.
Is it a Split Vacuum Hose?
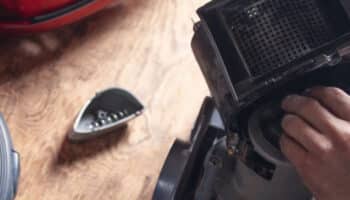
There are several reasons why a vacuum could be losing suction. The most common causes are full dustbins, clogs, and filter issues.
If you haven’t actually seen a hose tear yet, check your vacuum for the other causes. Empty out the vacuum’s dust bin. If that doesn’t solve it, check the hose for any clogs. Truth be told, that’s my vacuum’s issue 9 times out of 10.
Also, check those filters! Filters are easy to forget because they are out of sight and out of mind. Most vacuum filters should be cleaned or replaced monthly though!
If you want to get any replacement part – or see how much one would cost – click to enter your model number in the search bar below. Our partners at AppliancePartsPros stock almost every part with free guides on how to install them.


Gather The Necessary Materials
If you’ve determined it must be a hose leak, then let’s get to it. Before starting, take a minute to grab all the materials you need and have them ready.
- Broom
- Utility knife
- Duct tape or electrical tape
- Chalk or talcum powder
- Face mask (optional)
Get Outside
This step isn’t pivotal to repairing your vacuum hose, but it’s a helpful hint. You could always fiddle around with your vacuum indoors, but consider something before you do. Recall all of the things you have sucked up with your vacuum – every crumb, pet hair, and dust bunny. Now, picture all of that drifting off into the air in your house and maybe even in your lungs.
If you’re thoroughly grossed out by that idea, now you know why you have to go outside. It saves you the drama of contaminated air and all those particles dirtying up your floor.
If you’re reading this in the middle of a snowstorm, though, the outdoors probably aren’t accessible. If you’re stuck indoors, consider wearing a face mask to avoid breathing in anything nasty. Opening a window would be wise as well.
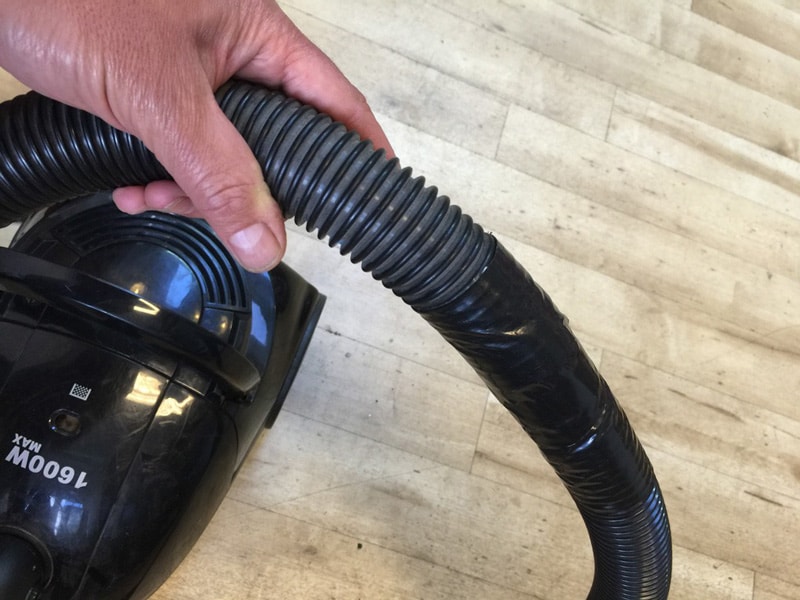
Clean the Hose
Yes, you need to clean the appliance’s hose. It will just make your job easier!
You don’t have to perform a full-blown disinfecting deep clean. Gentle dish soap and water around the torn area are sufficient. You just need to remove any grime and grease.
If you have to cut your hose, a non-greasy area is safer. Likewise, if you go the tape route, it will adhere stronger to a clean surface than a dirty one.
Keep in mind – unless your vacuum is of the wet/dry variety, try to keep that soap and water away from the mechanics of the machine!
Once it is clean, you’ll have to wait on the hose to be completely dry to begin repairing it.
Repair It
- Tear Near The End of the Hose?
If the tear is located at the end of the hose, you’ve lucked out. This will likely be an easy fix.
Assuming your vacuum allows for it, disconnect the hose from where it connects to the body of the vacuum. Usually, there is a plastic connecting piece that houses the end of the hose and it twists off.
Now, some vacuums don’t disconnect so easily. In fact, some are glued and don’t detach at all. In that case, unfortunately, the fix isn’t as easy as originally thought. You may have to repair it according to the steps in the next section.
If you were able to remove the hose, find your utility knife. Using the knife, carefully slice off the hose underneath the tear. You may need to cut off a few rough parts to smooth it out.
Now, you’ll have a small piece of hose remaining in the plastic connector. Most vacuums have a release notch in that connector. The notch can be activated with the screwdriver you found earlier. Gently press the release button with the screwdriver and the end piece of the hose should come out.
With a new smooth edge, the remaining section of the hose should twist back into the connector. If for some reason it doesn’t, you could use some glue. This could hinder any other future repairs, however.
- Tear in the Middle of the Hose?
Well, you’re at this section, so that means the hose tear wasn’t an easy fix. If the rip is in the middle of the hose, you can’t cut it out because it would make your hose too short to use.
This doesn’t mean your vacuum is doomed though. This can be fixed too! You’re just going to need duct tape or electrical tape.
Did you cringe at the words “duct tape”? Am I about to suggest you simply duct tape the hose tear? The quick answer is yes, I am. It’s not the most elegant of solutions, but it works and will save you some money.
This will not last forever, unfortunately. You will end up having to replace the tape when it inevitably falls off. However, a roll of duct tape is still cheaper than a new vacuum!
Chalk It Up
When reading the materials list, you might have been a little curious about the inclusion of talcum powder or chalk. Trust me, it has a purpose and it will become clear now! If you repaired your hose without any tape, move onto the next step.
If you went with talcum powder, sprinkle a small line or pile of it onto your floor. For chalk, try to crumble it up so you can also make a pile of powder.
Why did we just do that? The tape you repaired the hose with now has a sticky side exposed in the interior of your vacuum hose. When you later use your vacuum to clean up a mess, the debris will end up stuck to that tape and will eventually create a clog.
Chalk or talcum powder can neutralize the stickiness, so to speak. If the tape is covered with powder on the inside, other things won’t stick along as well.
To get the powder to the tape, you can simply vacuum up the powder with the hose. If that doesn’t feel like it did the trick, try coating a broom handle in the powder and then threading it through the hose.
Conclusion
A split vacuum hose doesn’t automatically mean it’s time for a replacement vacuum.
With the simple steps listed above, you can prolong your vacuum’s lifeline (and save money)!
While we have you here, is there anything else we can help you with?


Designing Modern Living Rooms from Iconic Movies

7 Tips for Heating a Room with High Ceilings (On A Budget)