We've independently reviewed this article to make sure it's as accurate as we can make it.
To find out more about our article creation and review process, check out our editorial guidelines.
Is your furnace not turning on, and making your home feel colder than Elsa’s castle?
You’re in good company! This might be hard to believe, but every day thousands of people all over the world face the same situation.
I know losing your central heating system is no fun, especially during Winter or on freezing days.
But don’t worry, you came to the right place for answers. Below, I’ve prepared a small article where you’ll find 6 quick fixes you can try to get your furnace back to working condition.
When your furnace is not turning on, you should try checking the position of the appliance’s switch, checking your gas line, and cleaning your air filters. If that fails, you can also check the thermostat, the capacitor, and the ignition sensor.
Keep reading to make your home cozy again!
#1 Check the Appliance’s Switch Position
First, let’s check out something really obvious, but very easy to miss – the appliance’s switch position.
I know what you’re thinking, but you wouldn’t believe how many people have this similar problem, only to find that they’d forgotten to turn their furnace’s switch back on after giving it maintenance.
Solution: Super simple. Just check that the switch is in the “On” position.
#2 Check Your Gas Line
Next, let’s touch base on your gas line, as it could not only explain why your furnace is not turning on but also represent a hazard for you and your family.
As you may know, in order to provide you with heating, your furnace draws gas from a meter on your wall. This allows it to stay on and work normally, but when there’s anything wrong with the gas line, you might not only experience freezing temperatures within your home but also leaks and fires.
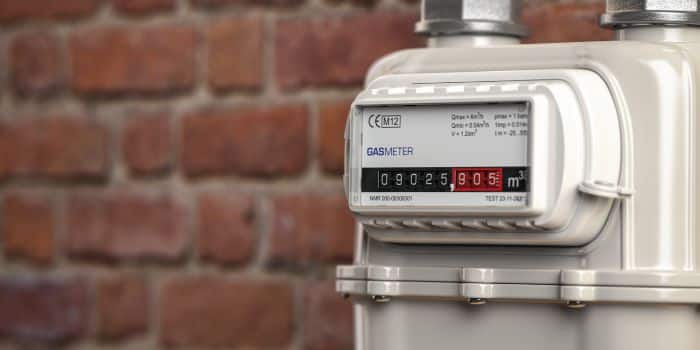
Since furnaces are commonly stationary, it would be strange to have your gas line sustain damage. However, while this is difficult, it’s been known to happen, and it’s definitely worth checking out.
Solution: Gas supply is usually handled by a utility or gas company. Although if you live in a residential compound, this might be a task for the people who maintain your building/home.
Given that tampering with your gas line is dangerous, I’d recommend calling a professional to remove it, test it and replace it if necessary. This way, you’ll be protecting yourself from any danger while allowing a certified technician to take a look at things.
I know you probably wanted to do this yourself, but don’t worry, there’s plenty for you to do in the sections below!
#3 Clean Your Air Filters
I know this might seem like a stretch when talking about a furnace not turning on, but trust me, it has a great impact on how the appliance works.
How so? I’m glad you asked!
You see, air filters on your furnace catch any particles, dust, and even bugs that might be trying to enter your home while heating it. They’re designed to last a long time and are highly efficient at keeping your home’s environment clean. However, waiting too long to replace them might start causing a lot of trouble.
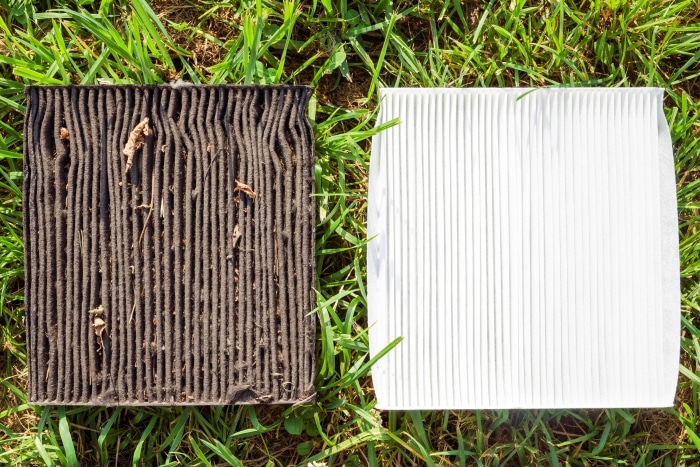
Clean air filters allow for proper airflow from your furnace to the outlets all over your home, which means that dirty or obstructed ones can cause blockages. This forces your appliance to work harder in order to push warm air outside, which can lower its lifespan significantly.
It’s always a good idea to keep an eye on this to maximize heating and electric efficiency.
Solution: Typically, you’ll want to replace your air filters (or clean them if they’re permanent) every 90 days. While not set in stone, this is the recommended period, as it’s usually when the filters start becoming too obstructed and airflow is affected.
Here’s how you can change or clean your air filters:
- Turn off the electrical switch located on either side of the appliance.
- Remove the front cover panel.
- If there’s another panel beneath that one, undo the screws to remove it as well.
- Locate your air filter (it should be placed on the vent through which your furnace blows warm air to your home’s distribution system).
- Carefully remove the filter.
- If you’re not sure whether your filter is permanent, try Google searching your appliance’s make and model and see if there’s an answer there.
- If your filter is not permanent, look up your make and model again followed by the word “air filter”. This should bring up several results with online marketplaces that sell replacements.
- Once you have the replacement, simply remove the old filter and place the new one in the appliance.
- Repeat this process for all air outlets in your home as they may also have air filters that need replacing.
Assuming that your filters are permanent, you can use compressed air cans (like the ones used for PC and electronic component cleaning). They’re very effective at removing any gunk that might have built up on your filters.
Note: please remember to do the cleaning outside, as otherwise, you’ll be blowing all the dust and particles onto your home.
#4 Check the Thermostat
Moving on, let’s make sure your thermostat is working adequately.
If you haven’t got the faintest clue as to what this is, don’t worry. This is a place of learning, and as such, I’m glad to walk you through this.
Long story short, a thermostat is a component that communicates with your appliance and senses its temperature to regulate how it works accordingly. You probably see it every day, as it’s the little control panel on your wall where you change the temperature.

More often than not, your thermostat does its job perfectly, and you have a warm, cozy home. But sometimes, electrical overloads, age, or other elements can make your thermostat fail or break.
Something like this could explain why your furnace is not turning on or off, as it’s designed to be non-functional in the event of being unable to sense and regulate its own temperature.
Annoying, I know, but it’s for your safety.
Solution: To check and replace your thermostat should it be necessary, try the following steps:
- Locate your thermostat control panel in your home.
- Carefully undo any screws holding the front protective panel in place.
- You should see a bunch of wires. Check your user manual to find the wiring diagram and see what goes where.
- Look online for a thermostat that works with your furnace (matching it to gas, electric, or dual fuel two stage/single stage)
- Once you have a replacement, check your wiring diagram again to connect the new thermostat properly.
- Place the front protective cover back in place and test.
This process is a little more complex than replacing a capacitor, so if you’re not feeling too confident, please do not hesitate to call a professional to get the job done.
Remember, safety first!
#5 Check the Capacitor
Next, let’s talk about your capacitor. If you have no idea what this is, that’s ok, I’m happy to give you a quick explanation.
In a nutshell, this is a little component within your furnace gives it an extra kick to get it started. Similar to a battery in a car. Thanks to the capacitor, your entire home can be filled with warm air evenly and your furnace can work as expected.
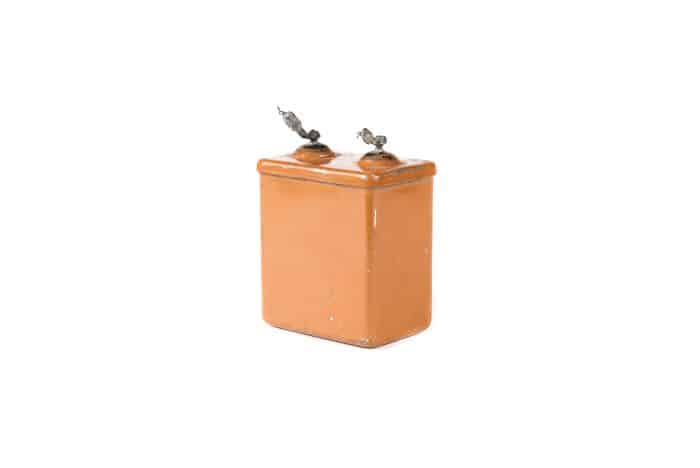
In most cases, the component should last a long time. But sometimes, power surges, excessive strain, or other technical difficulties can cause it to stop working, and that’s where the trouble begins.
Solution: Testing and replacing your capacitor shouldn’t be too difficult, all you need to do is follow a couple of simple instructions:
- Turn off the power to the furnace.
- Remove the front cover panel.
- If there’s another panel beneath that one, undo the screws to remove it as well.
- Locate the capacitor (you can Google search for an image for reference).
- Check the capacitor’s microfarad rating (MF). A blower will normally have a 5, 7.5, or 10mf. Though 15 and 20mf capacitors are out there too.
- Carefully disconnect the capacitor.
- If you have a multimeter, use it for testing. The MF rating should be within 6-10% of what it’s rated at to be good.
- Should the capacitor be broken or non-functional, get a new one by looking for a replacement through the part number.
- Reassemble your furnace by following steps 1-6 in reverse.
Naturally, if your original capacitor passes the multimeter test, there’s no need for a replacement yet, and the culprit behind your current situation likely lies elsewhere.
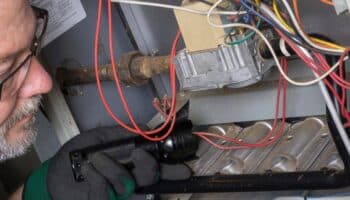
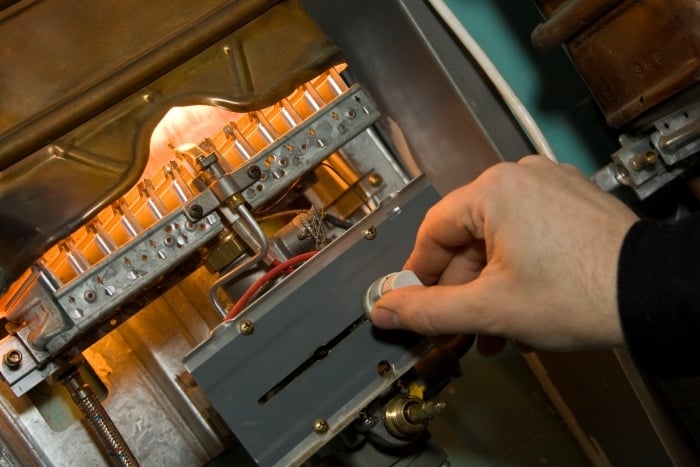
#6 Check the Flame Sensor
Finally, a faulty flame sensor could also explain why your furnace is not turning on, and there’s a very good reason for it.
You see, this component is arguably the most important part of your furnace as it is what keeps you safe from a fire or an explosion. The ignition sensor (or flame sensor) is in charge of measuring the electrical current that passes through your furnace upon activating it.
When you turn your appliance on, gas starts flowing, and a spark of electricity ignites it, turning it into a steady fire source. This spark is measured in micro amps, and it’s always supposed to show the same readings. In the event that your ignition sensor detects lower or higher stats or a lack of fire, it shuts off the furnace immediately to prevent accidents.
Now, most of the time, this is a most welcome safety mechanism. But if your sensor is failing in any way, it could be getting inaccurate readings, thus preventing your furnace from turning on, even when nothing’s really wrong.
Solution:
HVAC Expert: When it comes to flame sensors, sometimes they just get blocked by a build-up of debris. You can often fix them by just lightly cleaning with gentle sand paper or even a dollar bill.
Here’s how you can access (and if necessary, replace) your flame sensor:
- Shut off the electrical power and close the gas valve.
- Remove the front cover panel.
- Find the gas line running inside the appliance.
- Locate the burners.
- Locate the flame sensor (it normally is on the opposite side of the gas line).
- Once located, disconnect any wires and then carefully remove the sensor.
- After removal, place the new sensor in your furnace, reconnect it, and place the unit’s front cover back where it belongs.
Please note that there are many kinds of flame sensors, so you’ll need to either check your user manual or your manufacturer’s website to find the right one for your model.
You can also get universal flame sensors, however these have to be set up properly and can be quite complicated.
Conclusion
When your furnace is not turning on, cold days and Winter can feel like Hell on Earth. No one wants to be stuck at home shivering under the covers just because a small component is failing.
Luckily, as this piece has hopefully helped you see, addressing the most common causes behind this situation is very easy. More often than not, all you need to do to get things back to normal is replace a capacitor or a flame sensor.
Thank you for sticking with me all the way to the end. If you found this article helpful, please be sure to check out our other resources below. We upload new content weekly, and you can always come to us for fixes to everyday appliance problems.


Designing Modern Living Rooms from Iconic Movies

7 Tips for Heating a Room with High Ceilings (On A Budget)