We've independently reviewed this article to make sure it's as accurate as we can make it.
To find out more about our article creation and review process, check out our editorial guidelines.
Pinpointing the source of a leak in your underfloor heating is a tricky task. But you’ll find all of the best leak-detection tips and instructions on how to fix it in this article.
To find and fix a leak in your floor you should:
- Detect the source of the leak using thermal imaging or an acoustic microphone
- Remove the portion of the floor with the leak
- Turn off the water supply
- Apply self-amalgamating waterproof pipe repair tape
Fixing a leak in your floor heating system is a job that you need to complete asap. So, let’s jump straight to it with the help of the following step-by-step guide.
What You’ll Need
Fixing a leak is a specialized job, especially when it’s located under your floorboards. That’s why to complete the task, you are going to need some pretty specialist equipment. I’ve made a list of some of the best tools for the job. But, in case it’s tricky for you to get a hold of some of the pieces, I’ve also listed some alternatives.
- Thermal imager
- Self-amalgamating waterproof pipe repair tape or an epoxy putty stick
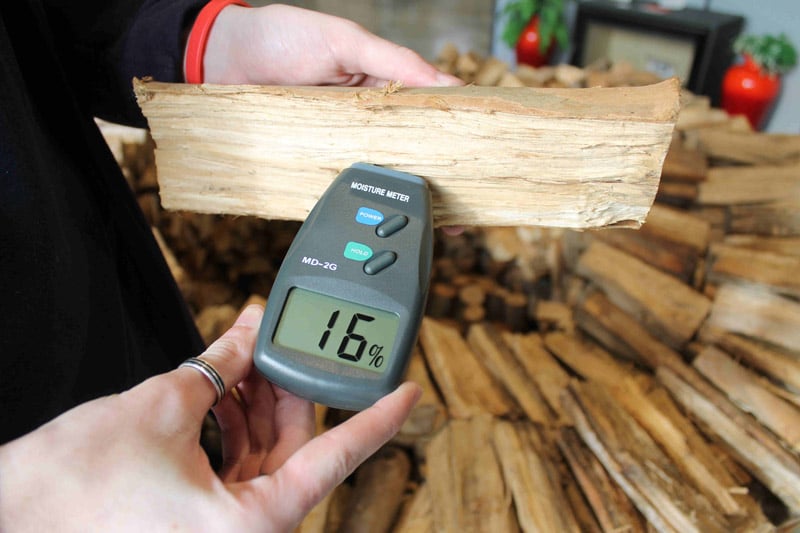
In case you cannot get hold of a thermal imager, you could also use a moisture meter. Moisture meters are also great for locating leaks under the floor.
An acoustic microphone is also a fantastic alternative to a thermal imager and a moisture meter. This microphone listens to the sound of a leak under the floor. This tool will help you to pinpoint the location of a leak.
There is quite a learning curve with this tool, but it’s accurate once you get the hang of it.
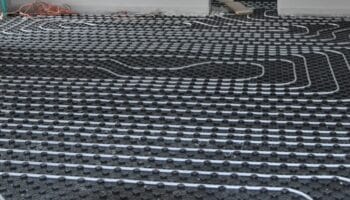
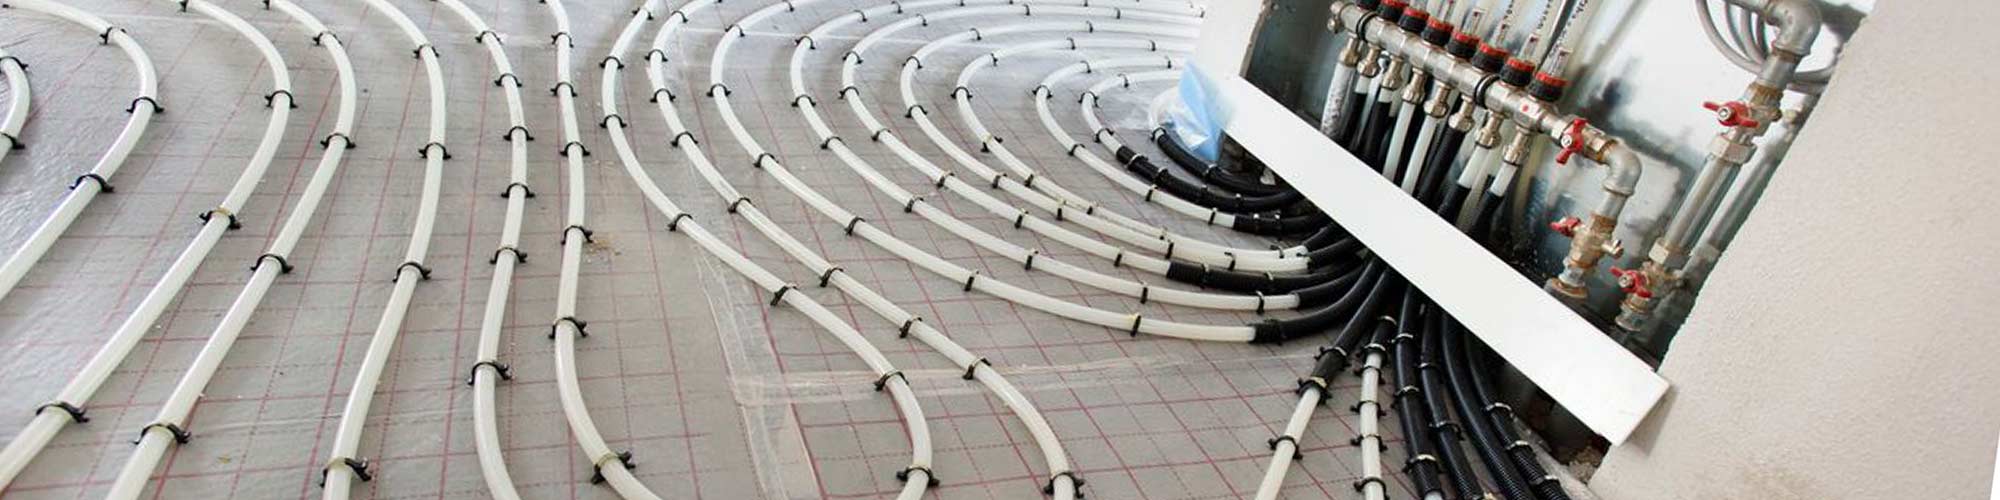
Finding and Repairing a Leak In Your Underfloor Heating
Has your underfloor heating system stopped heating up like it used to? Does the pressure often fail in the boiler? Or, have you noticed an off-putting musty smell in your home? Then all of these could be signs that there is a leak in your underfloor heating system.
Laying flooring is expensive, and the thought of having to dig it up to find a leak is catastrophic. So, there has to be an easier way. And there is! Coming up in this section, I’ll list a couple of methods that you can use to find and repair the leak in your underfloor heating. Let’s begin.
Step #1 Find the Leak
Finding a leak under your floor without ripping it all to pieces may seem like an impossible feat, but with the right tools, it can be simple. Here are a couple of techniques that you can use to locate a leak under your floorboards.
- Use a thermal imager. You can use thermal imagery to check the position of the pipes under the floorboards. The thermal images will help you to detect a leak as the hot water will collect in an area that disrupts the pipe’s heating pattern. The pooled water will show up on the screen of the imager.
- Use a moisture meter. A digital moisture meter is also effective at scanning your floor for the source of a leak. Using this technology is reliable as long as you hold the tool flush to the floor. The electromagnetic frequencies will inspect the floor for moisture.
- Use an acoustic microphone. You can use an acoustic microphone to listen for abnormalities in your flooring. The microphone will amplify the sound of water leaking from a pipe so that you can locate the problem area.

So, we’ve spoken about some rather specialized equipment that you can use to locate a leak. But, what if you don’t have access to any of these tools? Before you start ripping up all of your lino, there’s still something you can do.
- Get a bottle of strong-smelling perfume
- Empty the bottle into your heating system (which can be easier said than done!)
- Allow the perfume to work its way around the system
- After a few weeks, have a smell around your house to try to locate the leak. You will no doubt have found the source of the leak when you smell the perfume.
Do you fancy having a closer sniff at this tip? Then take a look at this video.
Step #2 Remove the Floor
Now that you have pinpointed the exact location of the leak, you can remove a section of the floor without having to rip up rolls and rolls of carpet or endless planks of wood. Remove the patch of floor around the leak and then jump to step 3.

Step #3 Turn off the Water Supply
Before we do any work on repairing the leak, you must shut the water system down. This will help you to avoid doing any further water damage to the area. Turn your water supply off and then you’ll be ready for step 4.

Step #4 Apply Self-Amalgamating Waterproof Pipe Repair Tape
During this step, we will apply waterproof repair tape to your pipe. This tape resists water temperatures of up to 250 degrees Celsius and sets in less than 30 minutes. Here’s how you can apply the tape to your pipes.
- Pinpoint the exact location of the leak in the pipe
- Wrap the tape around the pipe stretching it as much as you can as you wrap it. The more you stretch the tape, the better its tension and hold.
- The tape will fuse and harden over time and seal the leak
What can you do if you do not have enough space to wrap repair tape around your pipes? Then you can use another handy tool that works just as well – an epoxy putty stick. An epoxy putty stick is a great putty to fix leaks when you are working within a limited space. Once completely set, this material is harder than steel! Here’s how you can go about applying it to your pipe.
- Pinpoint the exact location of the leak in the pipe
- Cut off the amount of putty that you need to cover the leak
- Knead the putty with your hands to start the chemical process that begins hardening the putty
- Push the putty into the hole in the pipe
- Leave the putty to dry for an hour before you turn the water back on
What Happens If Underfloor Heating Leaks?
Are you trying to detect a leak in your underfloor heating? Detecting this type of leak can be tricky because you cannot see through the floor to find the leak. Without leak detection tools, it can feel almost impossible for you to know what’s going on under your floorboards.
However, there are a couple of tell-tale signs that make you suspect that your underfloor heating is leaking. If you notice any of the following in your home, it is best to call your HVAC specialist or plumber to inspect your system for a leak.
- A sudden loss in boiler pressure
- Boiler on/off problems
- The boiler keeps on filling
- An unexpected rise in your water bill
- A problem with your underfloor heating system. (It is not heating at all or only heats in patches).
- A damp smell coming from the floor
- Damp patches or watermarks on the floor
- Banging noises from your heating system
Conclusion
Some say that unless you have x-ray vision, you will not be able to spot a leak in your underfloor heating system. But fortunately, in this article, we have discussed a number of far simpler ways you can detect a leak. We’ve also listed a couple of ways that you can fix it. I’m sure these tips have helped you on the road to finding and filling your pipe leak.
If this article has helped you, please consider supporting us by checking out some more of our free guides or signing up to our e-mail list.
Thanks for reading, and have a great day!
Cheers,
Craig


Designing Modern Living Rooms from Iconic Movies

7 Tips for Heating a Room with High Ceilings (On A Budget)