Is your coffee maker steaming up? It might require some urgent cleaning. Here are 4 steps to solve it.
What does it mean when you try to brew some coffee, but all you get is a steamy pot? Maybe your coffee maker is a fan of James Cameron’s Titanic? Possibly.
All jokes aside, there could be a lot of reasons behind this, but the most common one is obstruction. As you know, coffee makers brew your coffee by passing hot water through ground coffee beans.
When you notice that your appliance is working, but no coffee is coming out to the pot, there’s probably something blocking the circulation of water. This can not only jeopardize your coffee maker’s proper functioning, but also expose you to harmful elements such as mold and sediment.
If you suspect this to be your problem, it’s of the utmost importance that you address this issue as soon as possible.
In this article, I’m going to walk you through 4 steps to solve this problem, so you can get back to enjoying hot, unblemished cups of coffee.
Ready? Let’s get started!
Here Are the Steps to Follow:
- Clean the pot and basket
- Fill the water tank with vinegar and water
- Run a brewing cycle
- Repeat and test
For This Repair, You’ll Need:
- A screwdriver (Not always applicable)
- A toothbrush
- Vinegar
Your appliance has a water conduct that takes the hot water it produces, and runs it through ground coffee beans. When it’s obstructed, only steam comes out to the pot, and causes the issue.
Cleaning your coffee maker is not only simple, but necessary every few months, as this will prevent unwanted buildup of sediment, mold, and any other unwanted substances that might make your coffee taste off, and harm you.
Now, before we begin, I want to remind you to please unplug your coffee maker and let it cool down in case you recently tried to use it. I commend you for trying to fix your own appliance, but remember to always keep safety as a priority.
The process might take a while, so buckle up and try to be patient. I promise that, in the end, it will all be worth it!
#1 Clean the Pot and the Basket
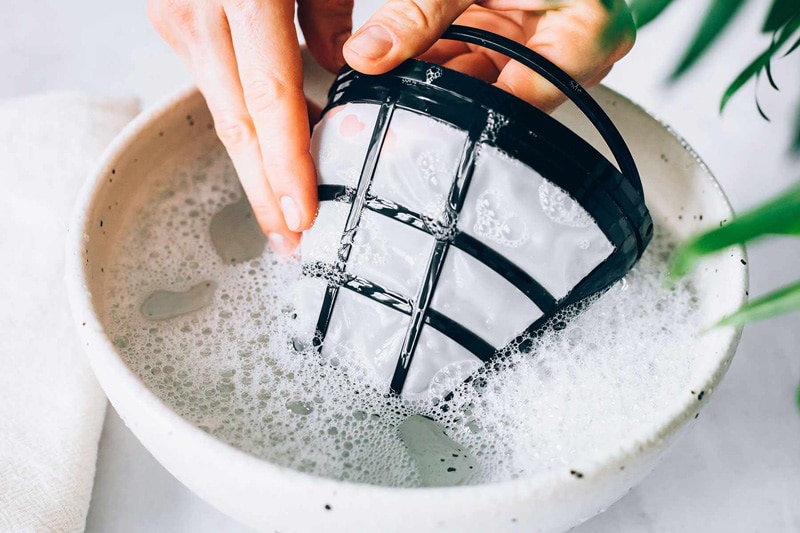
Keep your coffee pot clean
Before getting into the actual cleaning and unclogging off your coffee maker, it’s a good idea to scrub off any impurities from the external components. After all, you want to make sure everything is pristine so that you can enjoy the purest flavor, don’t you?
Rinse your coffee maker’s pot and basket, and then use your toothbrush to give them a good scrubbing. You’ll have to clean them again when you do the unclogging process, but it can’t hurt to have them spotless!
Dry them off with a towel and place them back in your appliance.
#2 Fill the Water Tank With Vinegar and Water
Vinegar breaks down sediment
Once your coffee maker’s pot and basket are squeaky clean, you can then proceed to the actual unclogging process. Bring out your water and vinegar and start pouring them in a 50-50 mixture onto your water tank. The dynamic duo.
Once you’ve filled your coffee maker’s water tank nearly to its maximum capacity with this combination, you can move on to the next step.
#3 Run a Brewing Cycle
Clean your coffee maker regularly
At this point, it’s time to start a new brewing cycle. This will soak up the water in the tank and circulate it through your coffee maker’s water conduct.
The vinegar in your mixture will break down any sediment or mold blocking your coffee maker’s conduct. Depending on how severe your problem is, you could see water flowing out of the pot immediately, or after 20-30 minutes. It’s very effective, but not magic.
I know you’re probably thinking, why did you make me clean the coffee maker’s pot if it was going to get dirty again? Well, the answer is simple, we don’t want old contaminants to combine with the new ones coming from the vinegar-cleansing process.
#4 Repeat and Test
Once you’re certain that the vinegar has done its job, you can proceed and refill your water tank with just water and run another brewing cycle. This will get rid of any leftover contaminants and finish the cleaning job.
At this point, your coffee maker is probably 100% unclogged. All that’s left to do is give your pot and basket another scrub and rinsing before putting it all back together.
If your coffee tastes a little vinegary after doing this, try adding some water to your water tank and run some additional brewing cycles to get rid of all traces of the taste. It is recommended to do this process every couple of months to prevent the formation of harmful chemicals and mold.
Bonus
Check Your Valves
While this process will fix most coffee makers’ clogging issues, if yours is more sophisticated, there might be a valve involved. Worry not, though, if this is your case, fixing it is also very simple, but a bit more time-consuming.
First and foremost, unplug your coffee maker from the wall outlet . Once you’ve done that, remove either the upper lid or turn it upside down to expose the screws and access its internal components. Put your screwdriver to work!
After you access your coffee maker’s guts, you should see the water conduct, it’s normally made out of rubber or metal. Carefully try to remove it and look for a valve. If you find it, remove it delicately, brush it until it’s free of any impurities, and put everything back together.
I’ll be honest with you. Leaving your valve dirty won’t necessarily keep clogging your coffee maker, but if you’ve already gone through the trouble of cleaning the entire thing, why not finish the job?
Is It Steam, or Smoke?
I’d be remiss not to tell you that what you’re experiencing could not be steam, but smoke. You’re probably thinking there’s no way you could confuse one with the other, right? Well, sometimes they look pretty similar, especially when they’re inside a coffee maker.
One of the easiest ways to tell steam from smoke is using your nose. If, when operating your coffee maker, you get a burning smell coming from it, the problem might be more severe than you thought.

It can’t hurt to double-check.
If your issue is coming from smoke and not steam, there could be a lot of reasons behind this. It could be something as simple as leftover coffee grounds at the bottom of your coffee pot, or as concerning as a failing component. But that’s another story.
Conclusion
Your coffee maker should generate steam, but when it’s the only thing it’s generating, you have a problem, and it’s called clogging.
Remember that, while your coffee maker might not seem as intricate or delicate as a Swiss watch, it still needs maintenance to keep operating normally and providing you with pure, untainted coffee.
Sure, the unclogging process, as you’ve learned in this article, is pretty simple, but the ideal scenario is to never let your appliance become that clogged before you give it another cleaning.
Thank you so much for reading. If you found the information here useful, why not keep learning and check out our other great resources below?
I see many delicious cups of coffee in your future!


Designing Modern Living Rooms from Iconic Movies

7 Tips for Heating a Room with High Ceilings (On A Budget)